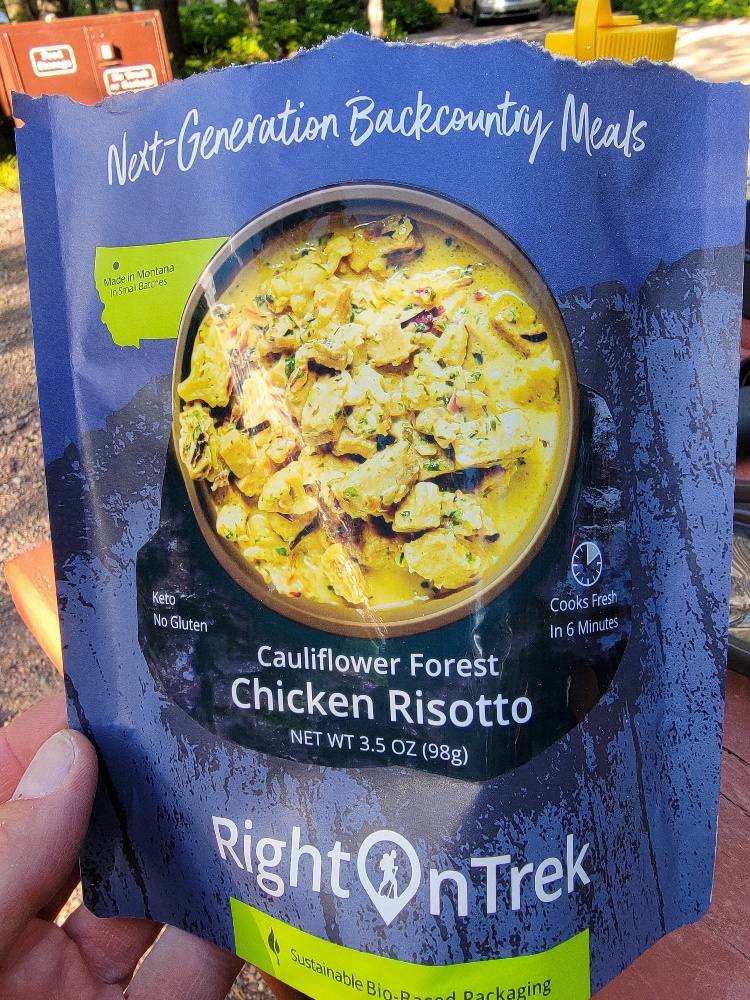
Local company RightOnTrek asked me to sample and review their adventure meals. I was quite impressed and here are some thoughts on why I will be switching to them for my “go to” back country meals. In later posts I’ll be discussing hints and tricks on things like stoves, fuel, and other food related topics. *This is an honest opinion and not an endorsement simply because they gave me some free meals.
A typical “food prep” area in a GNP Wilderness site
I choose my back country meals based on taste, weight, ease of preparation, and amount of calories. Freeze dried meals are essentially the standard nowadays and there are a lot of companies making reasonable products. I typically have used meals by Mountain House or Backpackers Pantry in the past. Of course nothing beats fresh food, but who wants to pack around 15 pounds worth of fruit, vegetables, meat, and pasta? Not me. But change is hard… So, how did I come to the conclusion RightOnTrek meals were better than what I’ve been using for the past several years?
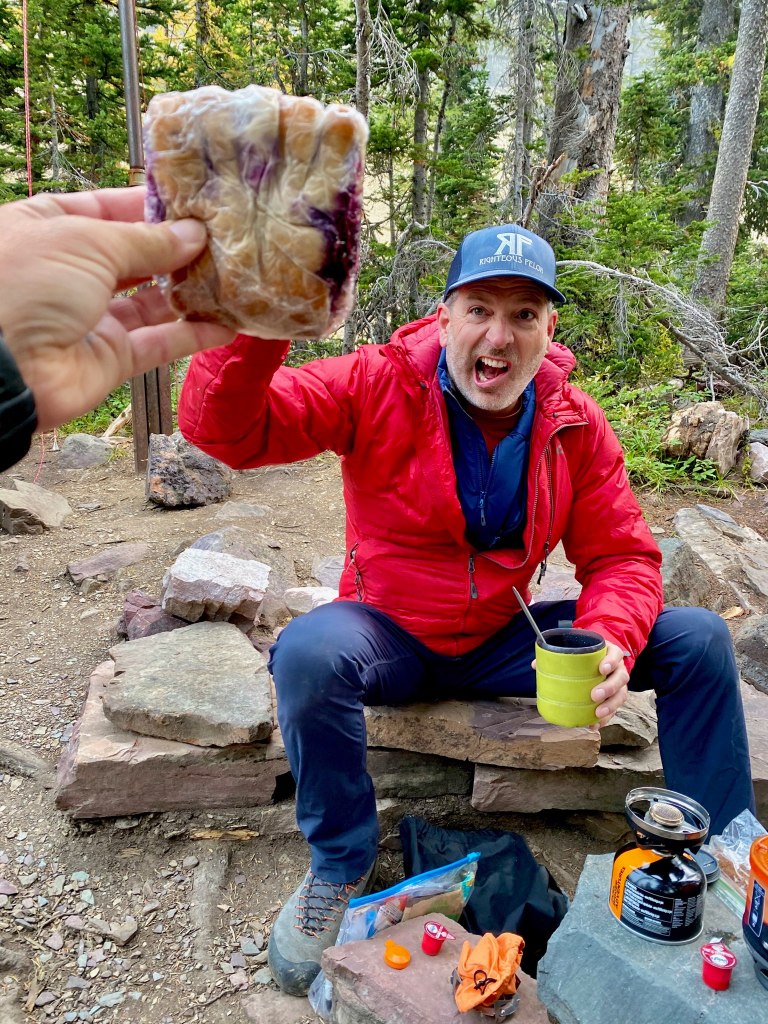
My favorite so far
Taste:
Taste is very subjective, but I found the meals to generally taste better than most. I used very little, if any added spice or hot sauce. Texture is authentic, likely due to their air drying process versus completely freeze drying and also attributable to not being pre-cooked.
Weight:
The air drying and freeze drying process seems to be relatively equivalent, or have negligeable differences in weight across brands.
Day 5, a break from the tents
Prep Time:
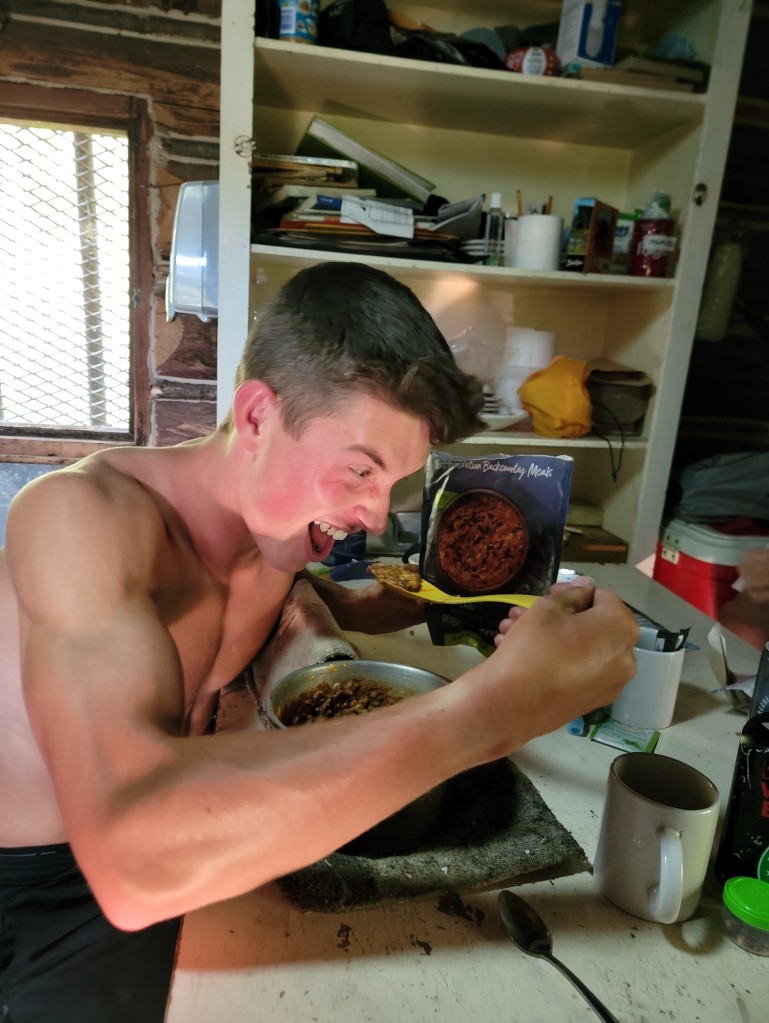
Freeze dried meals are rehydrated. RightOnTrek meals, because they can be a combination of freeze dried and air dried, are both rehydrated and cooked fresh in your pot. This means an equivalent or shorter prep time, and better texture\taste. And they’re not pre-cooked… you’re cooking it for the first time.
Calories:
Calories are critical for energy levels, warmth, and overall endurance. RightOnTrek meals have significantly more calories per serving than other brands. I only need a single serving package from RightOnTrek whereas I always required the two serving units from other brands.
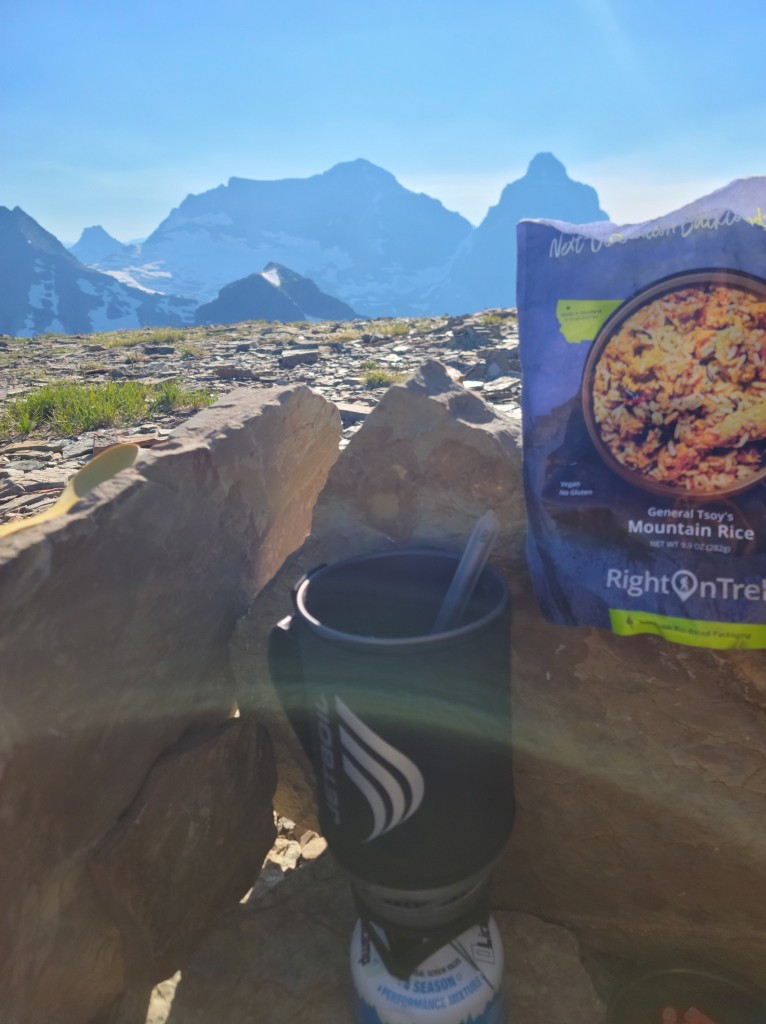
Cooking dinner on a peak to watch the sunset
Packaging:
RightOnTrek packages are 100% bio-based, 60% compostable, 0% plastic, light weight, and can safely be burned.
Cost:
Per serving calorie the RightOnTrek meals are less expensive than other name brands.
Tyler’s favorite was the Backcountry Chili
When comparing the categories above, the RightOnTrek meals come out ahead of other brands. But the MOST convincing thing for me was one that was completely unexpected. After waiting 9-12 minutes for typical freeze dried meals to rehydrate you end up with a warm, or cool meal. The RightOnTrek meals are cooked in less time and when they’re ready to eat they are HOT!
I would encourage you to look closely at the innovative products this local company is creating. Compare cost, nutrition, taste, and packaging to see why I think they are raising the bar on back country camping meals.
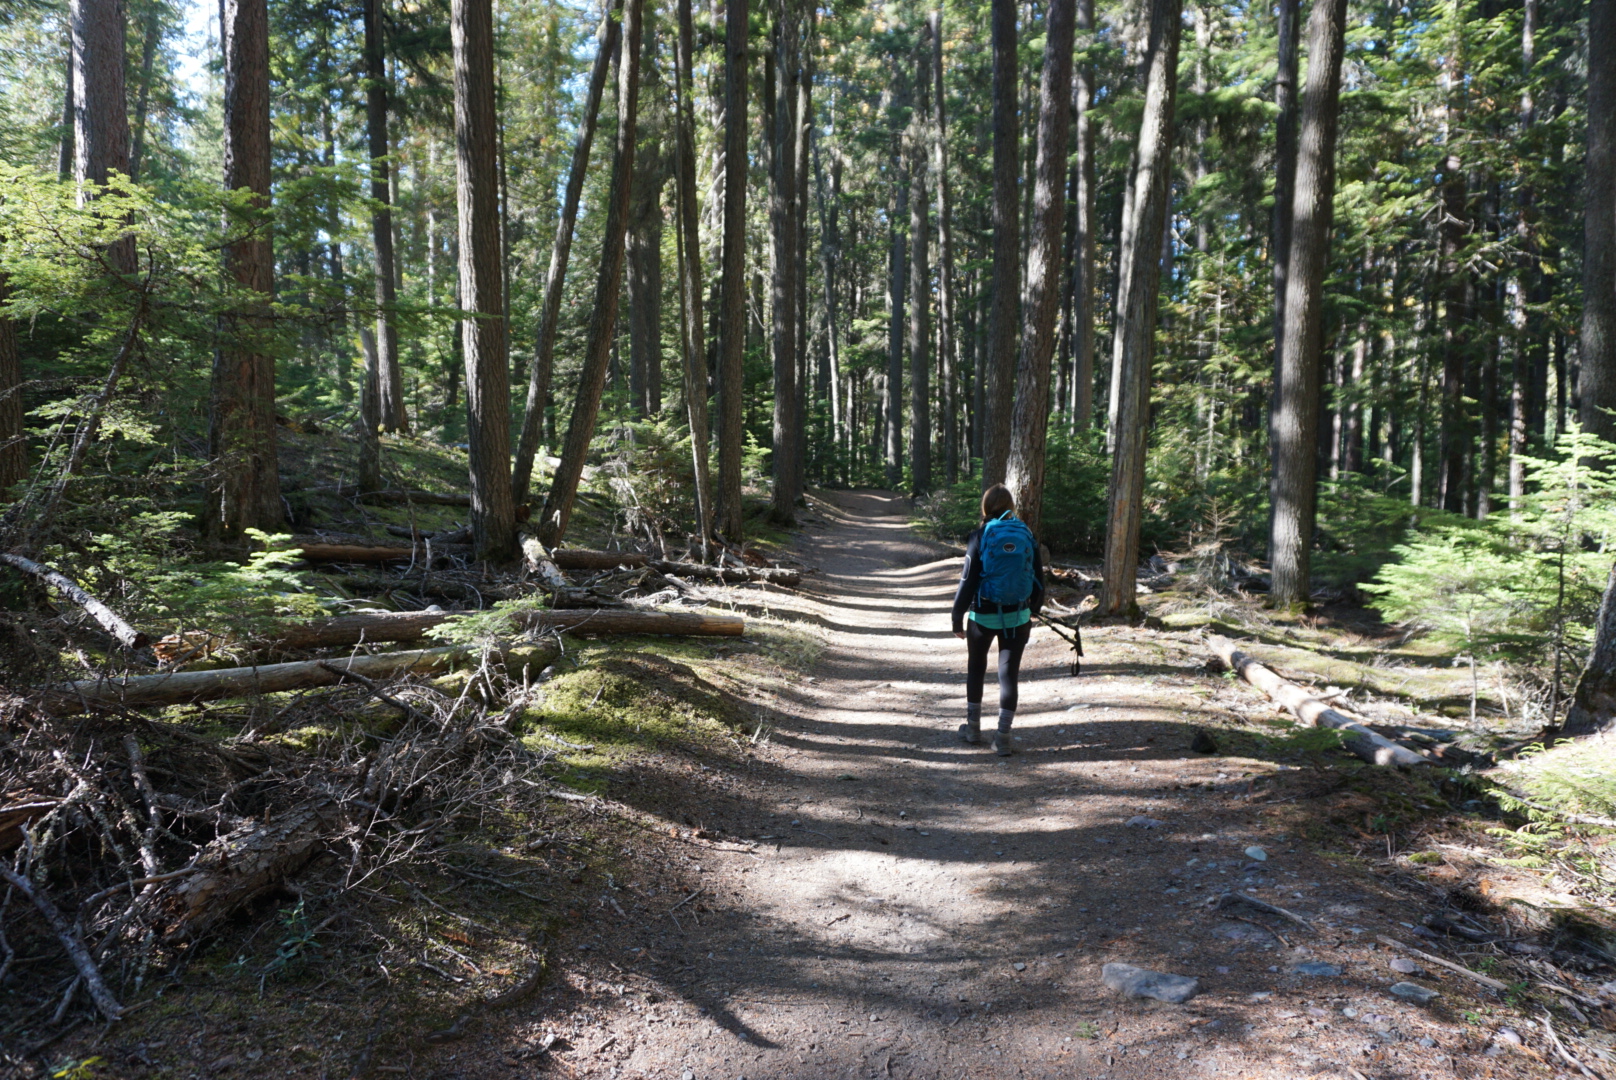
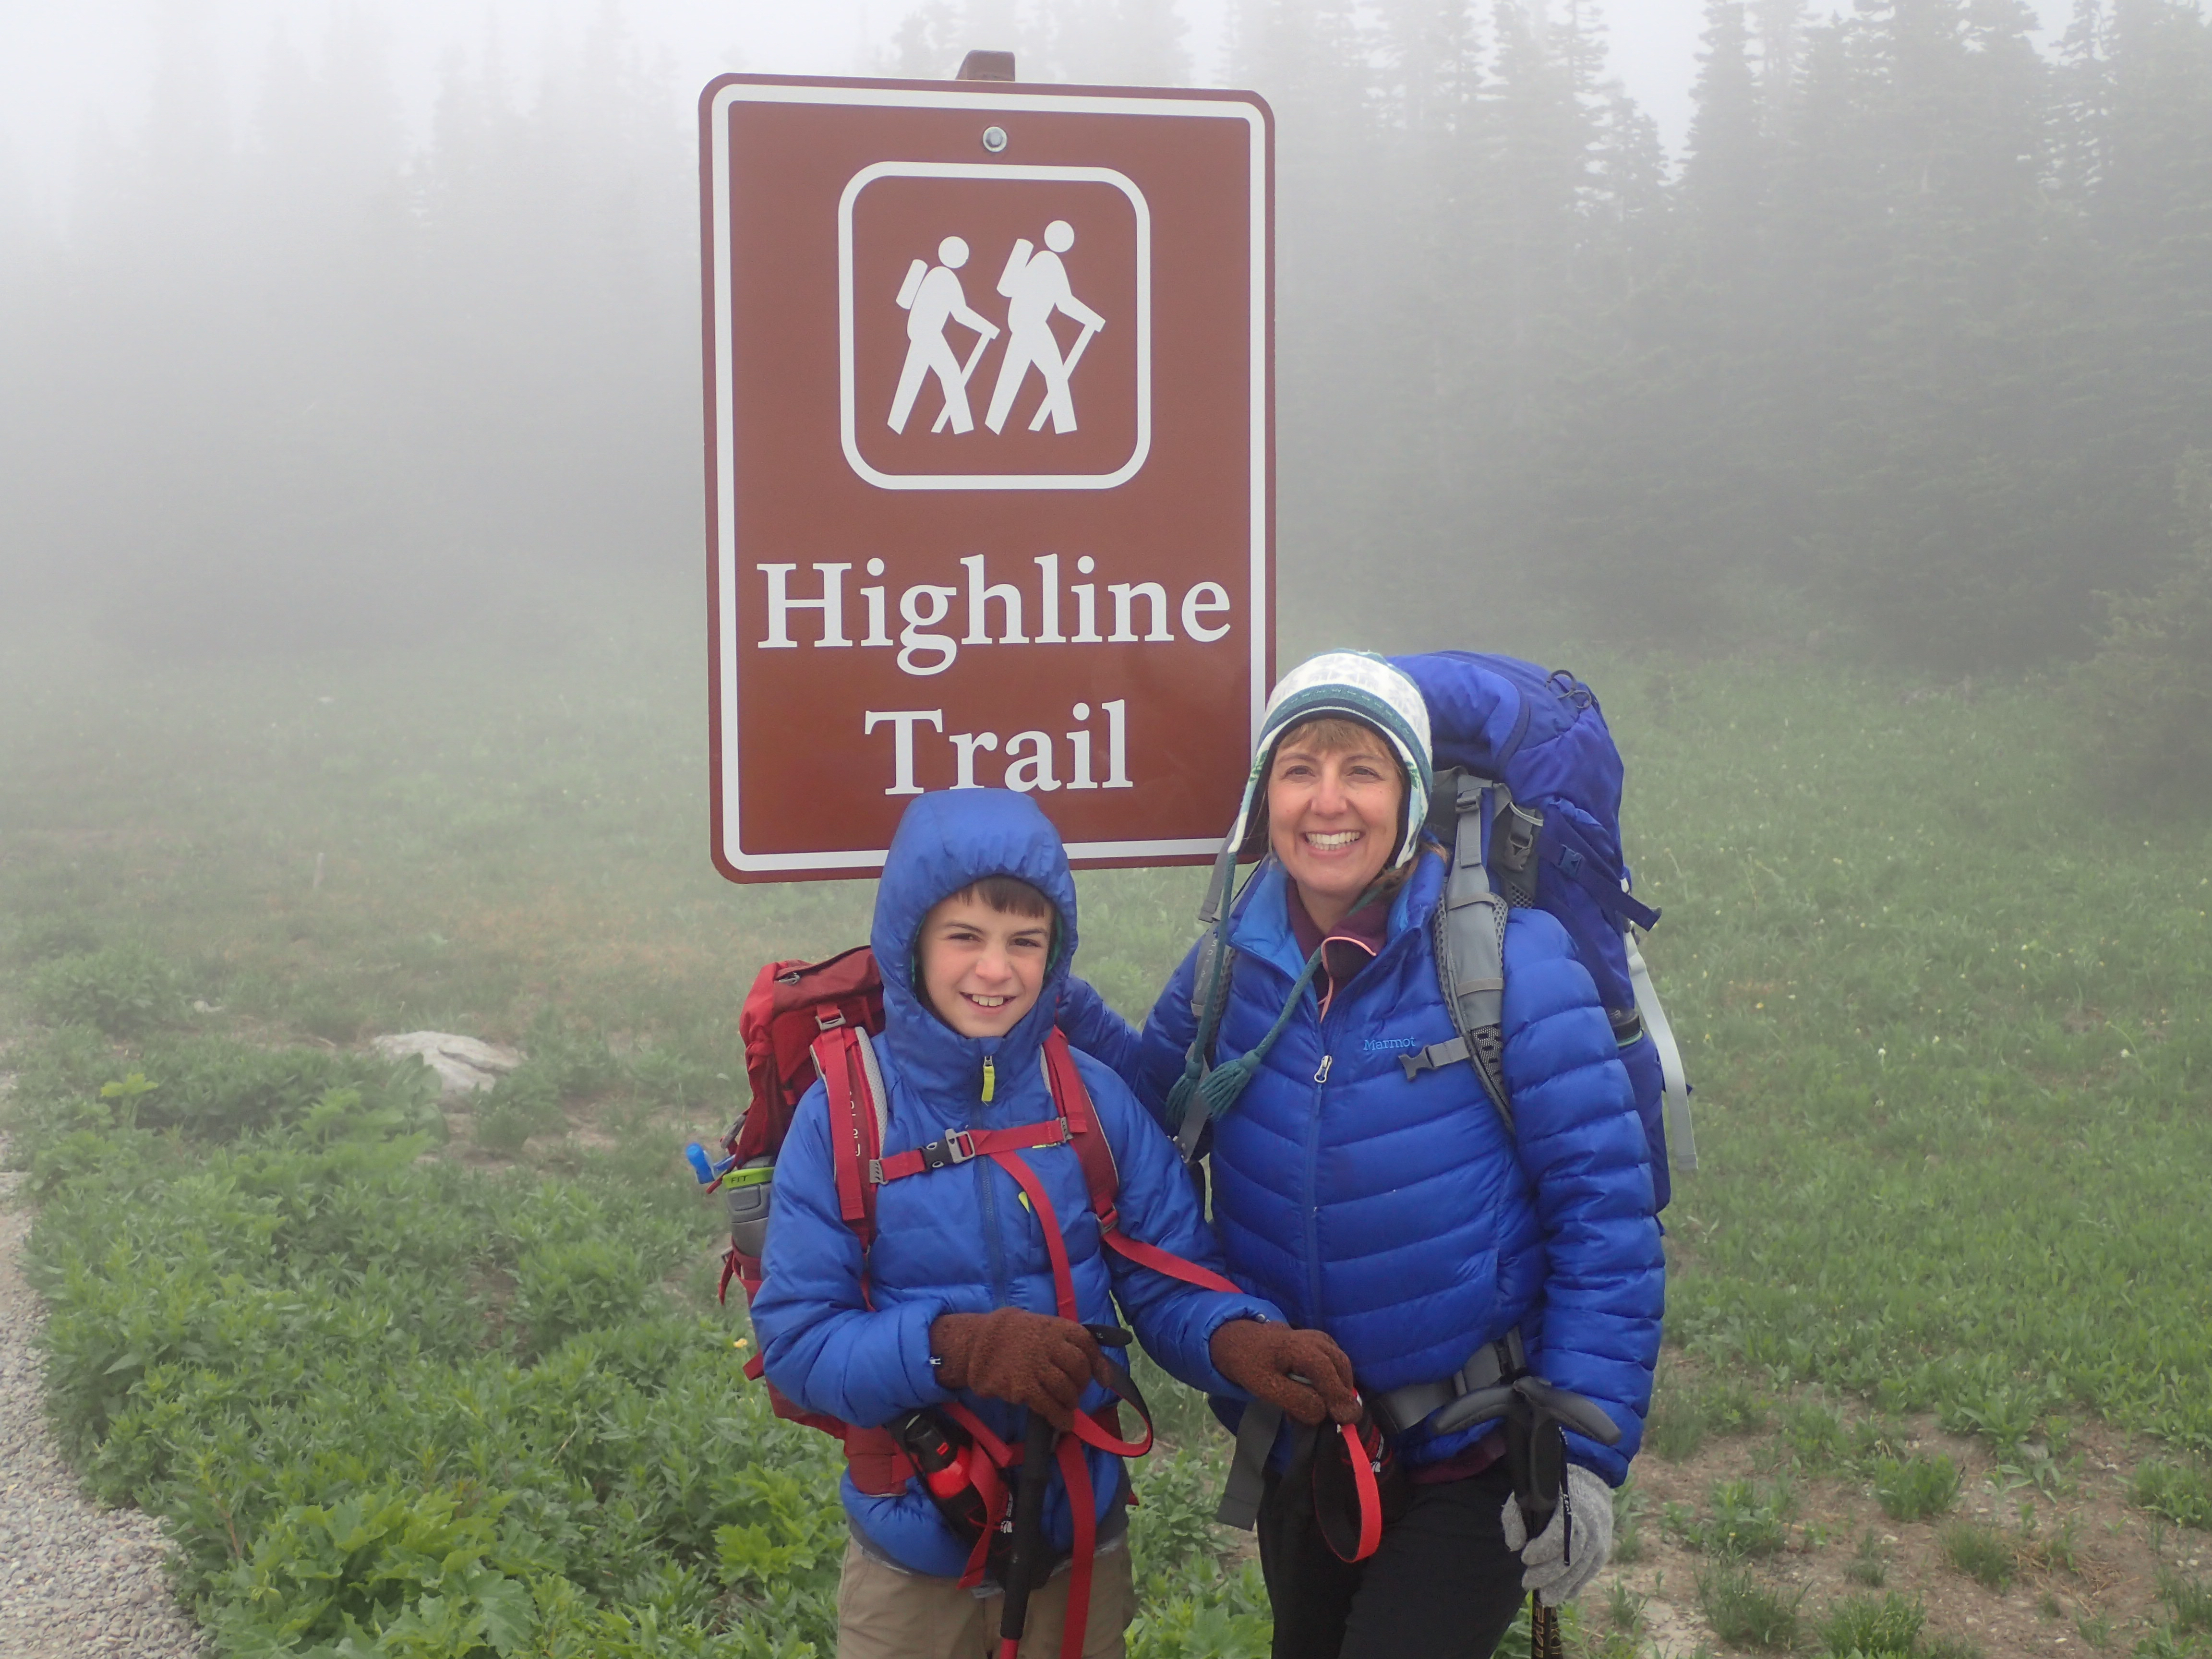
TAKE PLENTY or be prepared to filter. On hot days🌡, exposed trails without shade, and when exerting you might need up to 1L/hr to stay hydrated. I take 3-4L and a filter on every day hike and generally that’s adequate. ☀️ (It usually takes a minimum of 6 rangers to evacuate someone from a trail. One year we had 12 medical evacuations in 12 days on the Highline Trail from dehydration)
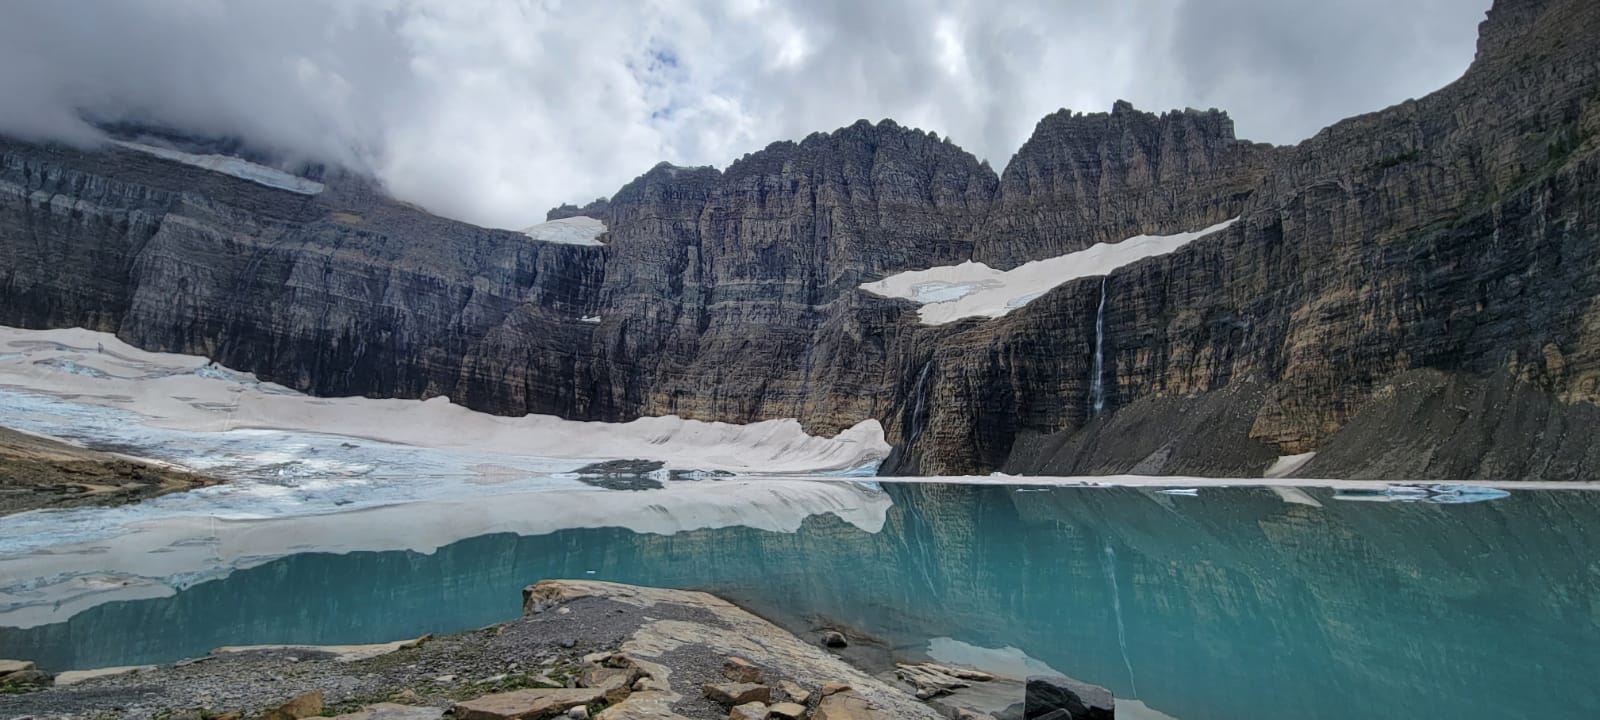
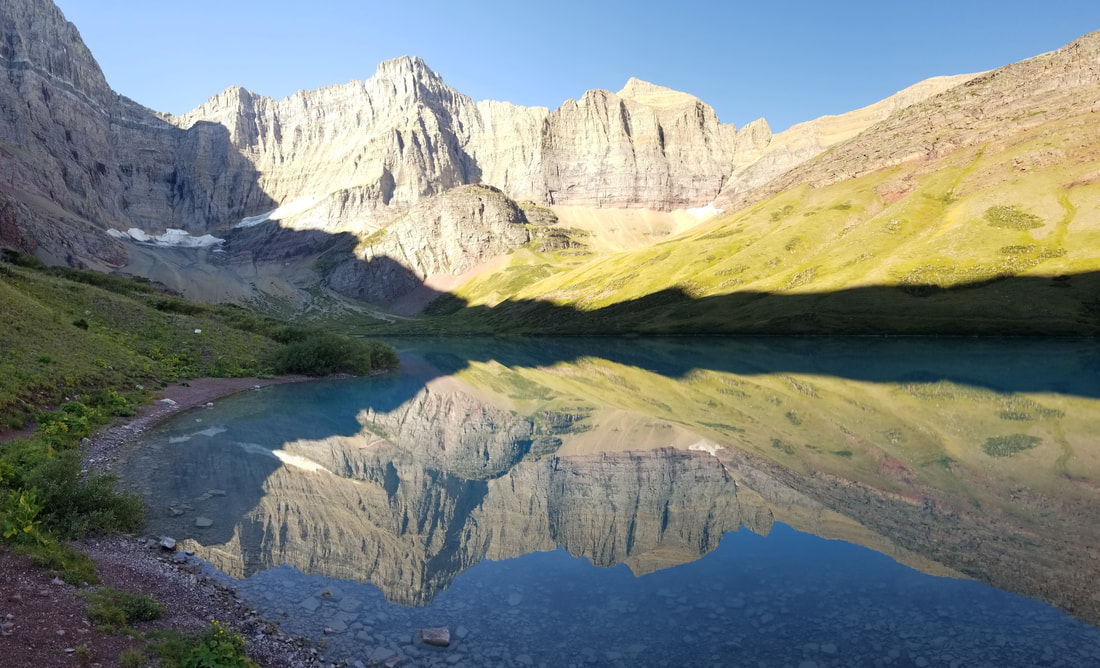
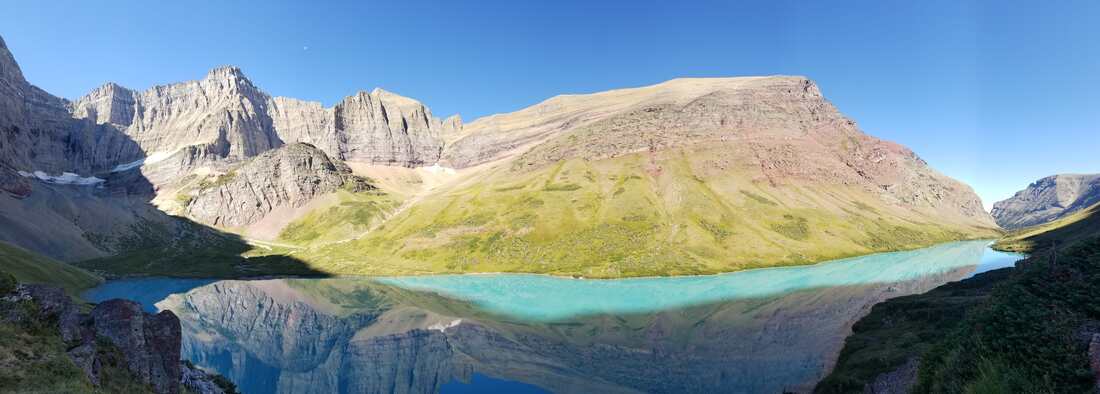
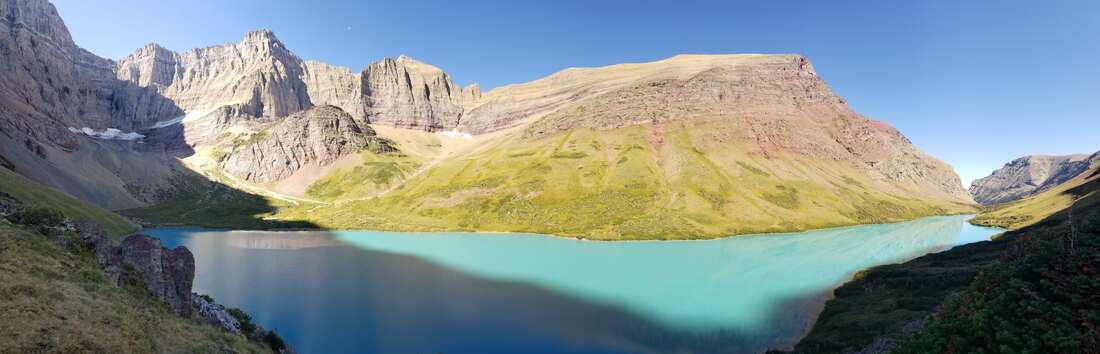
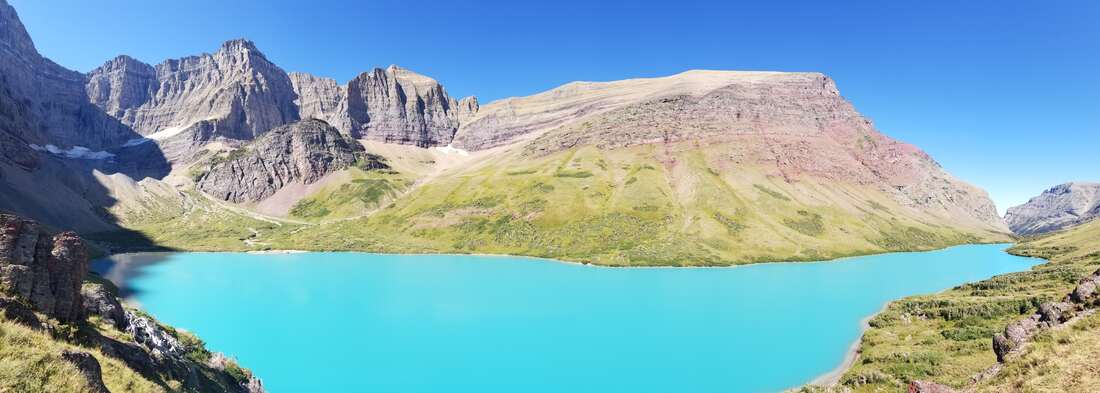
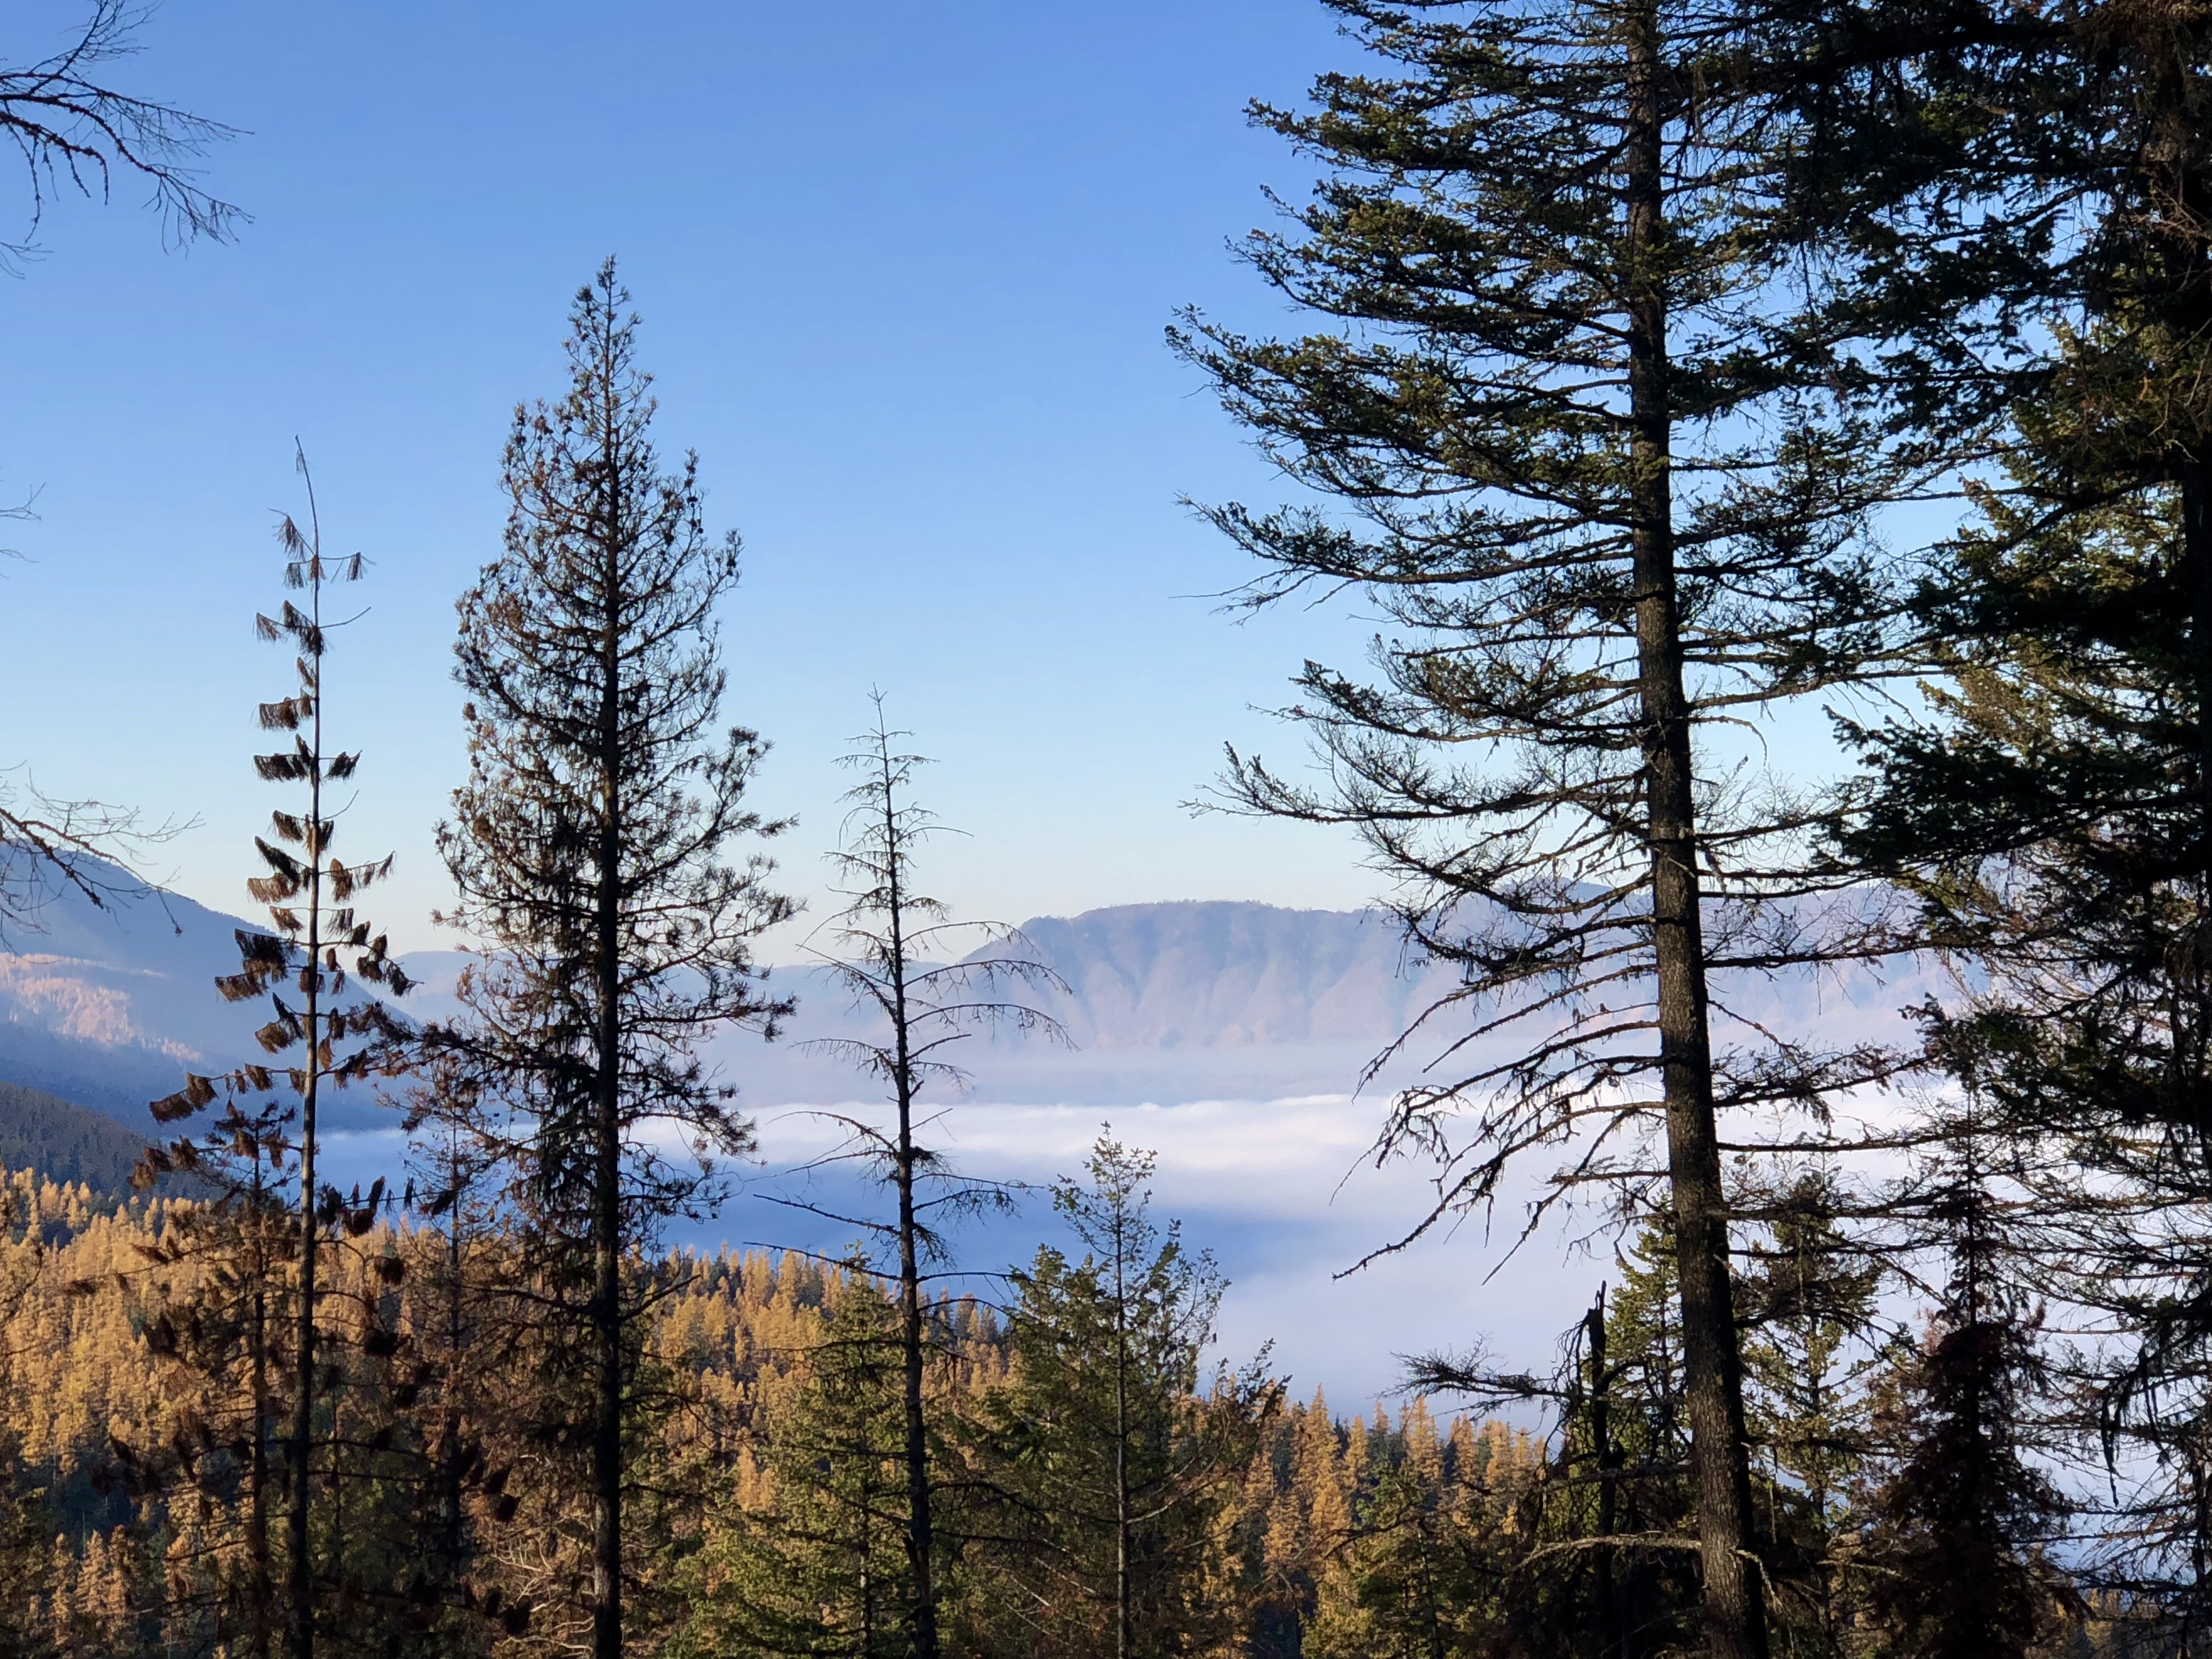
Thunderbird Pond and Thunderbird Peak
Part 2; LAYERS
On any given day the park can see rain, sun, snow, sleet, graupel, gale force winds etc.. be prepared for any and all of these. Layering is always the best choice. Choose materials that wick moisture and breath well. No cotton or jeans, EVER. So, top to bottom: *A sun hat ☀️to cool you or a light beanie to warm you. A “buff” type layer can do both. *Sunglasses *Sunscreen can also help with windburn. *Base layer shirt that is thin and wicks moisture away. If thin enough a long sleeve is good for sun protection and won’t over heat you. Next layer is light insulation such as thin fleece, something for just a little added warmth on a chilly day. Third layer is a bit thicker like Polartec or moderate fleece. Top layer is for wind and light moisture protection (softshell). *Shoulder seasons and winter ⛄ a puffy is often needed. Puffies (lightweight but highly insulated air trapping jackets) are useful when you stop moving but are cumbersome when you’re active. Down is ideal because it has the most warmth-to-weight ratio. But down is not a good active layer because if you sweat and the down gets wet you lose all of the insulative properties❄ *For rain, snow, and high winds🌬 you need a hard shell outer layer.🌧 Technology in modern jackets allows them to be waterproof, breathable, and light. (Pit zips are your friend!). *Now you have several layers of which you can use any combination to adjust for conditions and comfort👍 *Thin gloves are nice for wind protection. They also help prevent blisters when using trekking poles. A second waterproof pair for rain is nice to have. *🚶♂️Pants should be light, stretchy, and breathable. Don’t overdo insulation here because legs stay warm when moving and your core is where most insulation should go. Shorts are fine if you know the conditions will be warm and consistent during your hike. But I recommend a pair of pants to throw on if needed. Rain pants are helpful in continuous or heavy rainfall but can make you feel like you’re in a sauna if not well ventilated.
Gunsight Lake
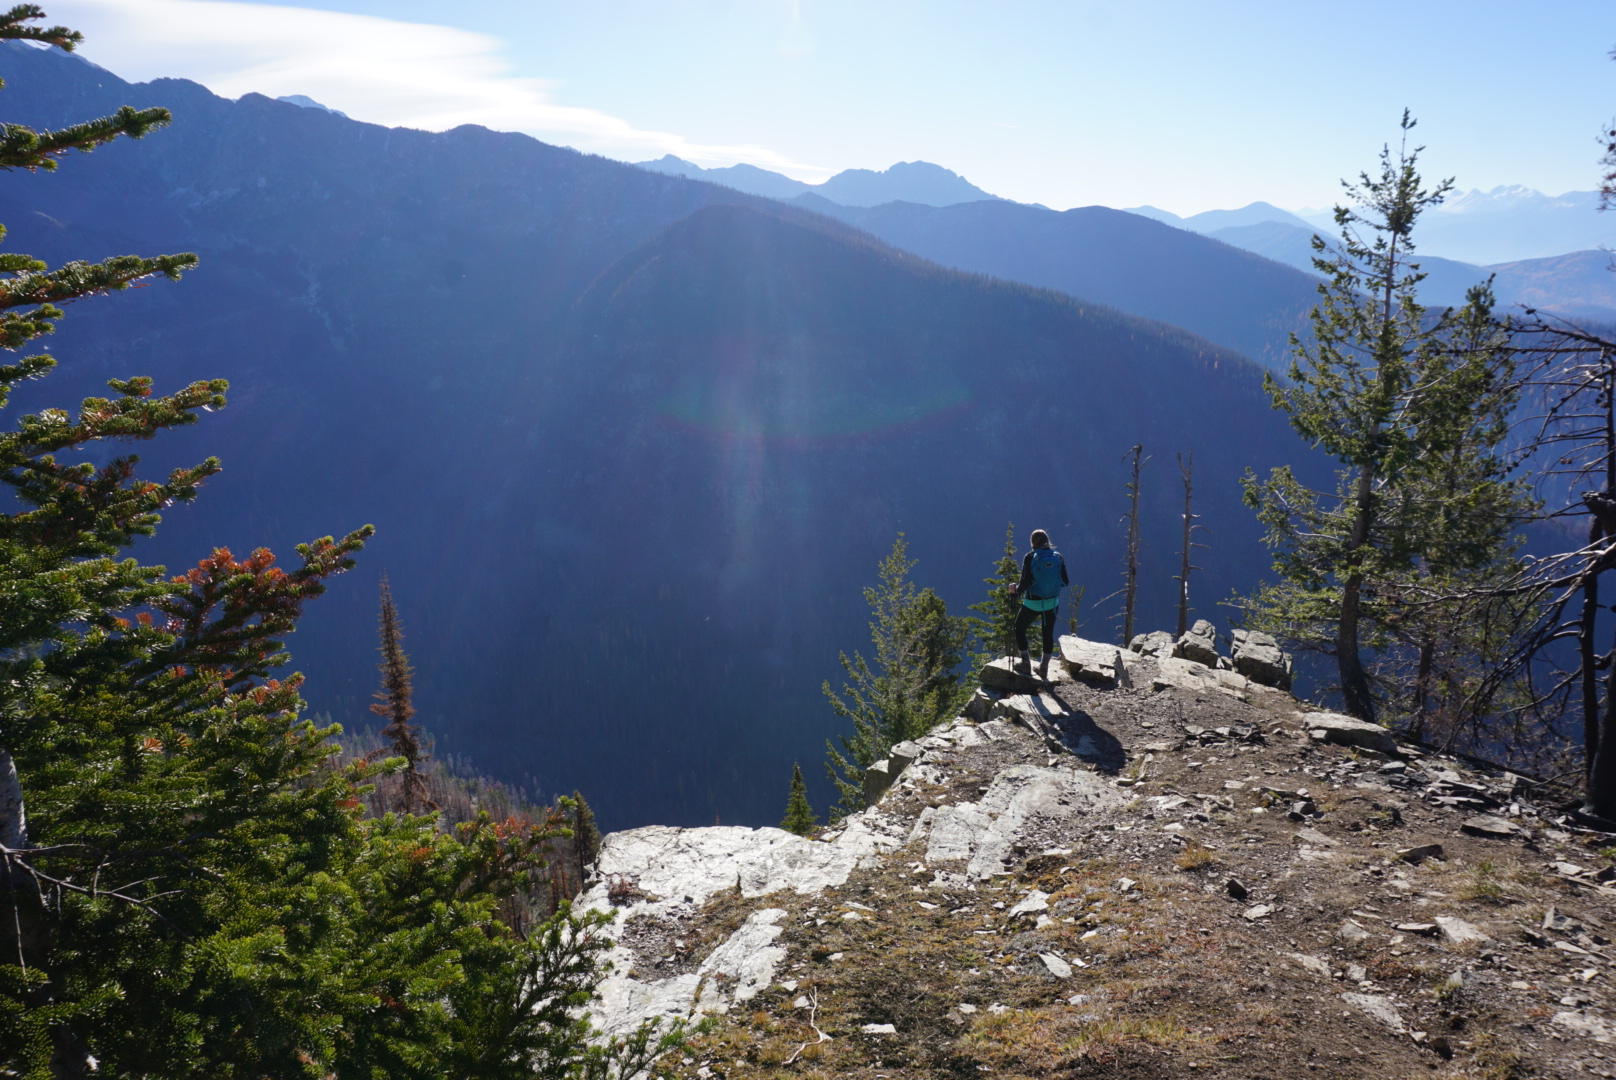
Part 3; FOOTWEAR
I’ll ruffle a few feathers here. Training and experience has led to my opinions and advice, and you may take it or leave it😎
Please see Part 1 where it mentions the many resources it takes to affect a rescue when unprepared. You don’t want to be that person🚫 I suggest divorcing yourself from preconceived ideas that comfortable footwear is the best choice. In GNP the trails are icy, muddy, snowy, rocky, uneven, full of roots, and generally inconsistent. Functional and supportive footwear is a good choice. ⚠️Sandals, flip-flops, Chacos and the like may lead to injury and rescue🚁
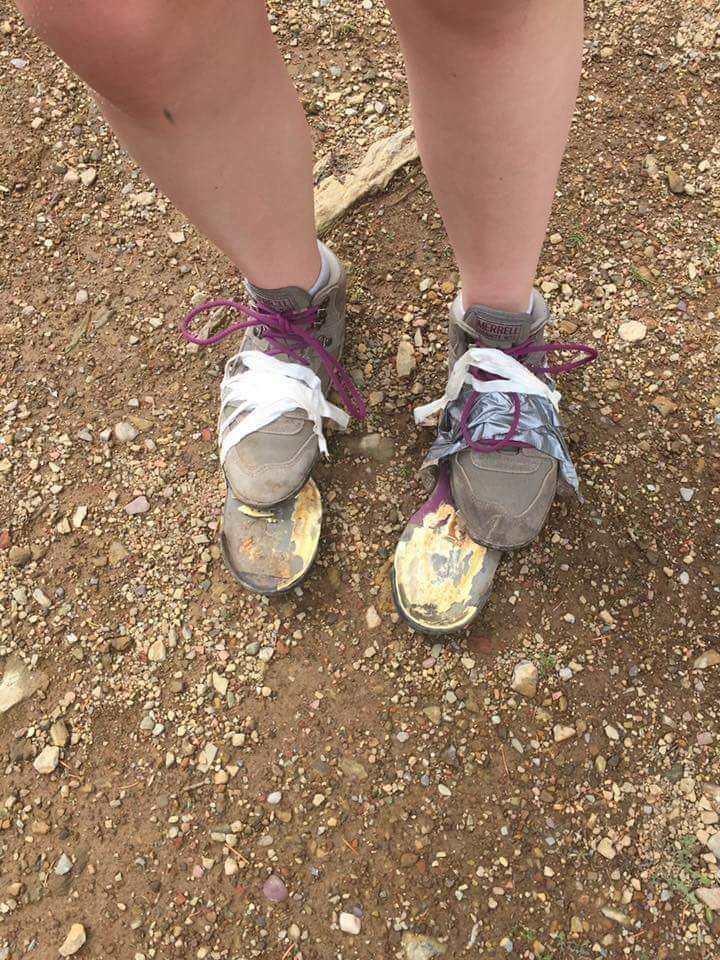
Glue on the soles was old and cracked
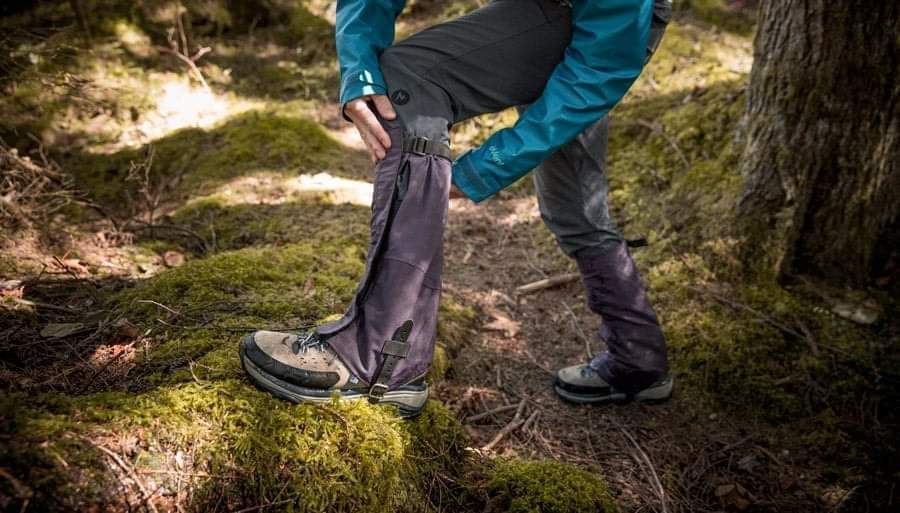
*Support: 🥾coverage of the entire foot to protect toes, mid-foot, and top of foot from impact (rocks etc.). Mid-ankle or high-ankle to protect from impact and minimize the chance of an ankle-roll type injury *Functional: Tread that has some grip. Consider material that has some water repellancy or waterproof if conditions dictate (waterproof doesn’t breath and gets very warm). *Socks: 🧦so many choices… no cotton. Find a material and thickness that doesn’t overheat your feet and protects from blisters. Consider a liner sock. Your feet will thank you if you bring a fresh pair for the hike out🙌 *Gaiters: wet pants from rain💦 or brushing against wet vegetation will wick water down your socks and into your boots. This will lead to discomfort and likely, blisters 👎. Gaiters are a nice barrier to prevent this👍
Gaiters are useful for rain, snow, and scree
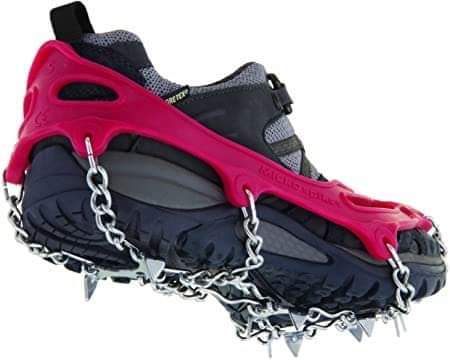
*Traction: in the shoulder seasons and winter ❄ the trails can be icy. YakTrax type slip-ons work well for flat trail. If there is any up or down slope you will want microspikes. If there is deep snow⛄ you will want snowshoes. And if the snow is steep you will want snowshoes with a heel lift.
Microspikes can prevent a slip and fall
*Blisters: as SOON as you feel a hot spot 🛑 take a minute to cover that spot with a friction barrier such as mole skin, a band aid, duct tape, something to minimize the friction against the skin. If you wait too long you will be miserable😢
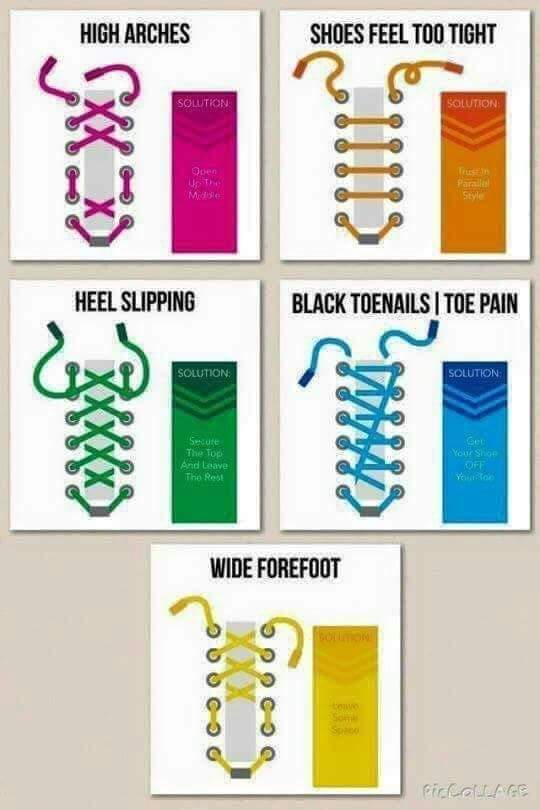
Lacing techniques could solve problems
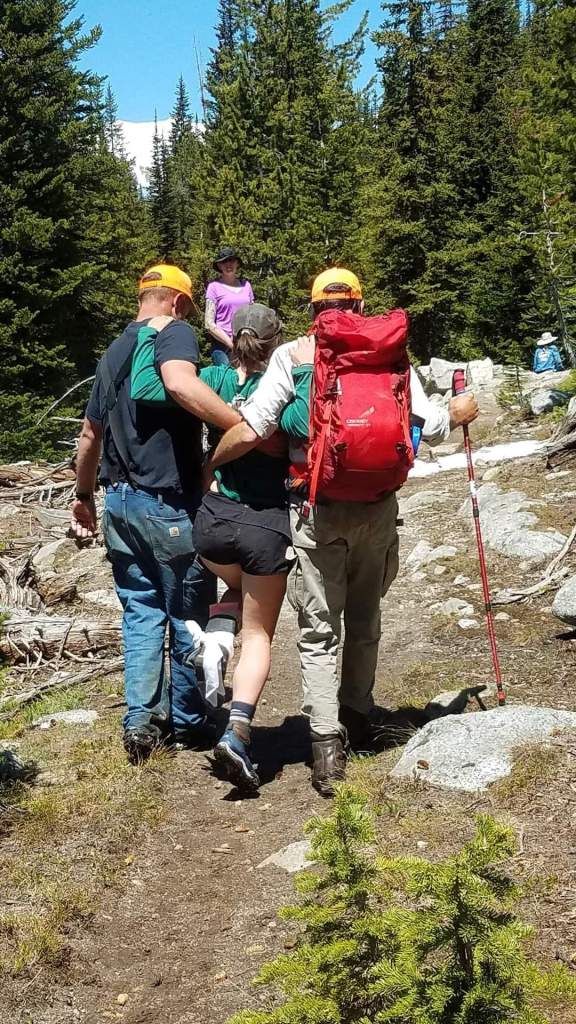
*See the above image for lacing technique to help with certain issues *There are few true orthopedic emergencies. You shouldn’t need to get a helicopter ride out for a rolled ankle or other minor injuries. Learn in advance how to self extricate or how others can help with extrication (see photo for one example)🧠
Helping a hiker with a busted ankle
Part 4; CAPABILITY AWARENESS
People are always asking for hiking suggestions. If you want the BEST feedback be prepared to provide specific parameters. Know the abilities/limits of yourself and those in your group in advance💪
Know where you’re going and what to expect.
*Distance: know how many miles, round trip, you can physically handle. *Elevation: know how much vertical gain and loss you can tolerate.🚶♀️ Generally uphill ↗️stresses your cardio while downhill ↘️stresses your knees. *Pace: understand your typical pace ⏱ in mph on flat ground, uphill, and downhill. *Route: part of the Ten Essentials is being “prepared.” Know the stats🗺 (mileage, elevation gain/loss, obstacles) for any planned outing in advance. Combinations of uphill, downhill, gear weight, and mileage will alter your pace. *Factors: understand there will likely be things in GNP that will DECREASE your endurance from that of your baseline. These factors include weather🌞🌧🌬❄ hydration, fatigue from travel, elevation above sea level, alcohol, sleep deprivation, and pack weight to name a few.
This knowledge will help you plan appropriate hikes that get you back to base before dark and without exhaustion or rescue 🤪
Can you handle vertical gain? Loose rock? Heat or cold?
Part 5; TEMPERATURE REGULATION🌡
This is a companion note to the layers thread.
*Always start a trail cool or cold. If you start warm you will quickly need to stop and shed layers. “Be bold, start cold” *In winter conditions 🌀try not to sweat much. Moisture will make you colder. *The quickest, easiest way to adjust temperature is via hands and head 🤲🦲. If you’re cold throw a beenie or buff on your head and put on some gloves. If you’re warming up, take off the hat or remove your gloves. If you’re overheating 🔥dip a ballcap or buff in a creek and put it on your head. Try holding a snowball❄ (if accessible) in each hand.
Fall days can be hot, or cold!
Part 6; TEN ESSENTIALS
The “Ten Essentials” is a generally accepted list of items one should bring with them while hiking, backpacking, and mountaineering. Having these systems in place could help prevent a bad outcome should things go wrong (and they might). I always carry these, typically in a sack labeled “10 Essentials”. Items can be adapted to suit specific trip attributes.
1. Navigation: map, compass, or GPS (Many options, and knowledge of how to properly use them. Can you tell someone where to rescue you? Can you find your way out if you don’t see a trail? Signaling with a mirror or whistle is nice)
2. Headlamp & Extra Batteries
3. Sun/Wind/Weather Protection: sunscreen, sunglasses, hat, buff, clothing etc.
4. First Aid: from foot care and bug bites to lacerations and bleeding (I will share my kit items later)
5. Knife and Duct Tape: (to help with gear repair, fire construction, etc.)
6. Fire: matches or lighter + firestarter (I use cotton balls and vaseline)
7. Shelter: protection from the elements should you have to remain in place for a while or overnight. (I use a space blanket type bivy in the summer and an insulated one in the winter)
8. Extra Food: plan to spend the night.
9. Extra Water: plan to spend the night. (Filter?)
10. Extra Clothes: plan to spend the night. (What could overnight temps and conditions be?)
10.5 Ok this is my own thing and while not necessary for survival it IS important… Toiletries: Ziplock baggies, toilet paper, feminine needs & trowel (So you can bury your excrement and pack out your paper including feminine products)
An infamous pooper at Boulder Pass
The best preparation is to expect the unexpected! I hope to see you out there on the trail. Feel free to follow me on IG @GlacierCountry and check out my post about the “Day Pack” for Glacier Park
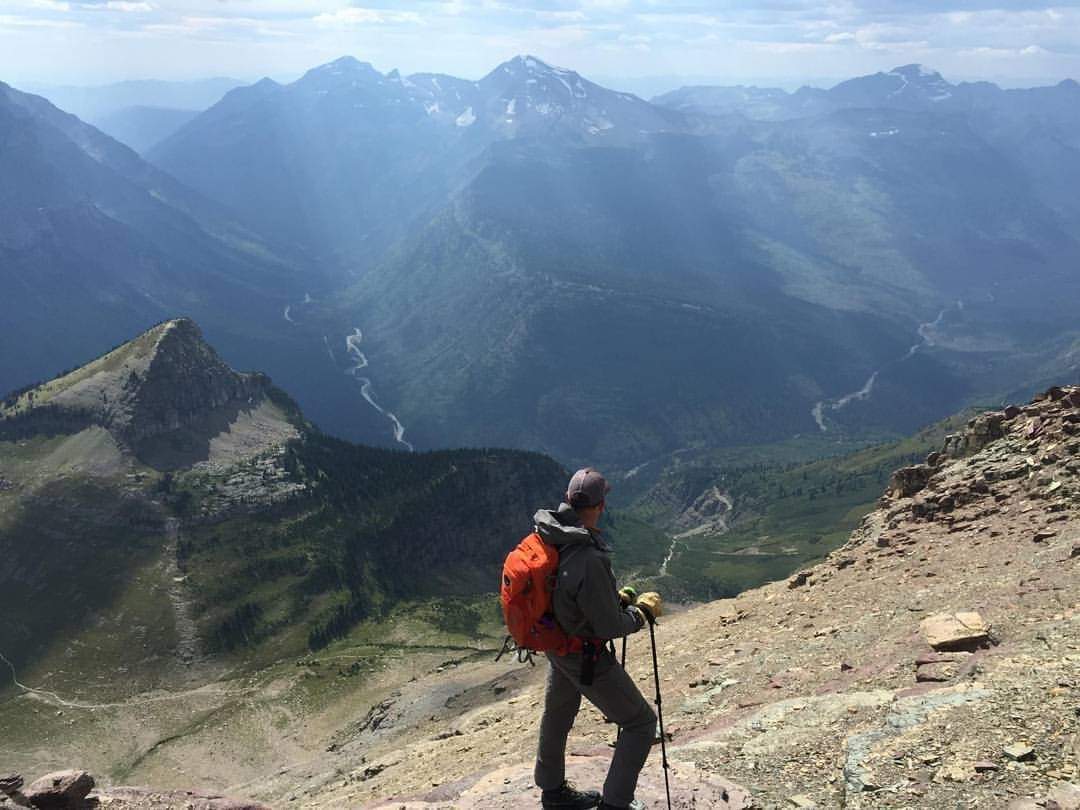
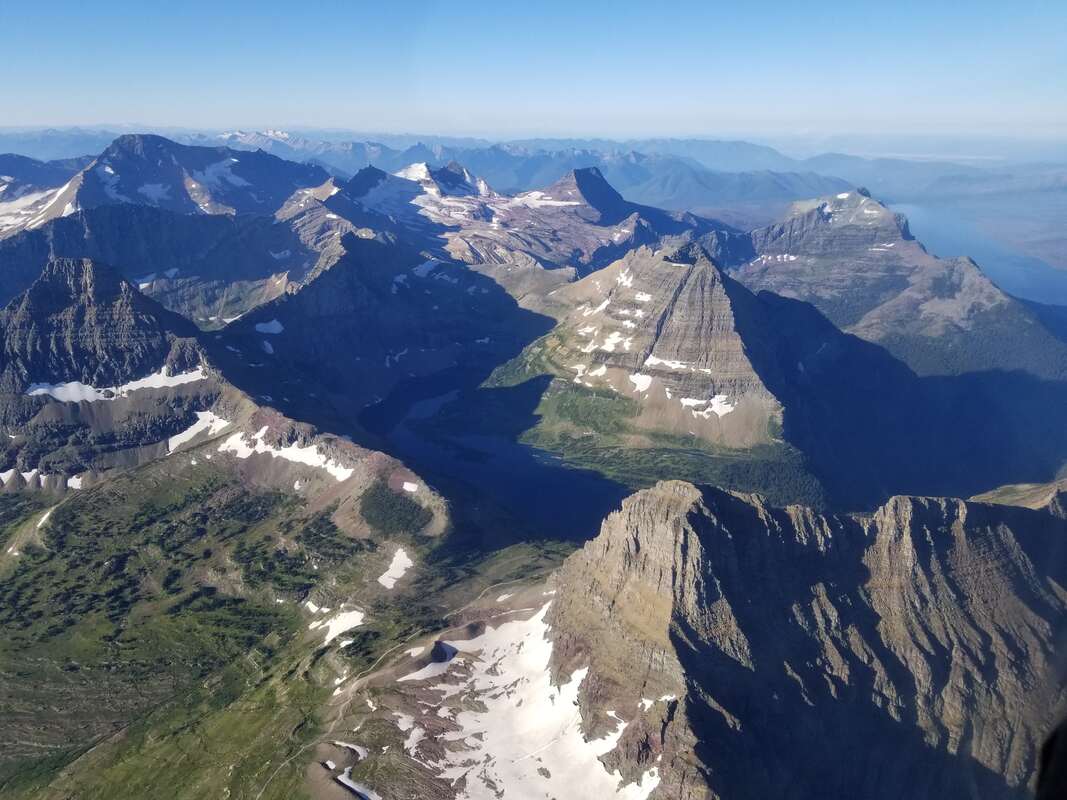
The mountains are calling and we must go… no matter how we get there! Although they are actually worth seeing from more than one perspective!
The 3D view from an aircraft provides a fantastic big picture of the area: its historical topography, its bearings (situation awareness)… its grandiosity. It’s also a much easier way to visit; almost like viewing it from a couch.
However, stepping foot on the trails feels like being a part of the mountains; an extension of them! Hiking through and over the mountains is a great feeling for me. I love the experience, being in nature, disconnecting from everyday life, the exercise, the challenge, the views, the smell, the ability to stop at any moment and, yes, the wild animals even though I prefer to see them from a good (safe) distance.
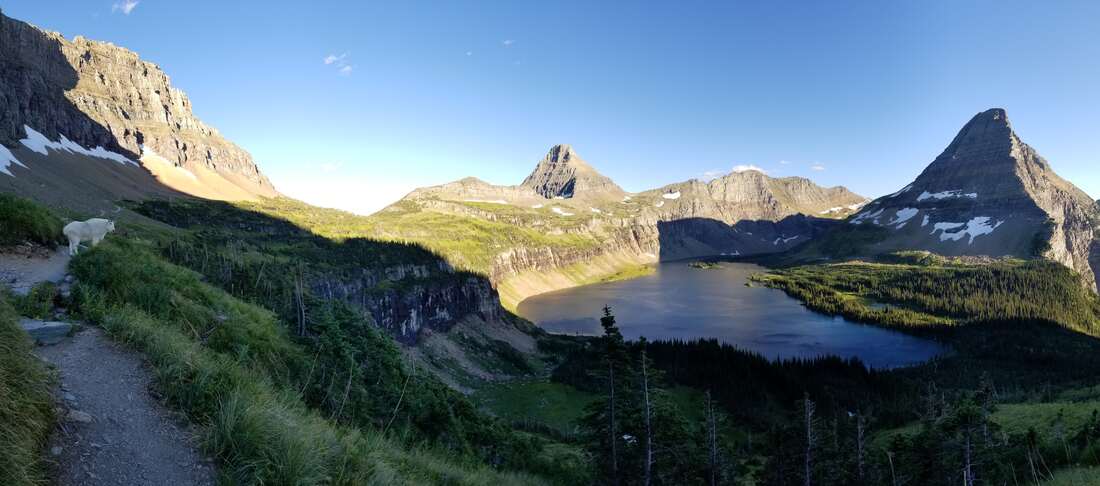
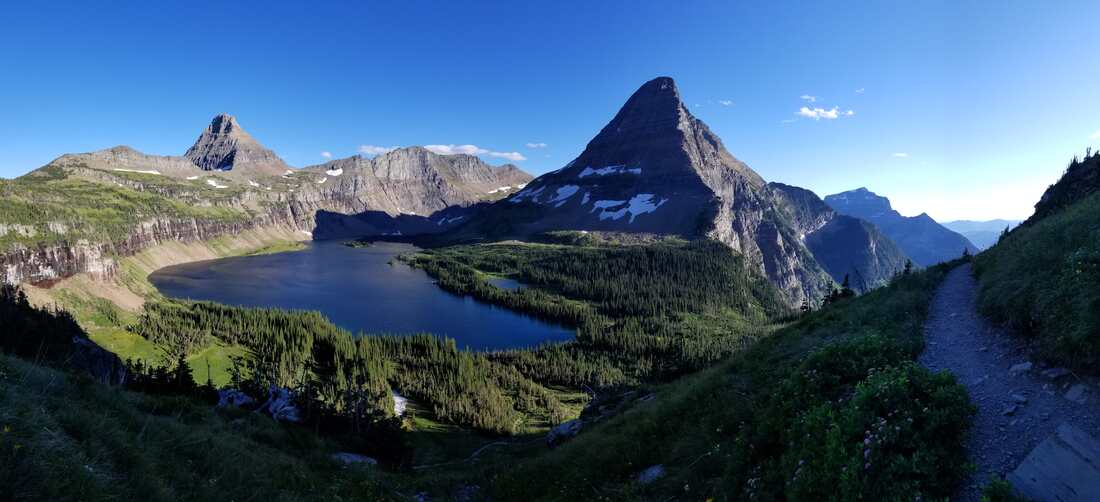
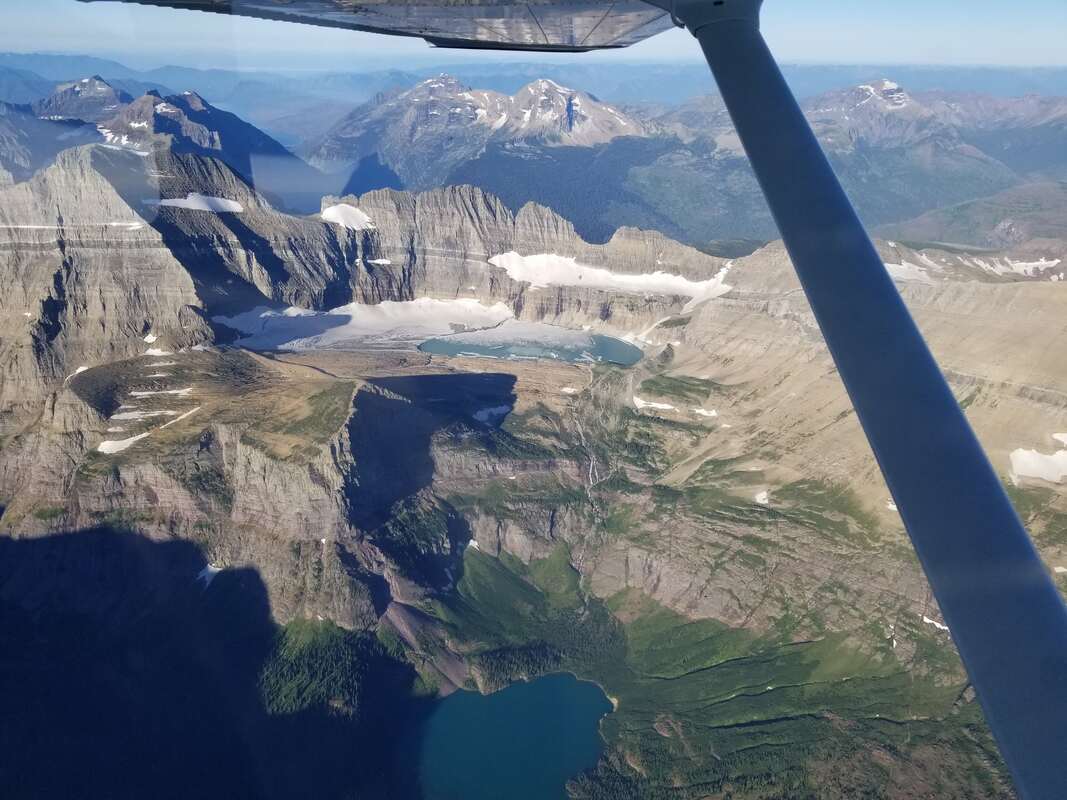
Let’s use a few examples from Glacier National Park to explain further. (Note that some of the aerial and ground pictures are from two different summers.) I’ll start with Hidden Lake, one of Glacier’s easiest and most popular hikes from Logan Pass.
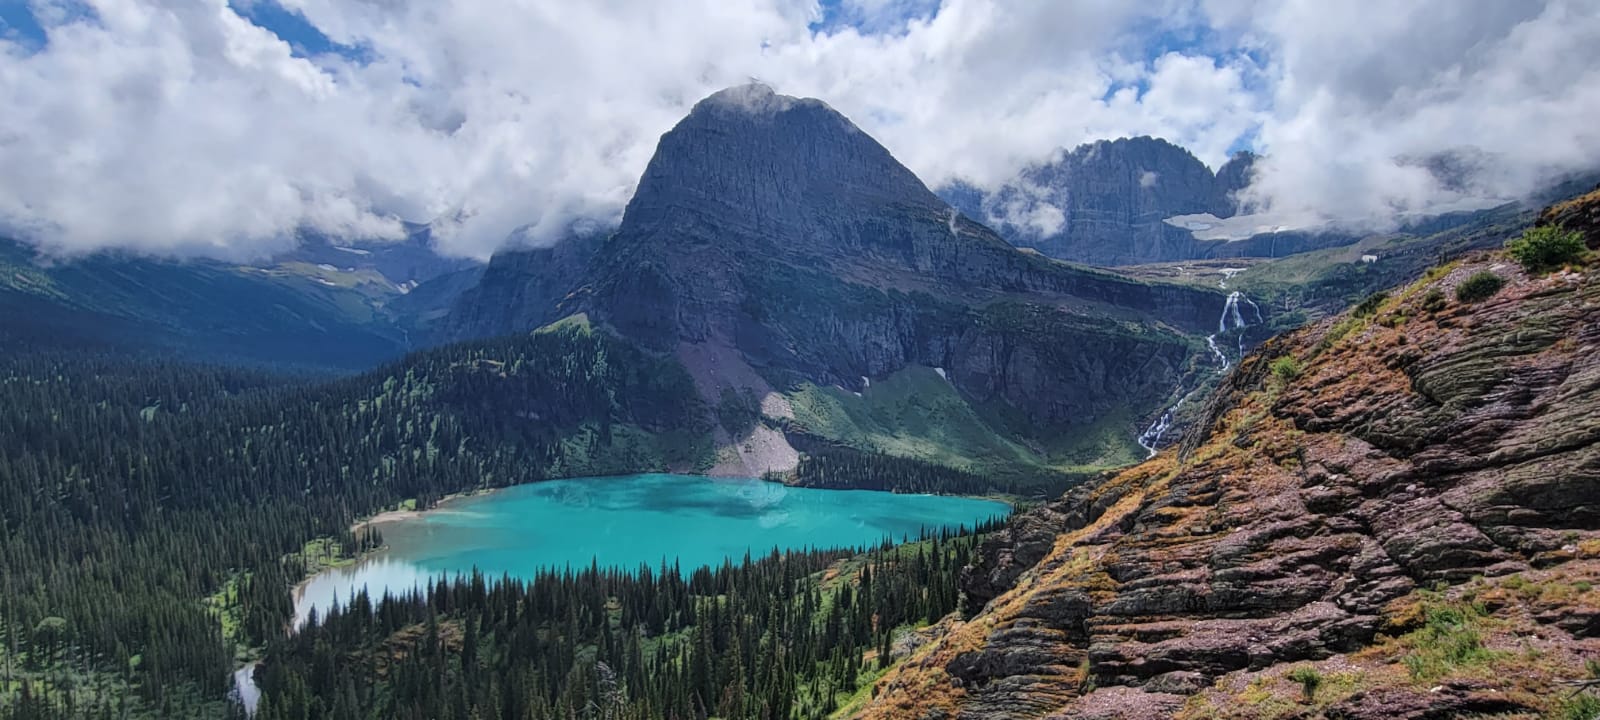
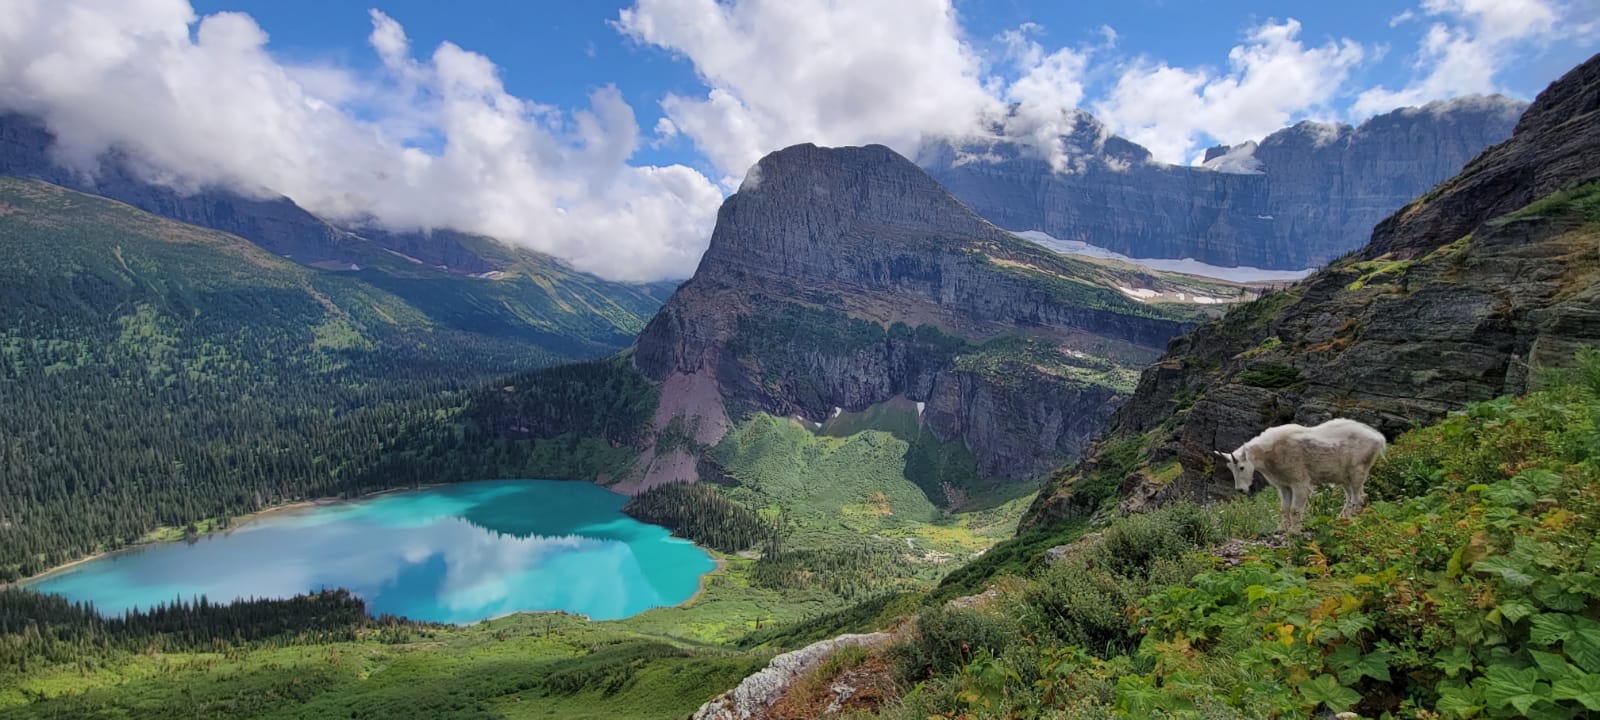
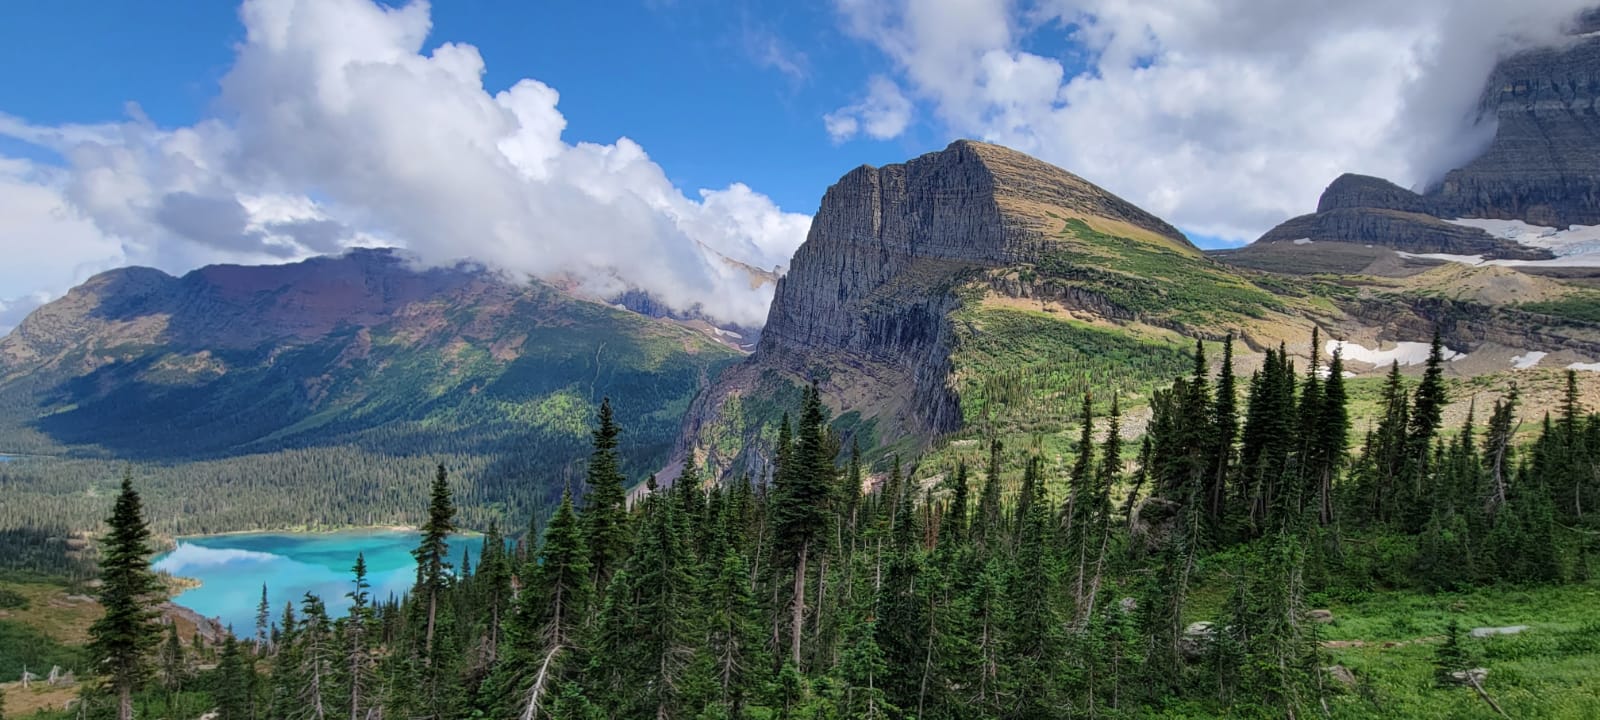
While one cannot see Logan Pass, you can picture it just south of the lower left corner of the picture. From there, one can follow the trail (partially paved and can be seen in the picture) to view Hidden Lake and its beautiful valley. The aerial view provides a great shot of it and its general area, including Sperry Glacier in the immediate distance. However, being on the trail allows you to be a part of the landscape. It puts you right in the middle of it all but does not provide views of the area beyond the valley. It’s also not uncommon for mountain goats to be enjoying this same beautiful area as hikers. Unfortunately for some though, this trail is often closed due to “bear activity.” In this case, it means bears chasing mountain goats up and down the valley, left and right of the trail.
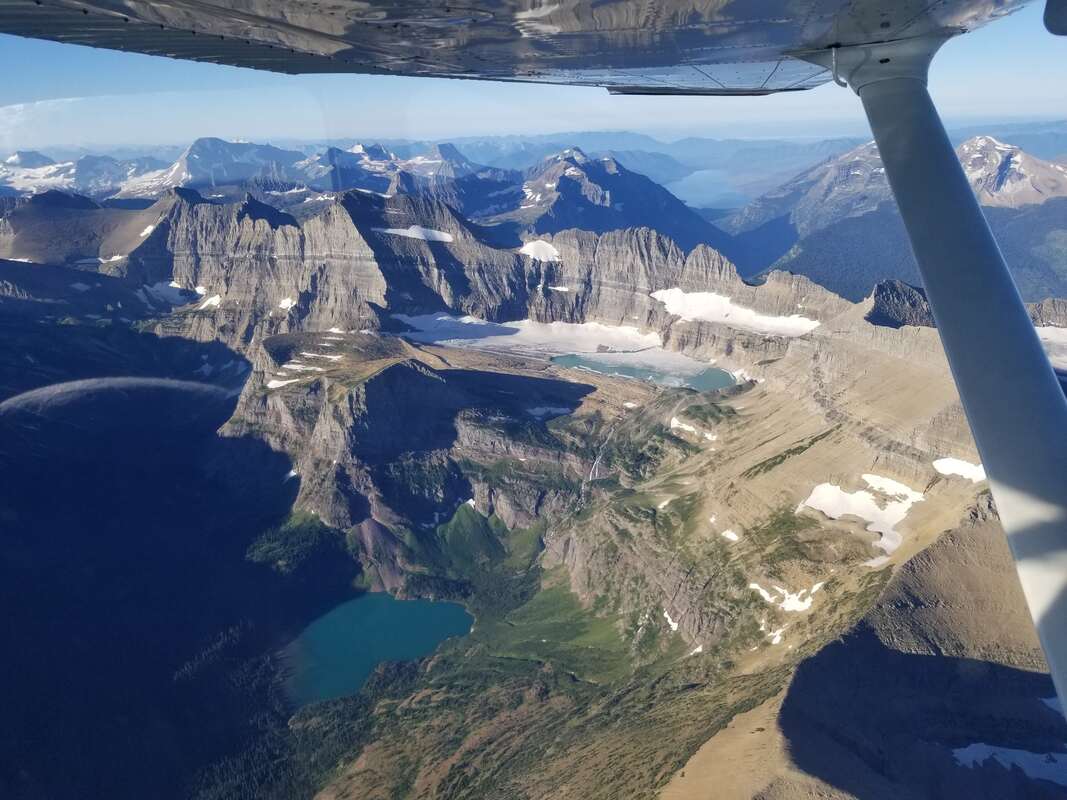
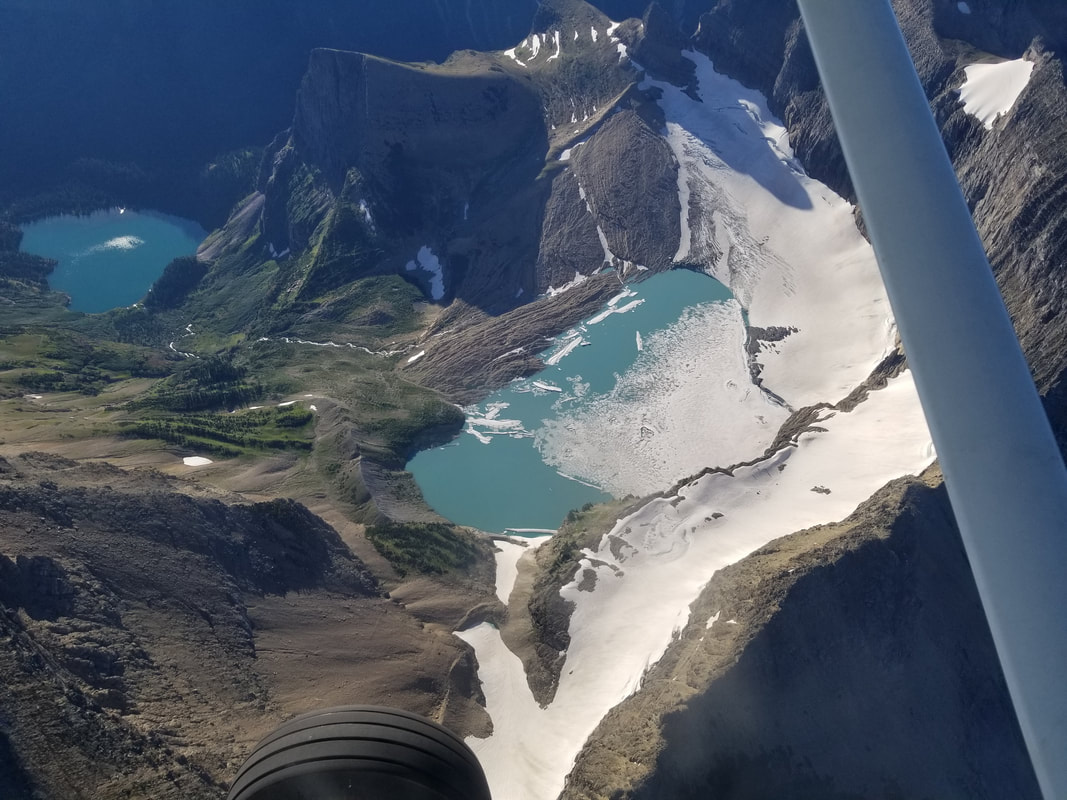
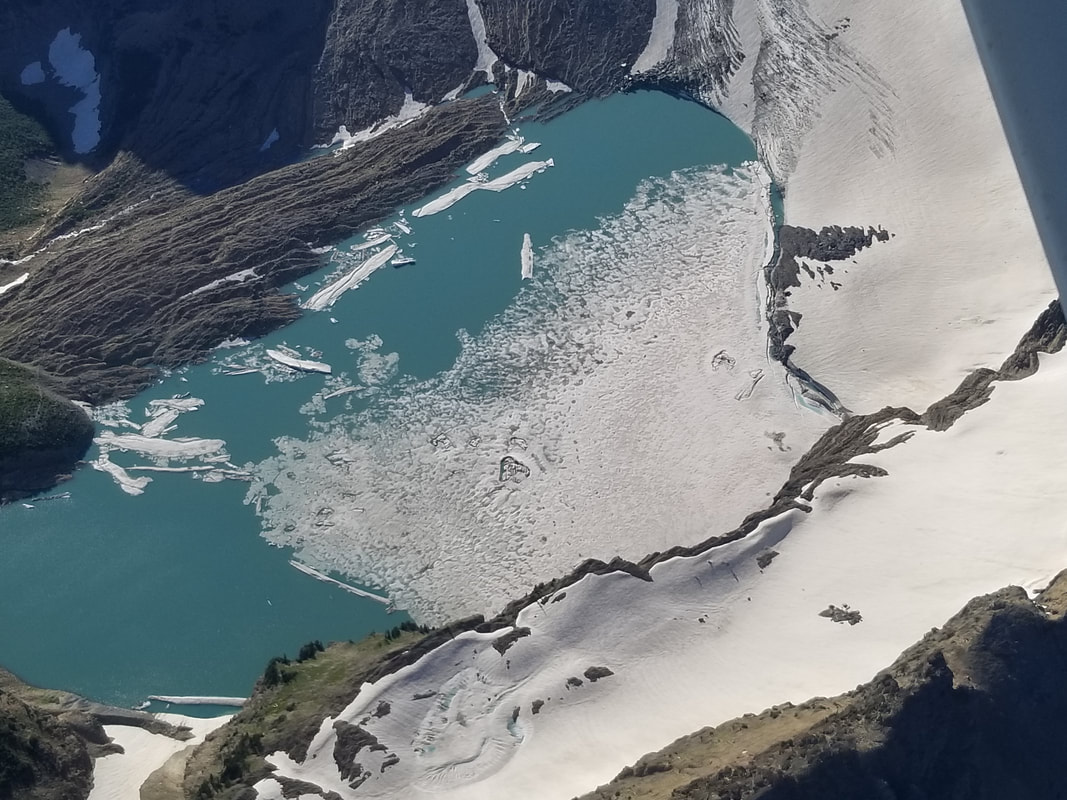
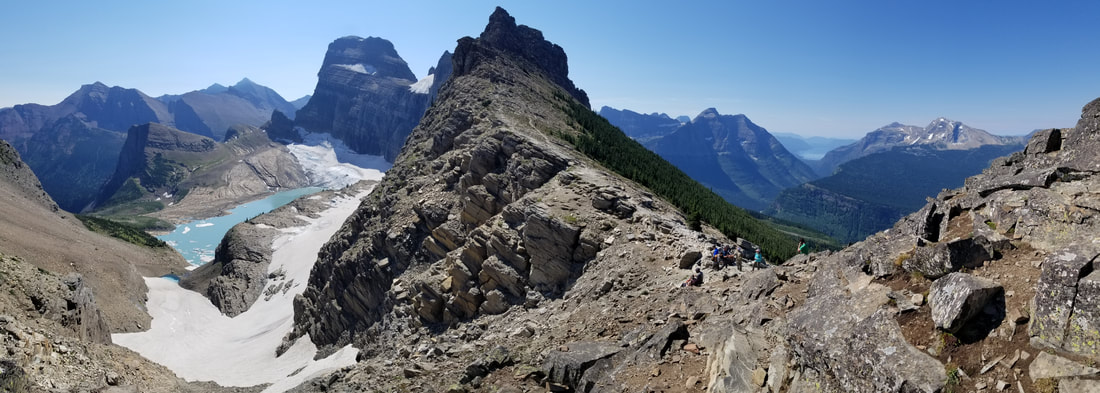
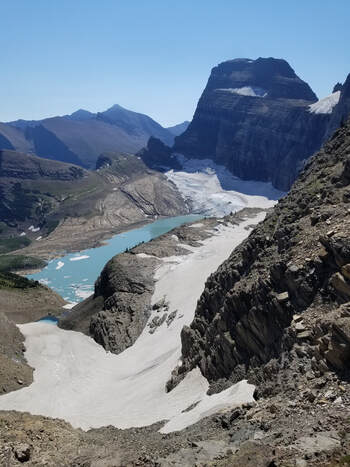
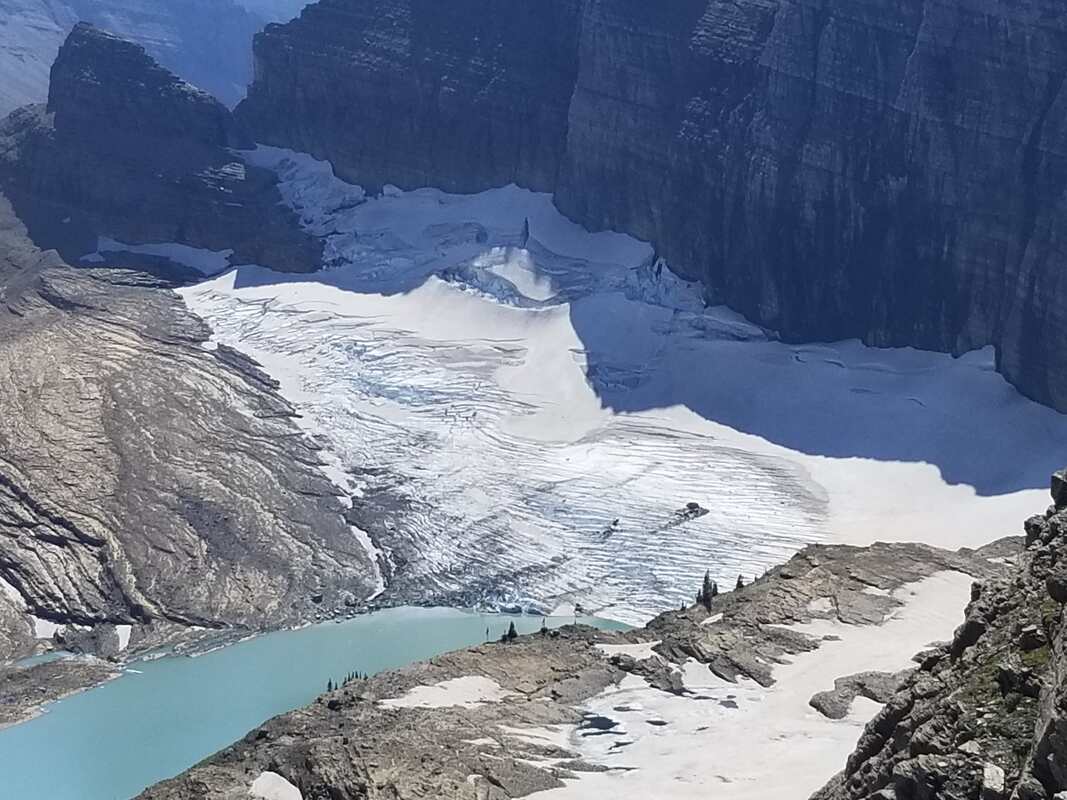
Continuing with famous trails… Grinnell Lake and Grinnell Glaciers are amongst visitor favorites. The hike to the lake is fairly easy, especially if shortened by taking a boat across Swiftcurrent Lake and another one (part of the same ticket) across Lake Josephine. But the hike to the glacier is moderate. Flying over the area clearly shows the difference between Grinnell Lake and Grinnell Glacier. Many first-time visitors question this because they think Grinnell Lake is the one on top, when it’s the one at the bottom. The lake up top is simply part of the glacier that is melting and receding.
One of my first thoughts when hiking to the Glacier was that the waterfalls were not as evident from the air as they were from the ground. My second thought was that the Angel Wing (the mountain west of the waterfall) is much bigger in actuality than the flight portrayed (even with the shadow). I still would have liked to hike up to it, but it was pretty rainy and stormy when we arrived at the Glacier so it’s on the list again for a future trip.
We could have never seen a ram this close or this good from any aircraft.
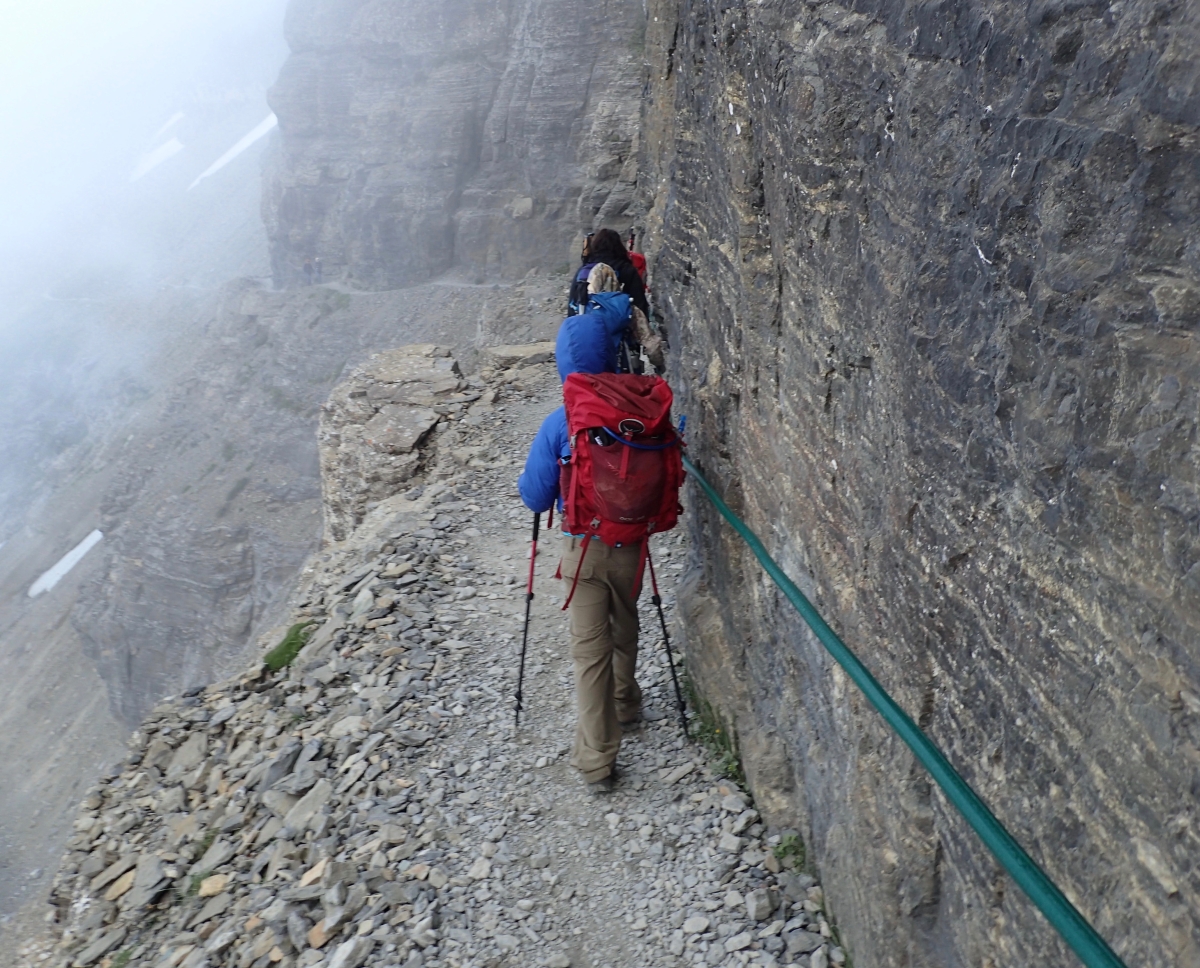
Hiking directly to the Glacier isn’t the only way to view the Glacier from the ground. The Highline Trail, also from Logan Pass, has a steep Grinnell Lake Overlook side trail (which may be scary to those afraid of heights), giving hikers a completely different viewpoint. One can look down onto the Glacier. This is the longest of the hikes discussed but it’s also one of my favorites.
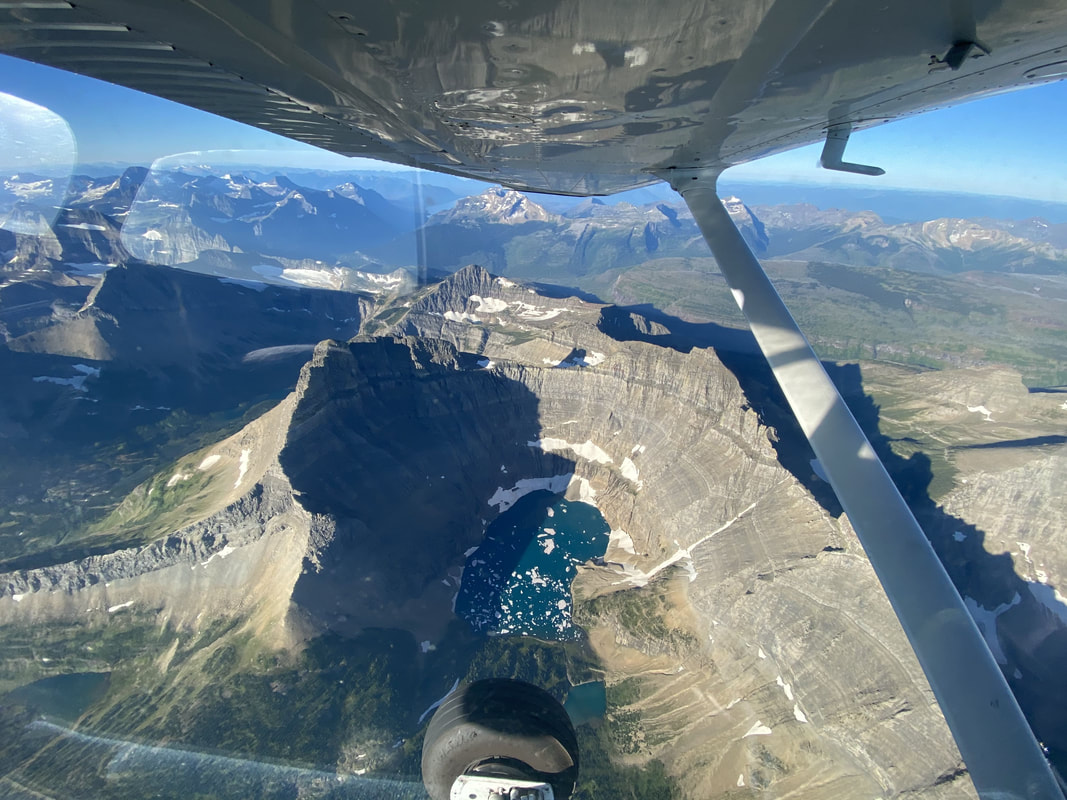
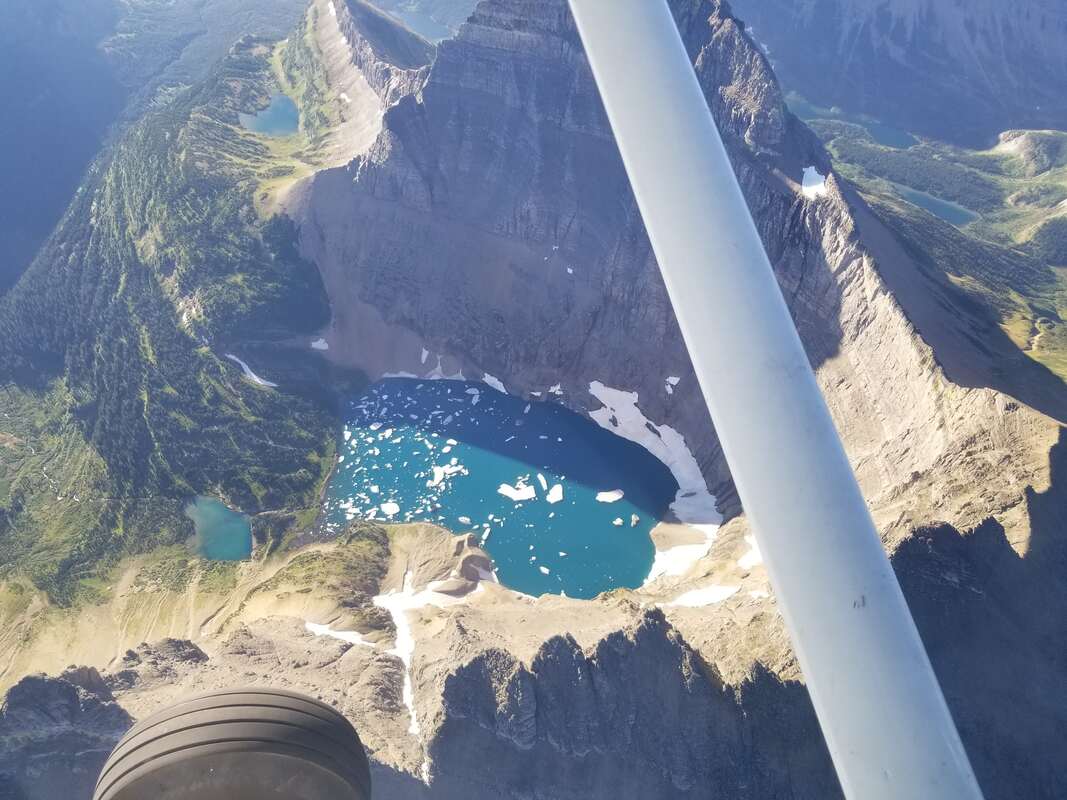
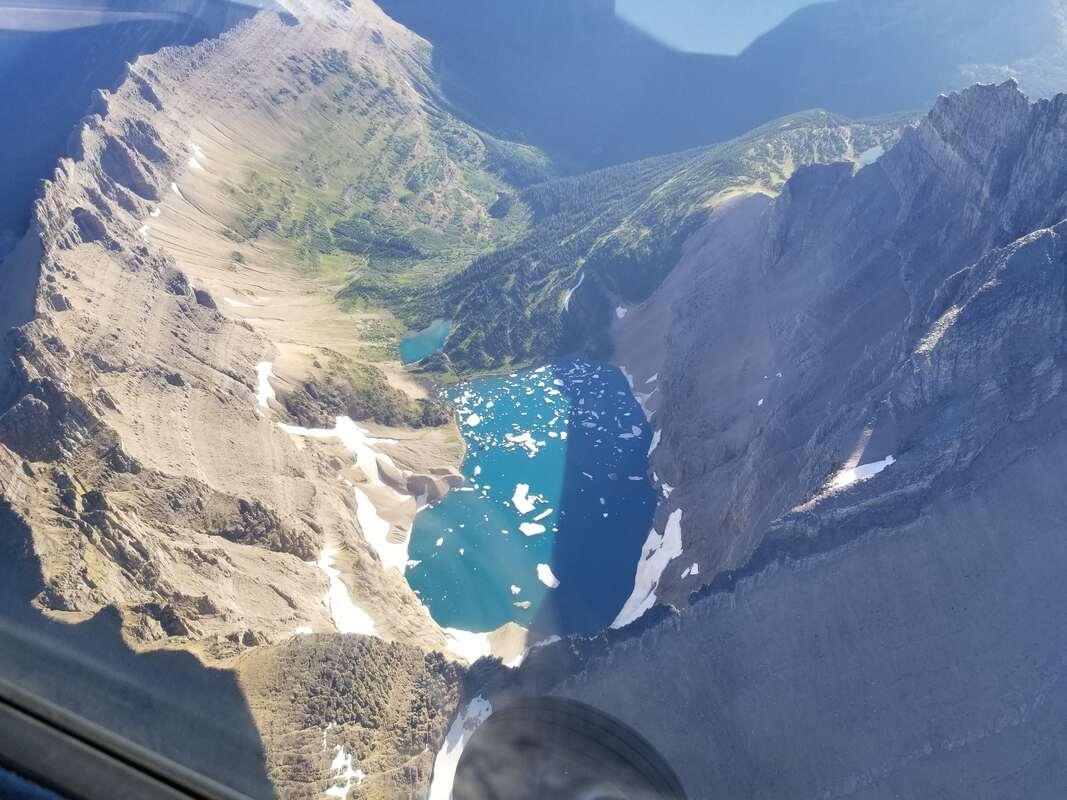
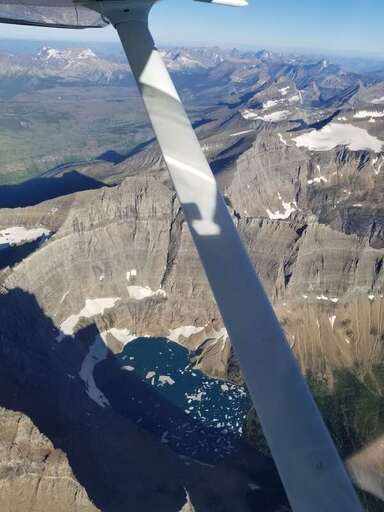
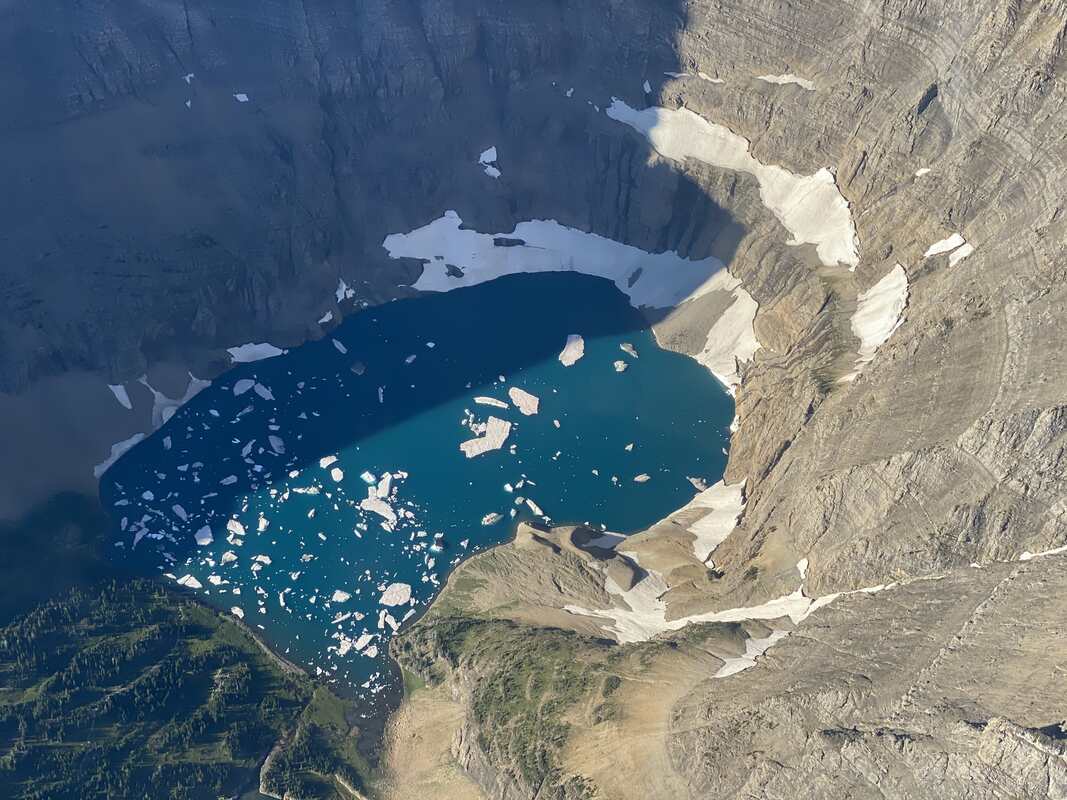
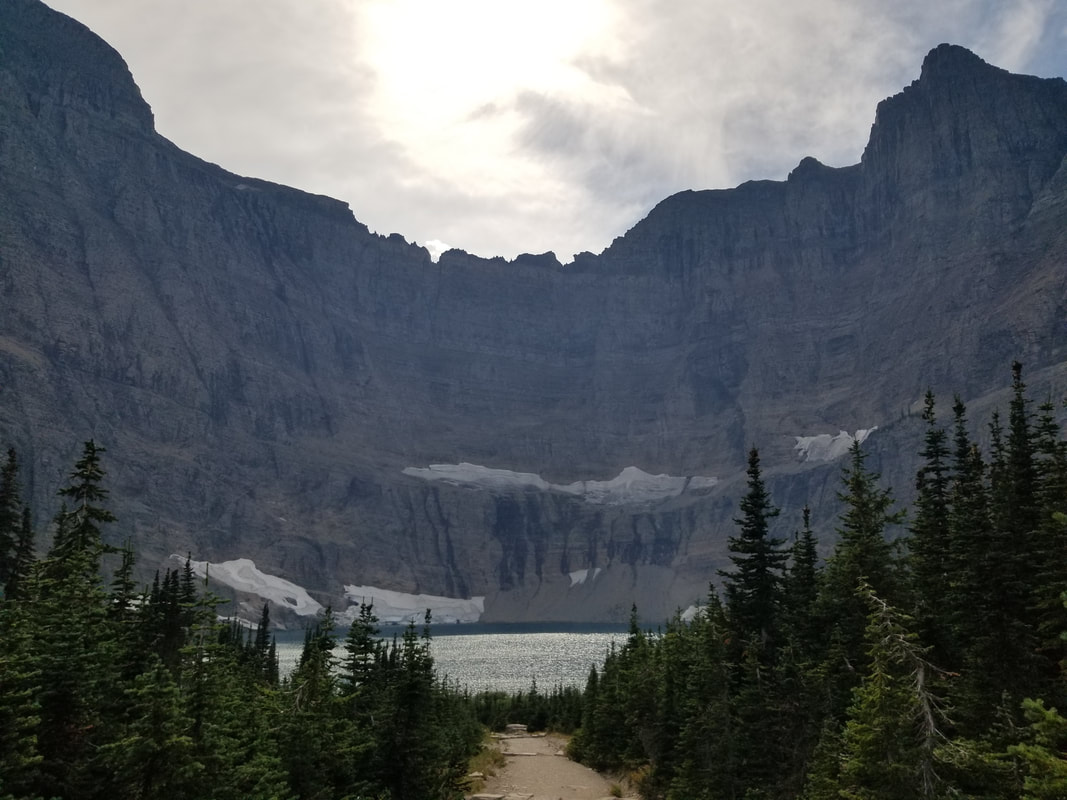
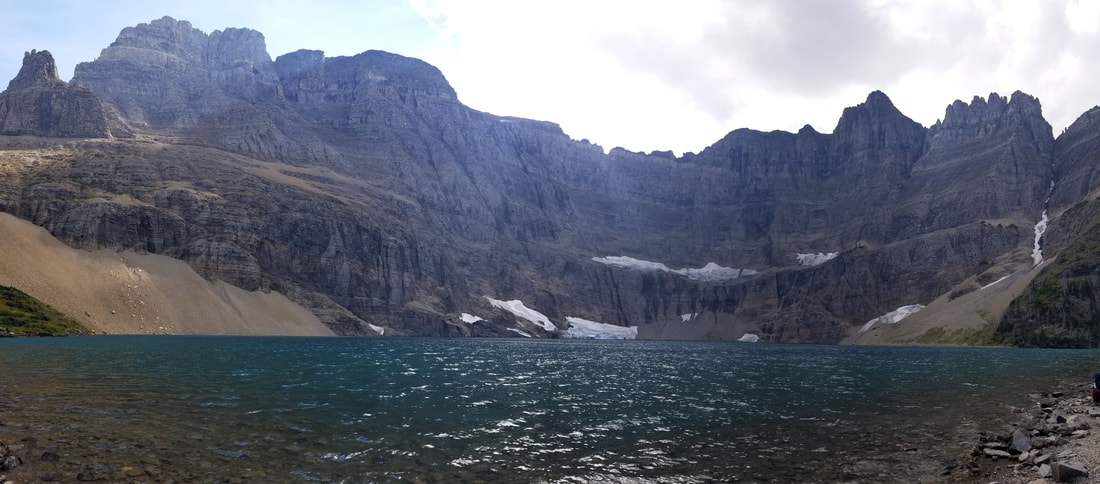
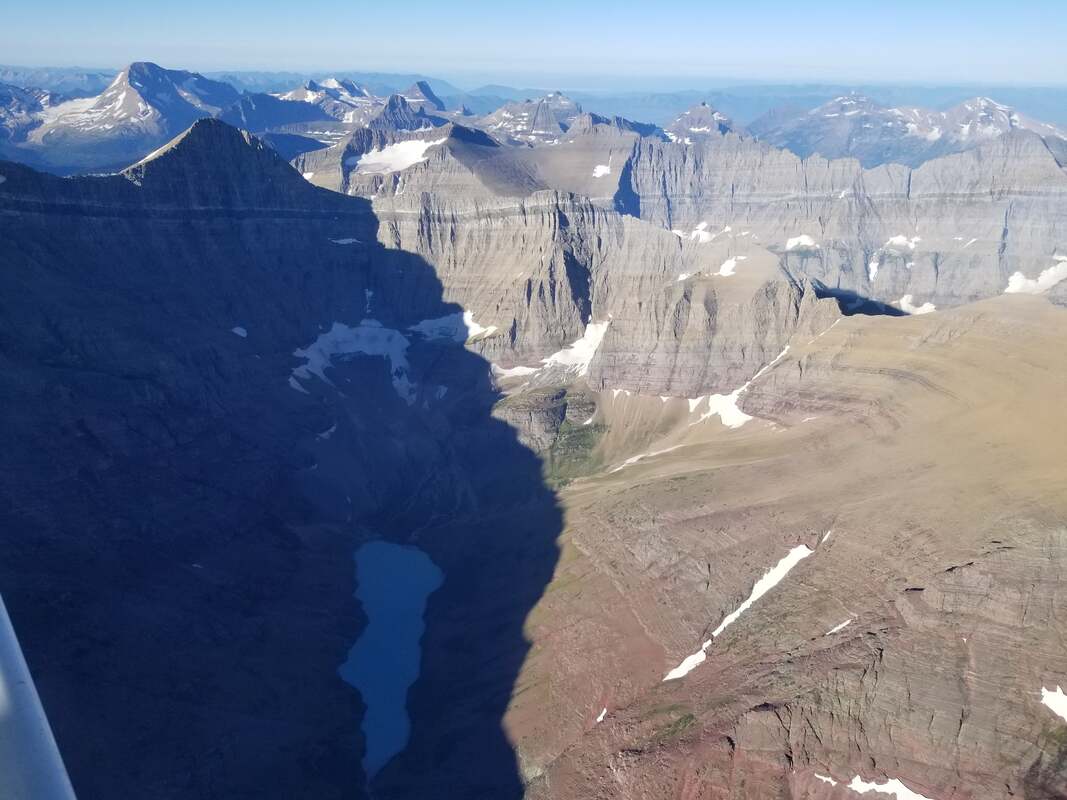
One of the reasons I enjoy flying over the mountains is to scout my next adventure. This was the case with Iceberg Lake. I loved the way the lake looked from the air, with its deep blue color and being surrounded by sheer glacier walls.
The sheer walls were honestly just as impressive, but in a different way, flying or hiking. Seeing their vertical nature from the air was impressive and seeing their rugged look up close from the trail was spectacular as well. My mom hiked it with me, making it even more special. It was a bit disappointing though that Iceberg Lake had no icebergs when we hiked it.
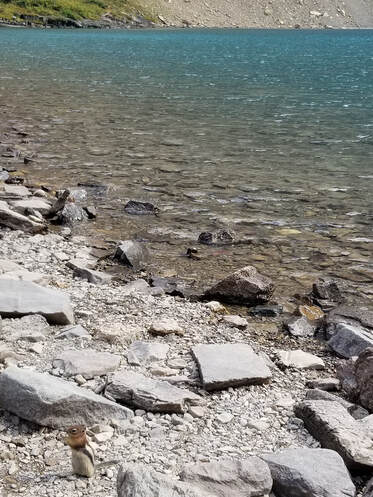
Oh and be careful with these little guys. They will eat your food and get in your backpack.
When I flew over Cracker Lake last year, it did not look as impressive to me as other lakes did, but it must have been because I flew too early in the day. The sun was not shining on its water yet and, as it turns out, Cracker Lake has the most beautiful water color of any lake I’ve visited or seen at GNP. It’s very different seeing it in the shade and the sun.
It was quite amazing to see the transition of water color on the lake as the sun rose up over the mountains. I had never seen anything quite like that before.
The details of things like the color of the rocks and the sediment in the water is something one cannot perceive from the air.
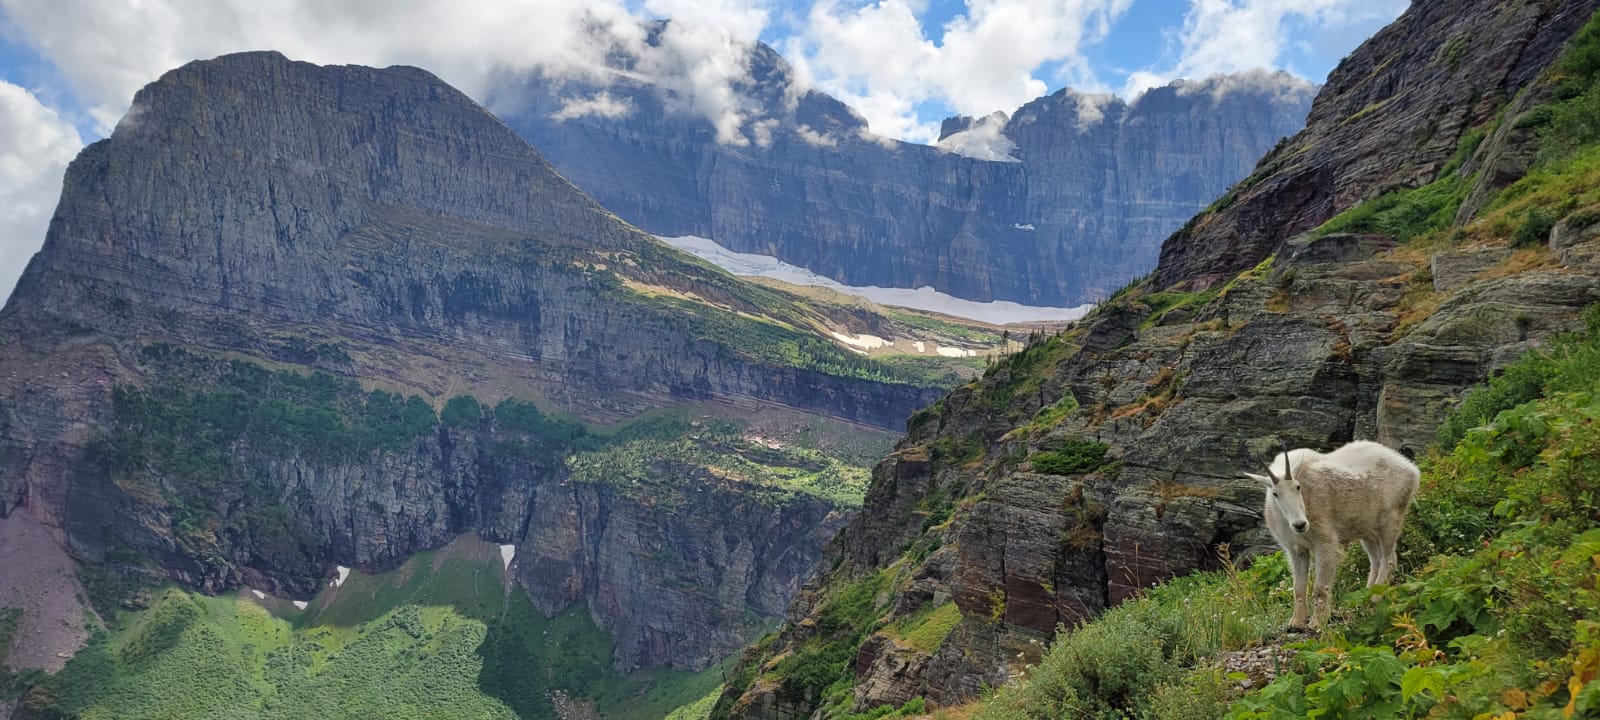
Glacier is also a great park to view moose, mountain goats (my favorite!), bighorn sheep, and bears of different types but it’s a bit hard to see them from an aircraft.
There’s no time to be bored in a world as beautiful as ours so get out and explore!
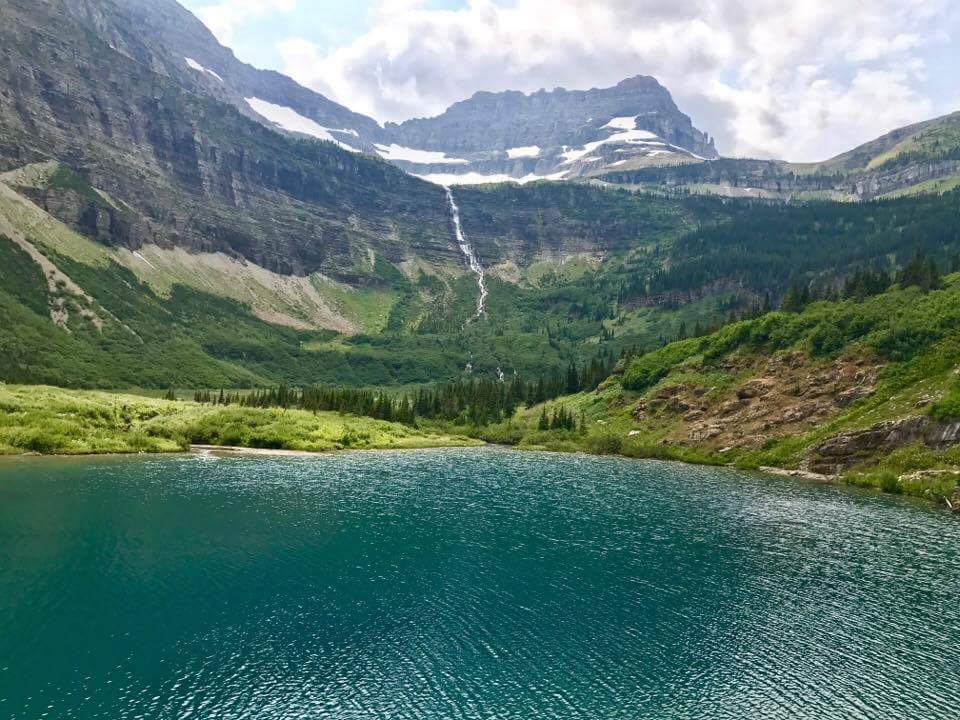
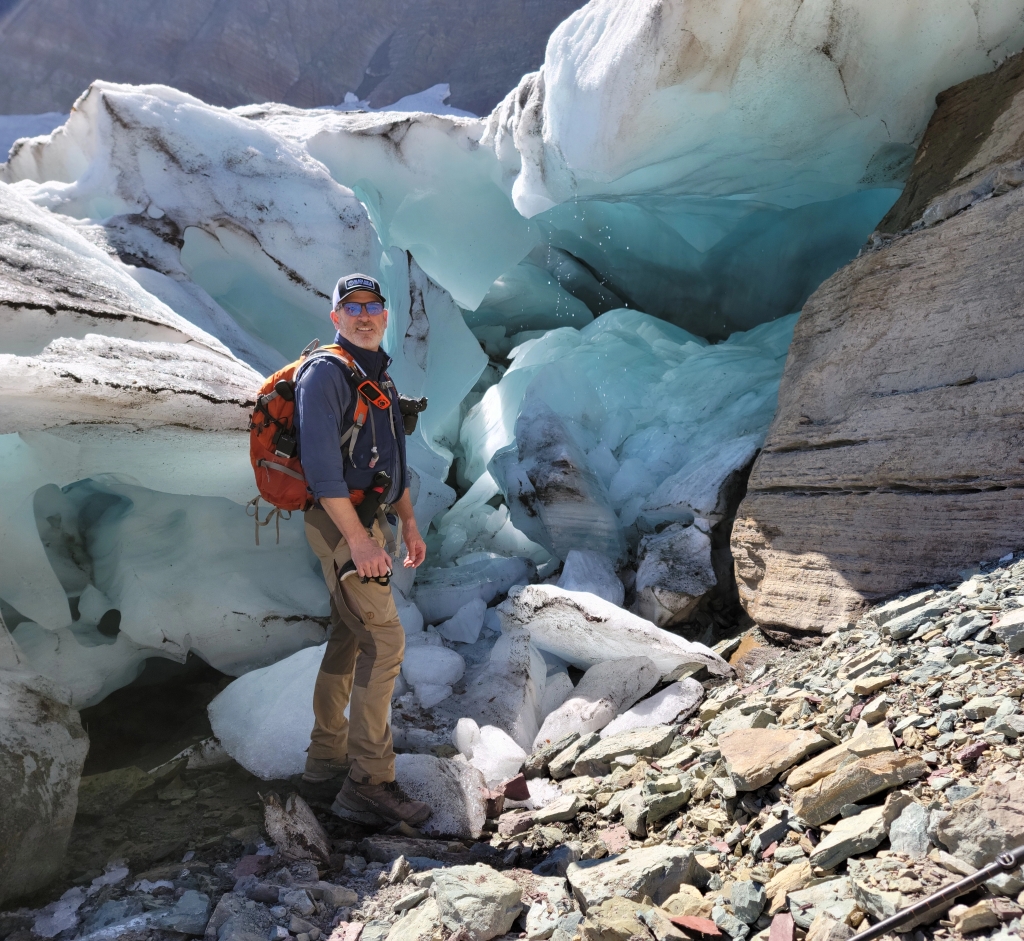
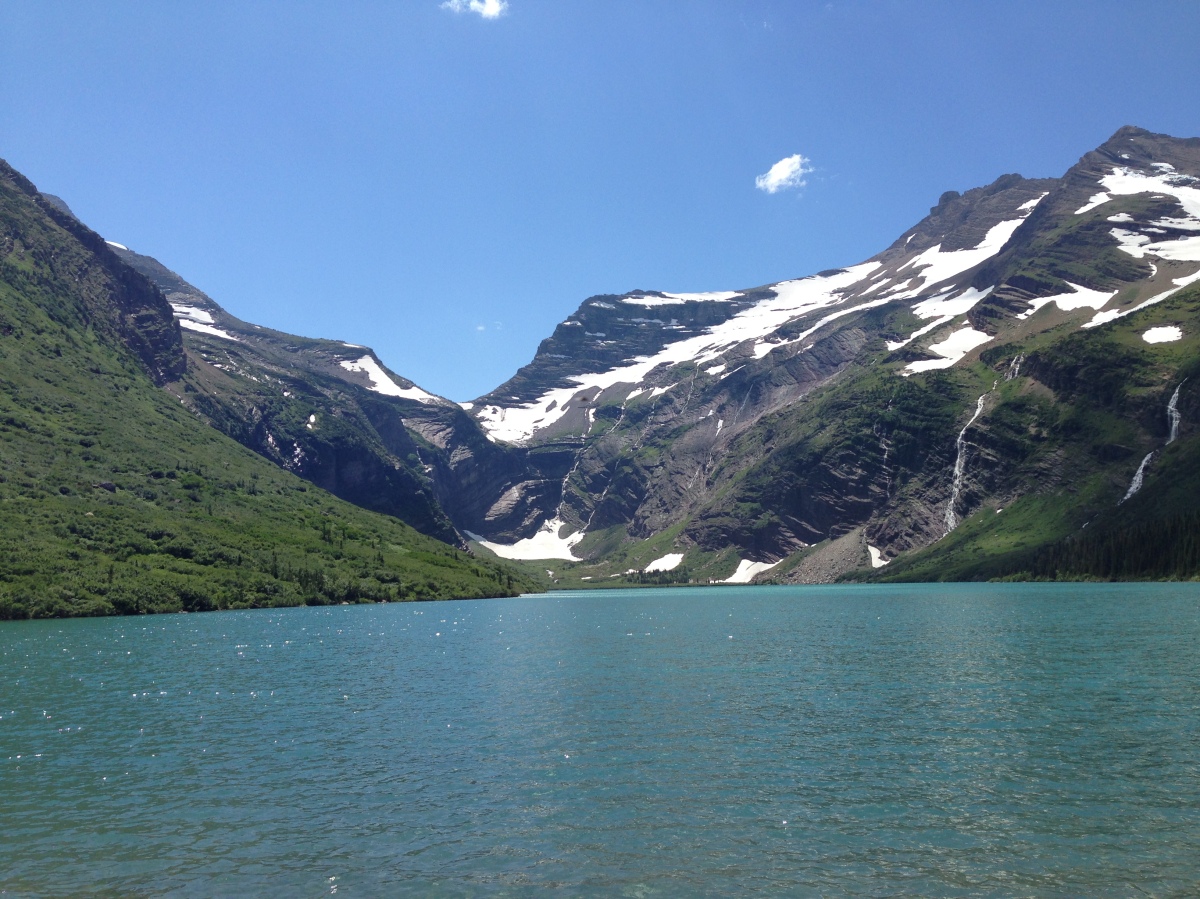
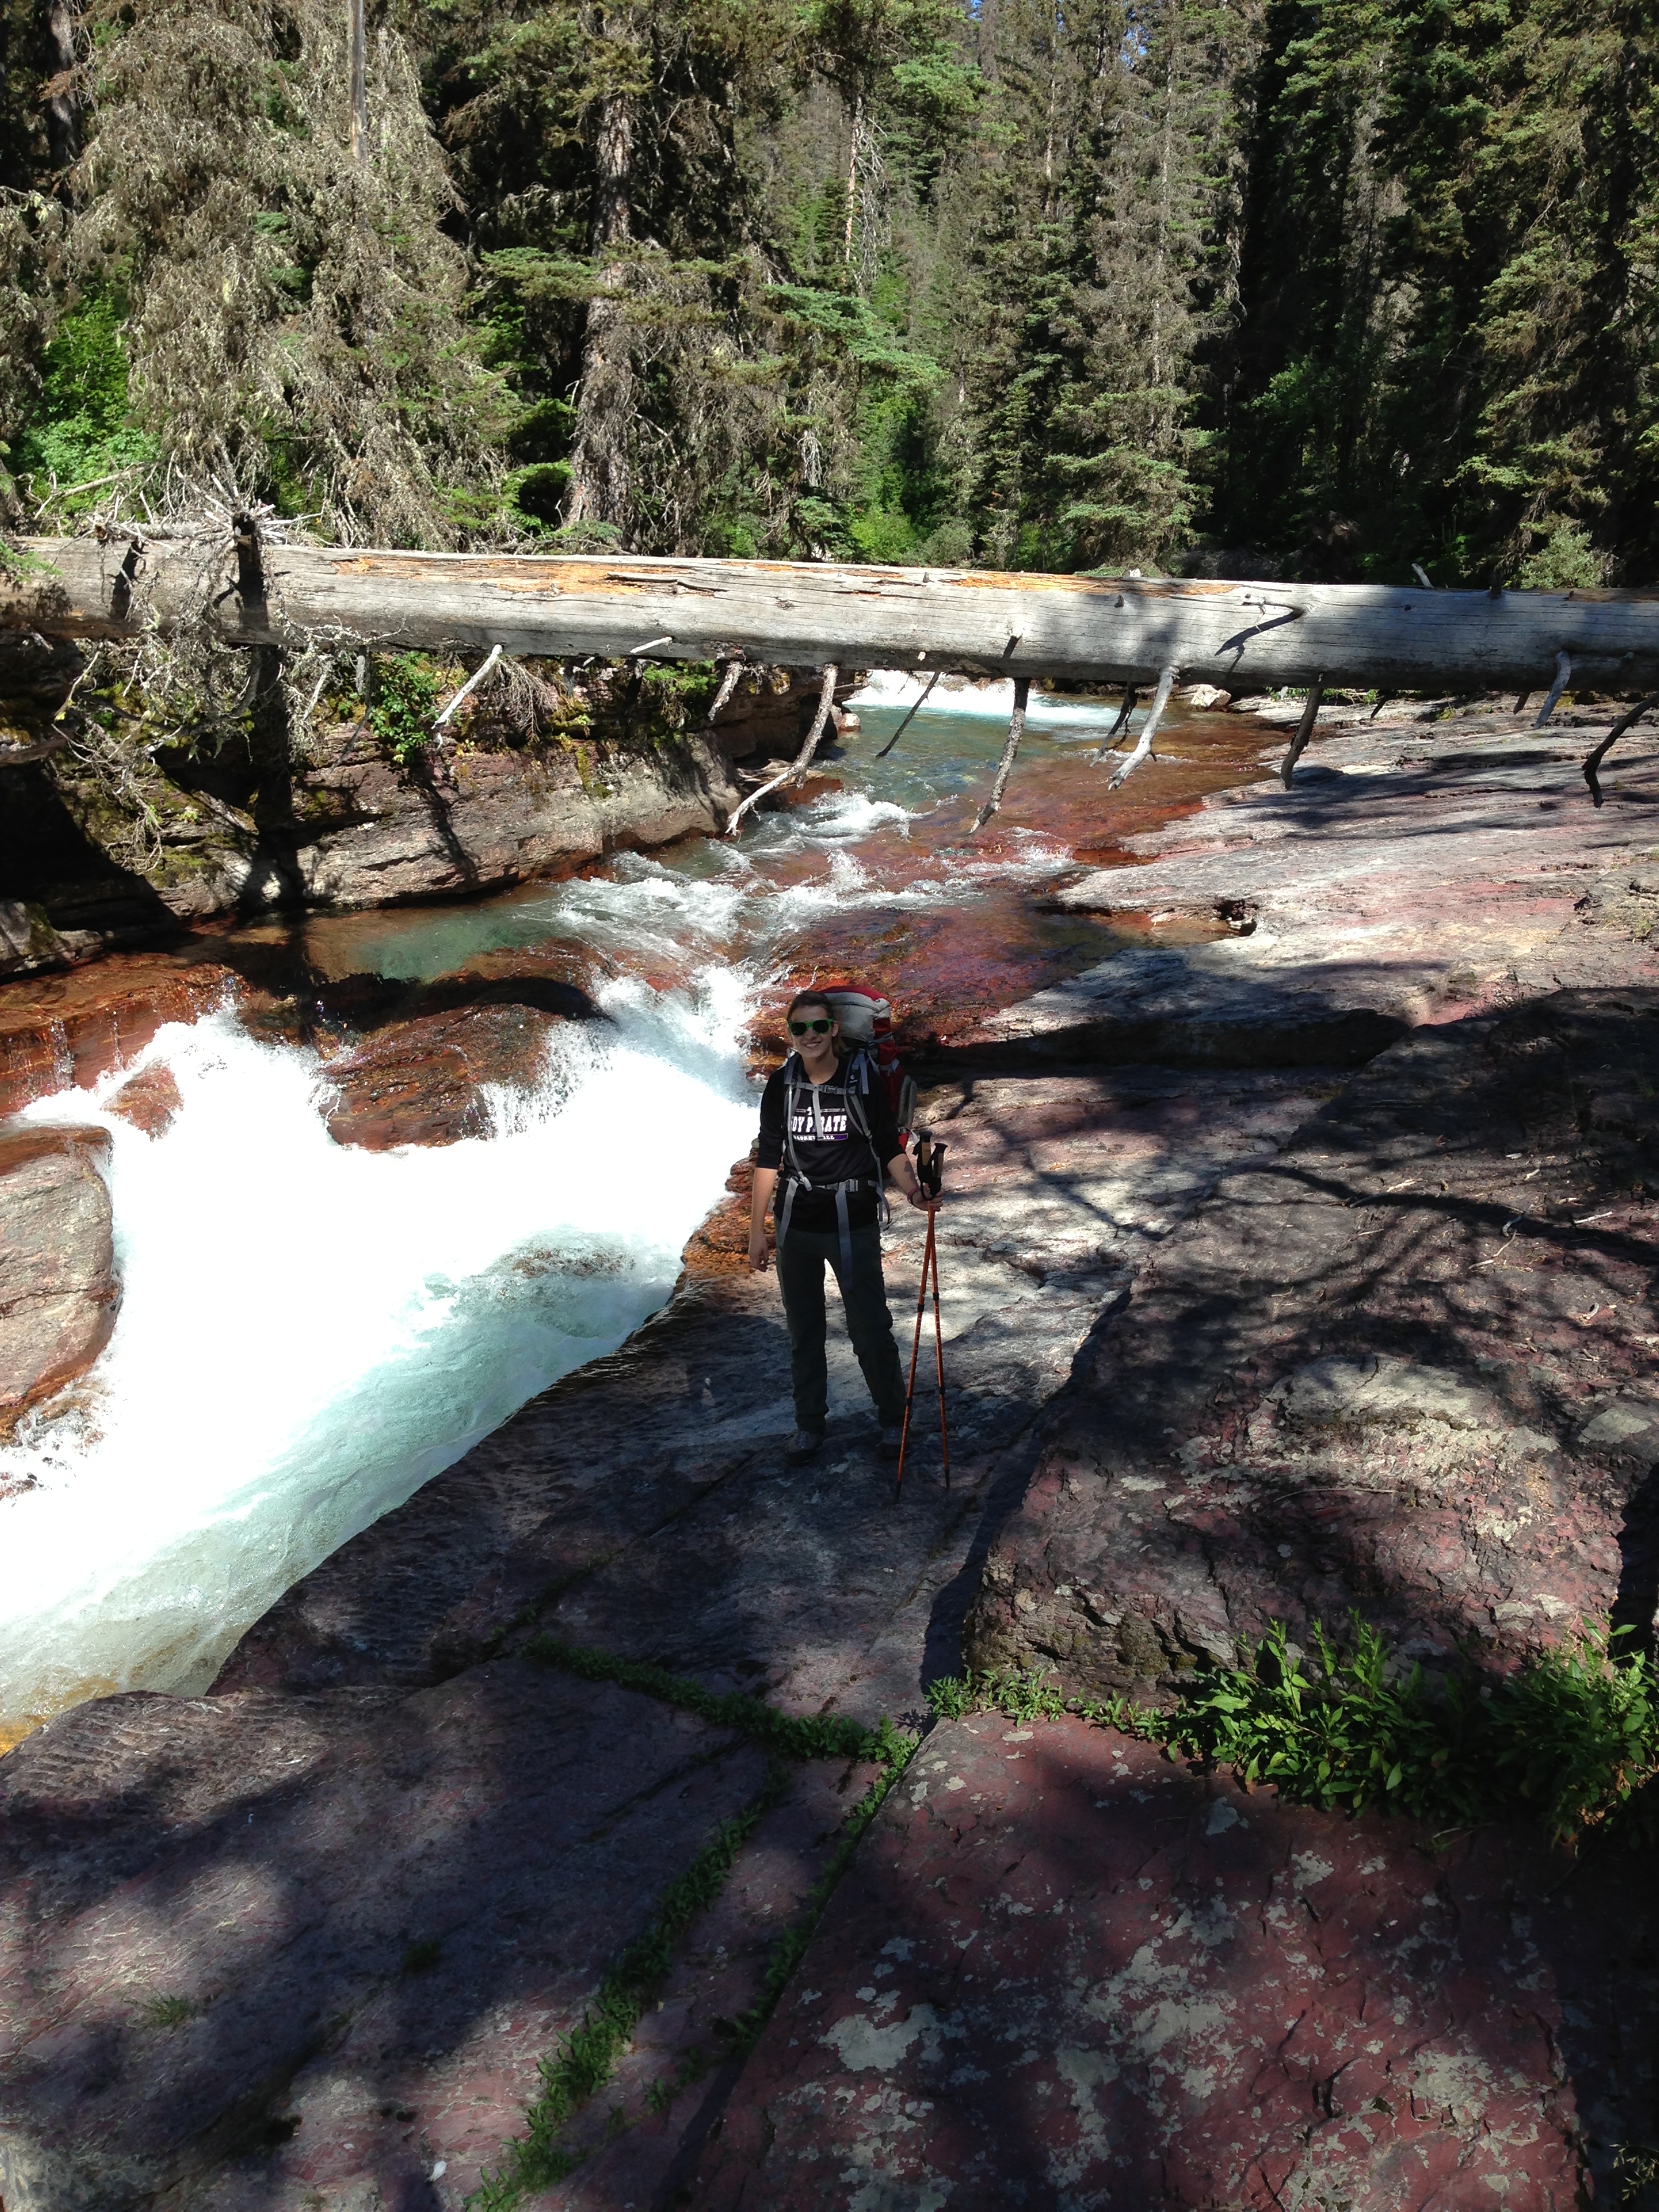
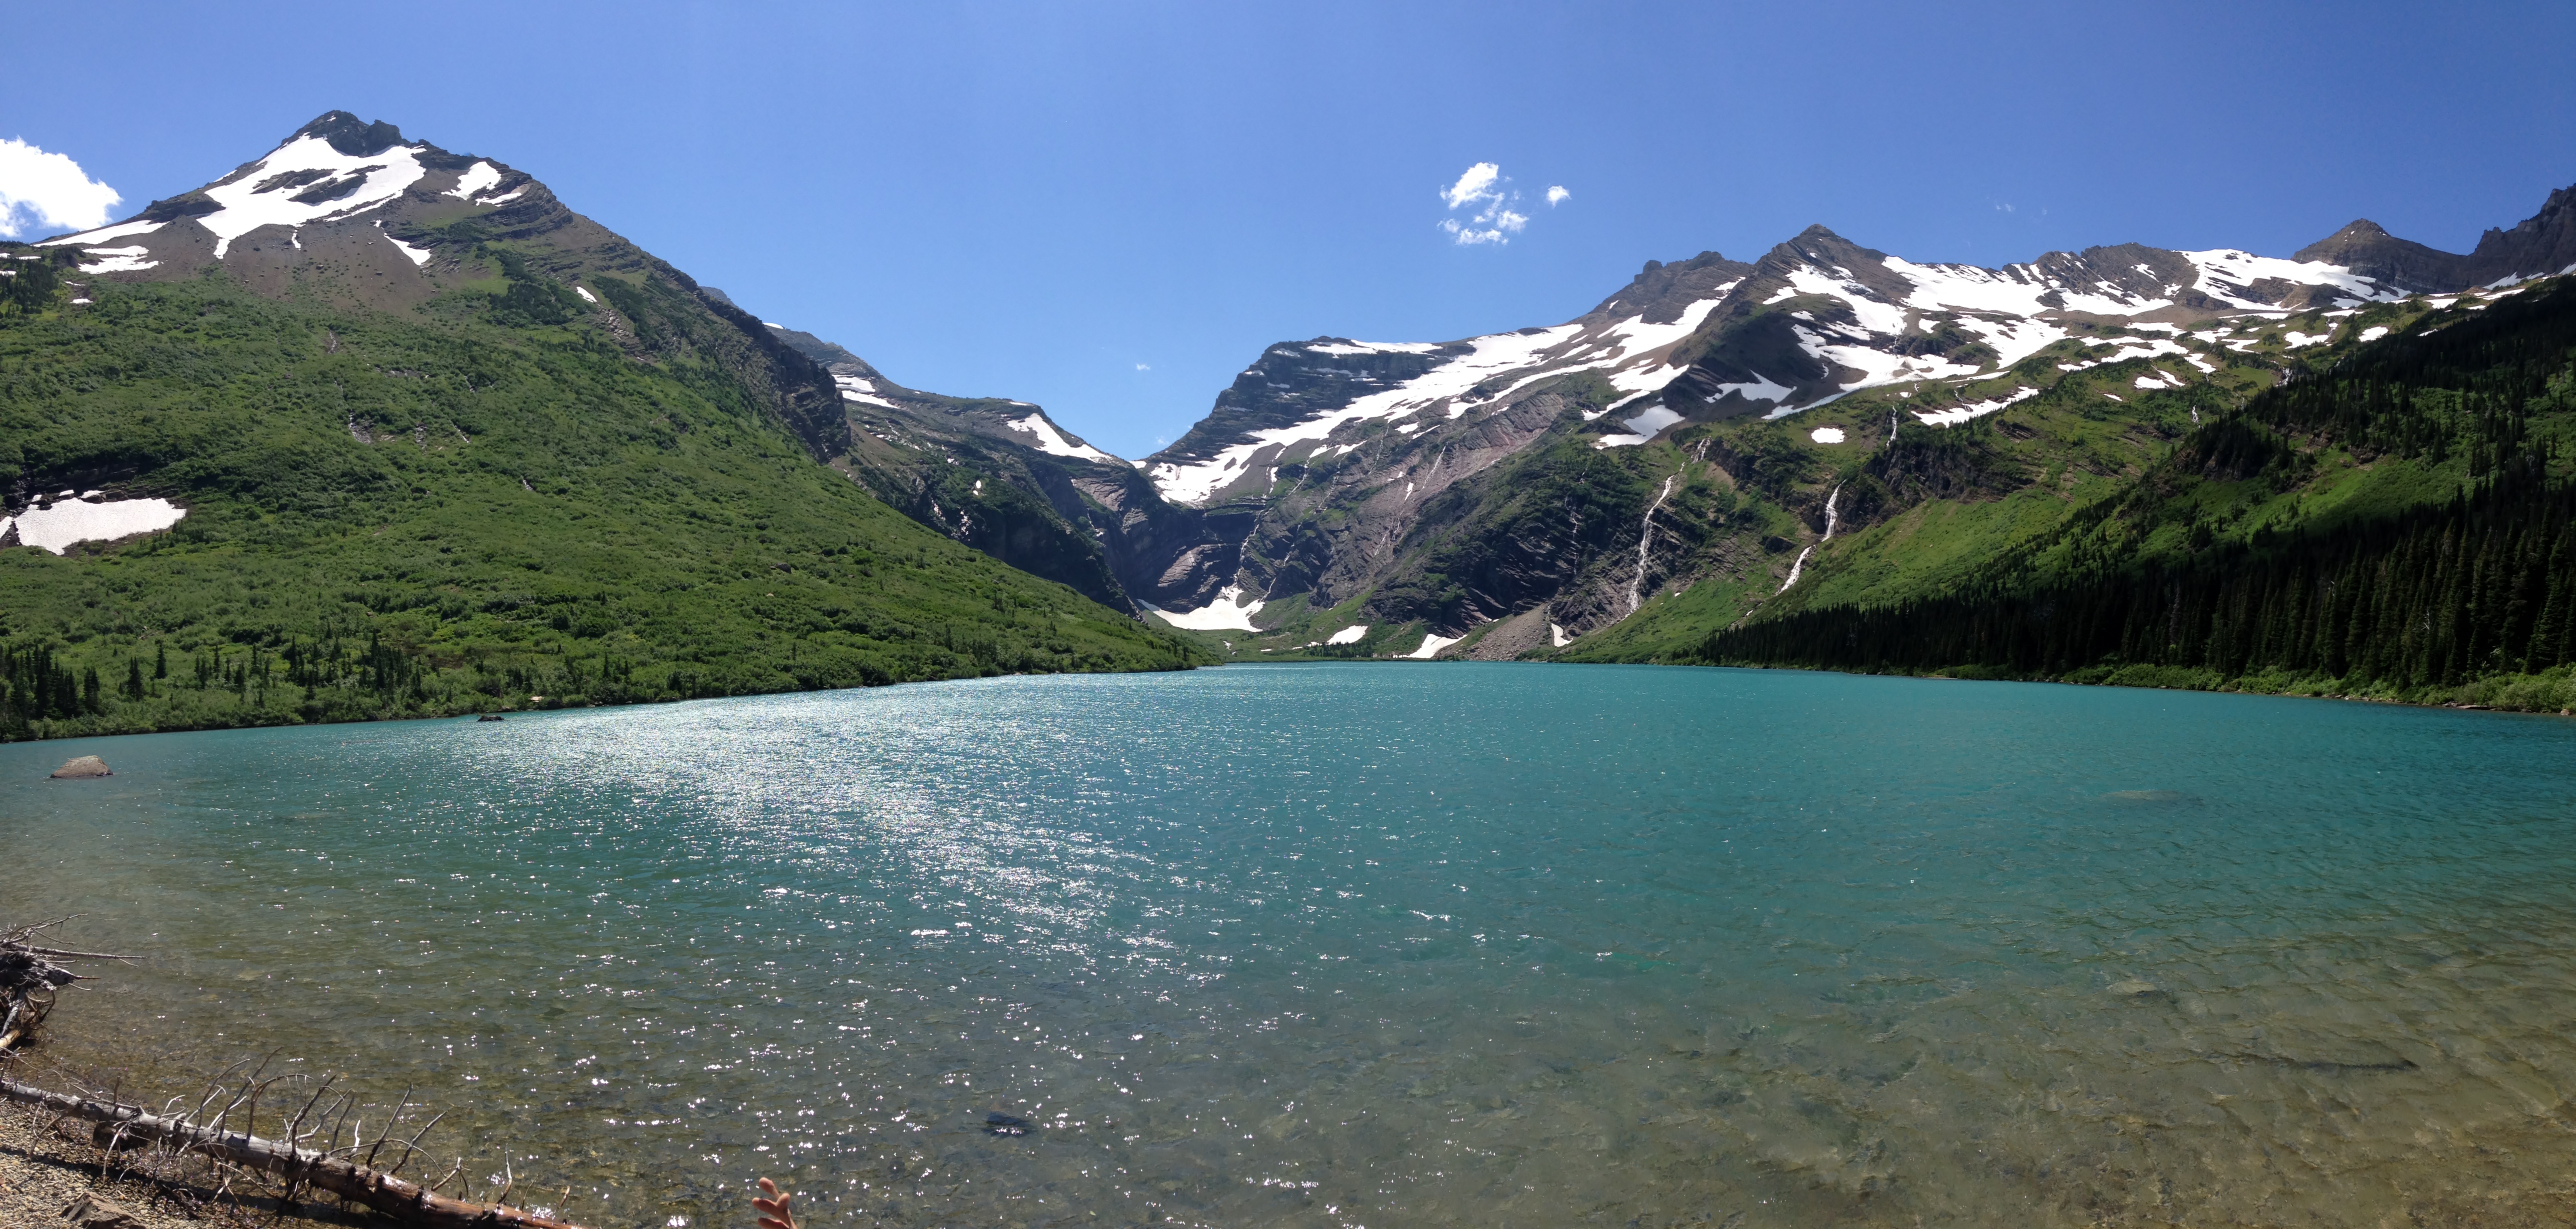
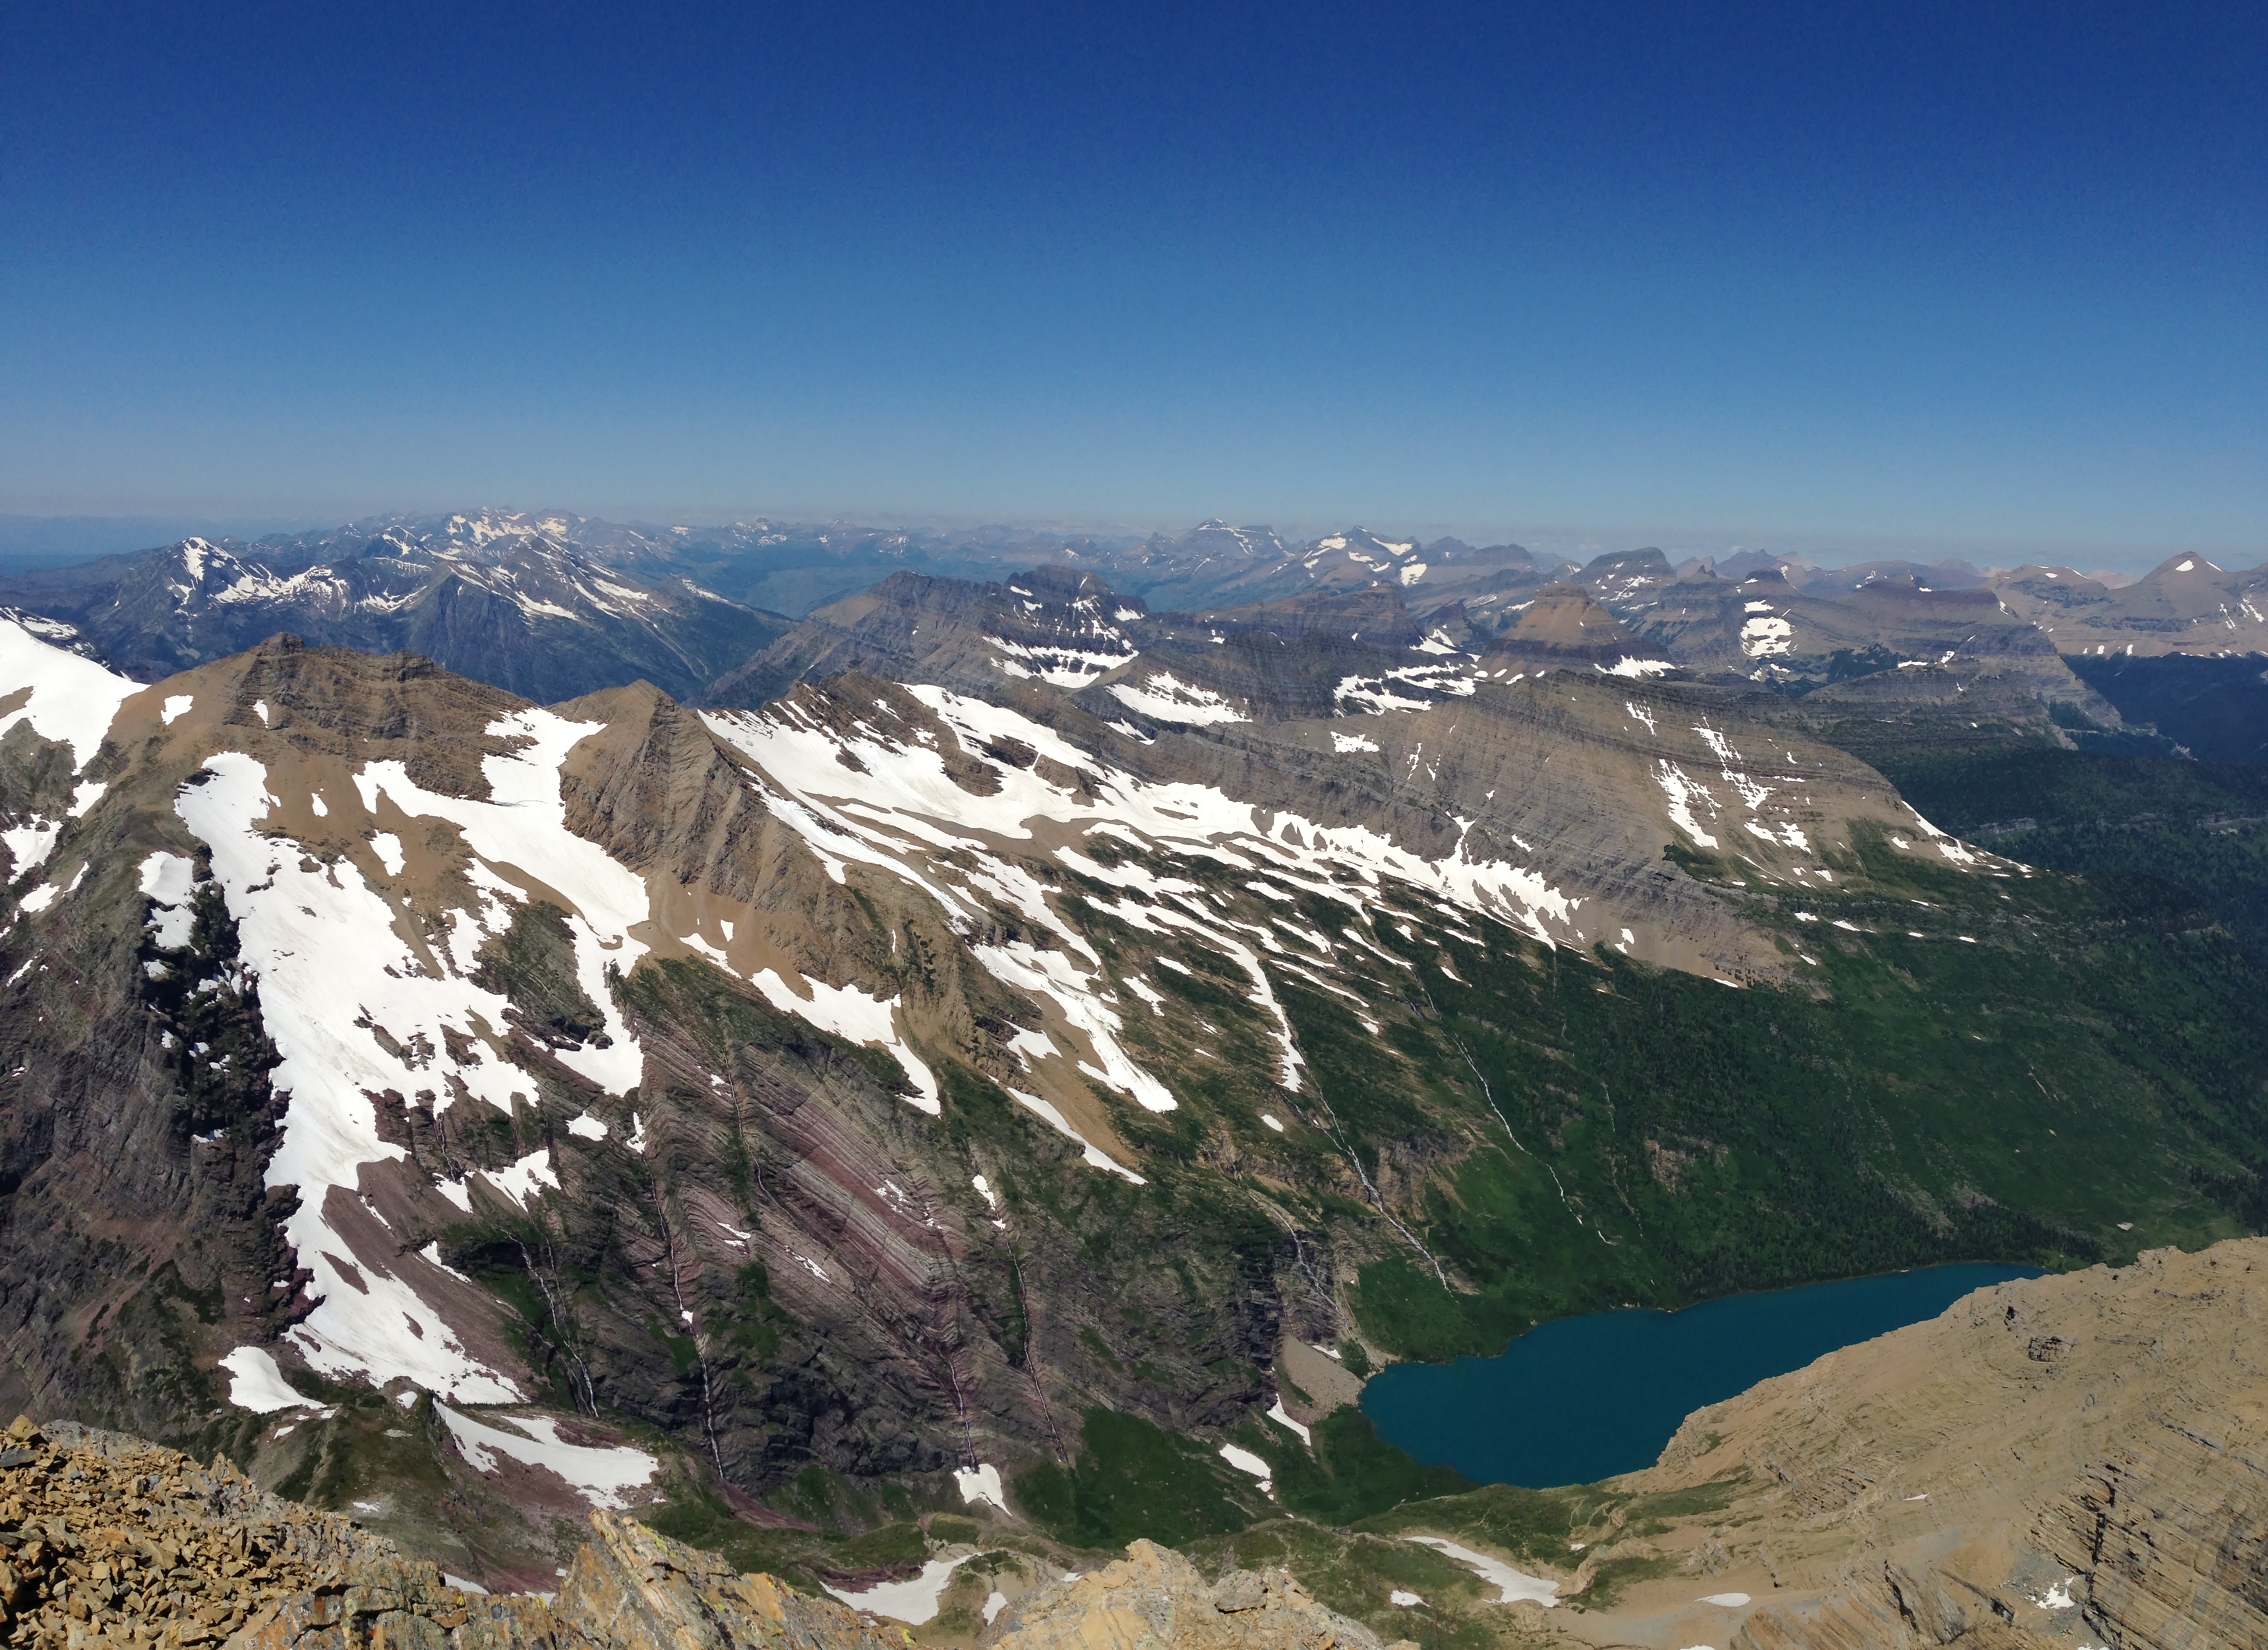
In July of 2013 my daughter and I set out on a camping and climbing trip to Gunsight Lake. We would meet my friend Dustin at camp on Gunsight Lake where we would base our climb of Mt. Jackson. The weather forecast was ideal and we were excited to get on top of some glaciers.
Gunsight Lake is a wonderful back country campground. It is set up like the other back country sites but the proximity to the lake and the views from the campground make this one of my favorite destinations. The hike in to the lake is only 6.5 miles and the elevation gain is a gradual 1500 ft. And there is plenty to see on the way in.
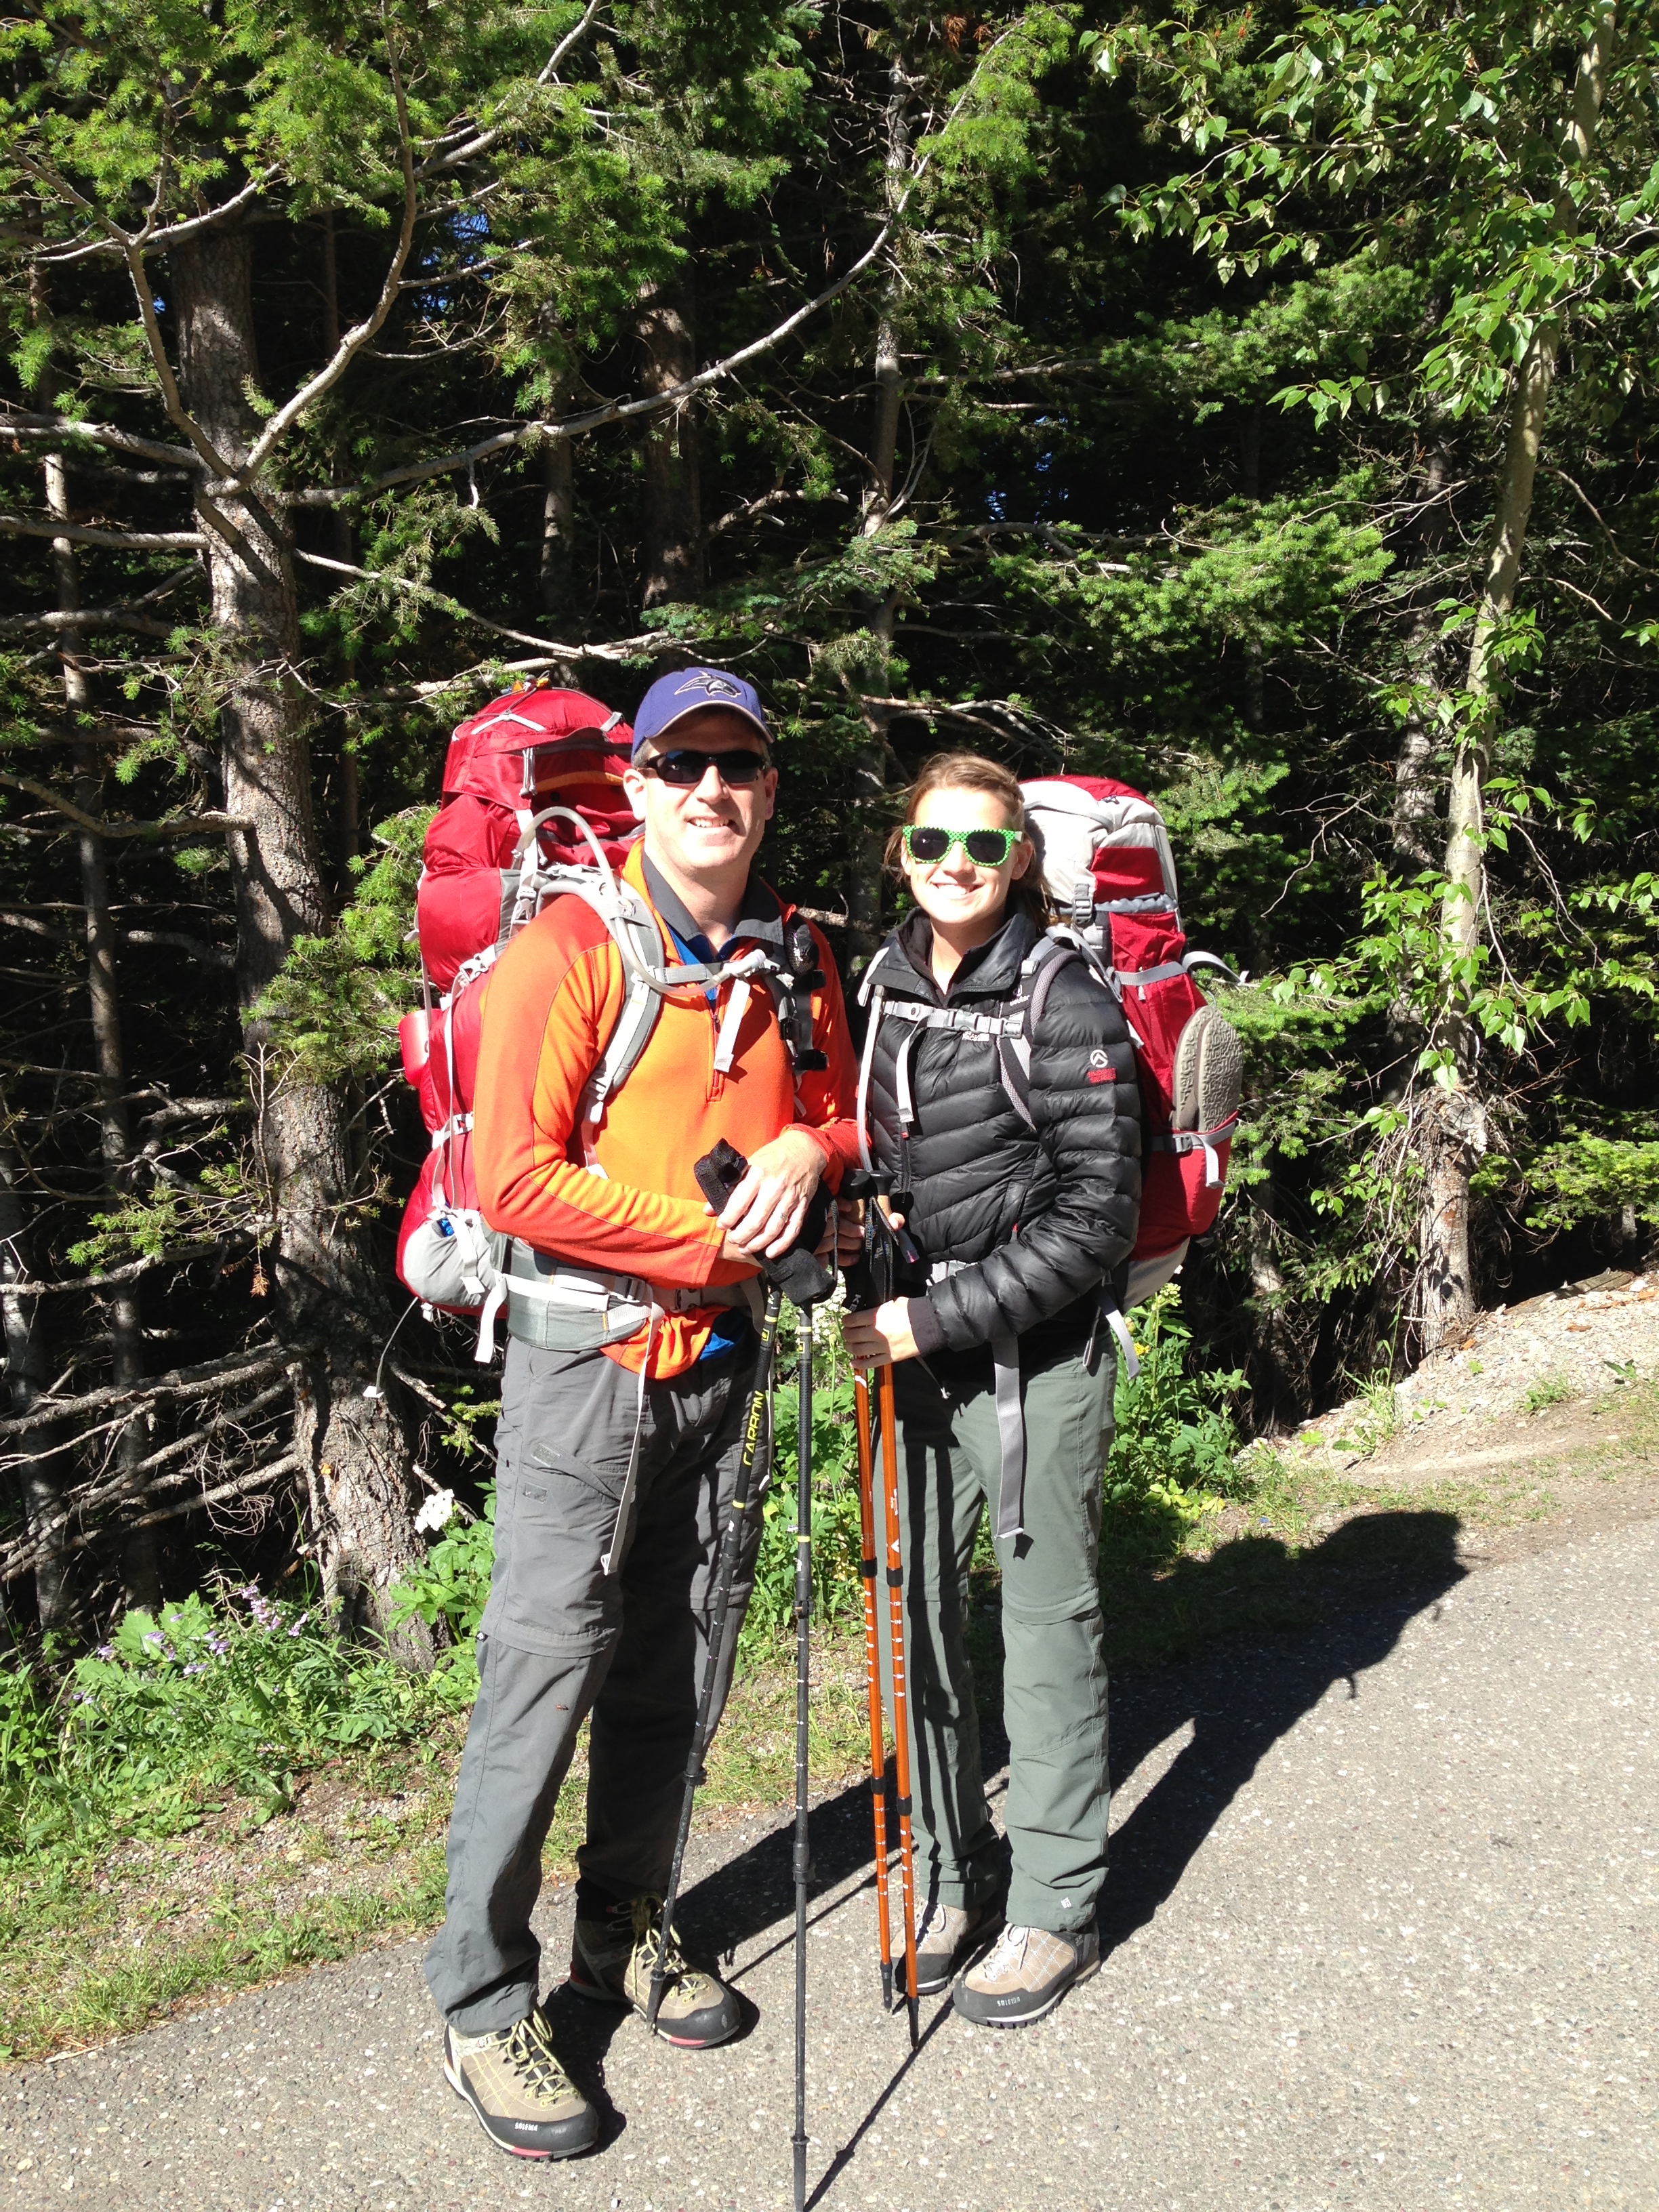
Ready to hit the trail for an adventure
After a couple miles of slow descent from the trail head we found Deadwood Falls. Here the creek creates some impressive erosive features on the colorful rocks as it hammers it’s way through the surrounding walls. This is a popular spot for hikers to stop and take photos. Remember that drowning is the leading cause of death in GNP so always be careful around slippery rocks and moving water.
Deadwood Falls area
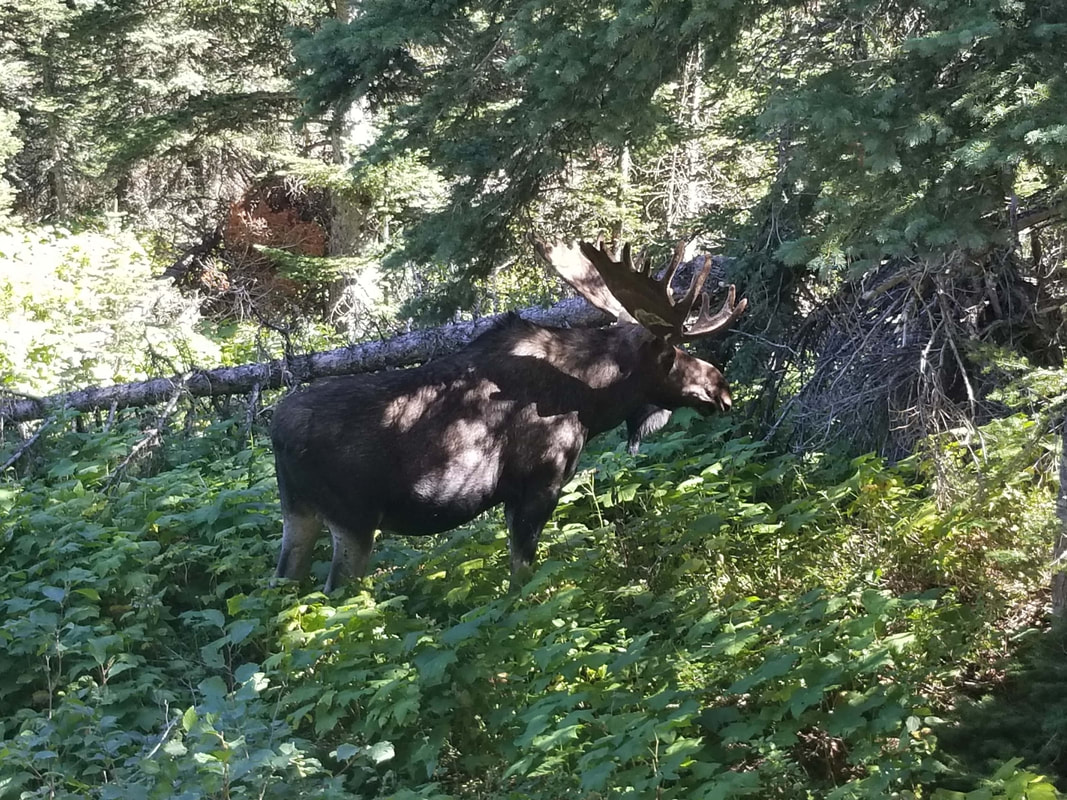
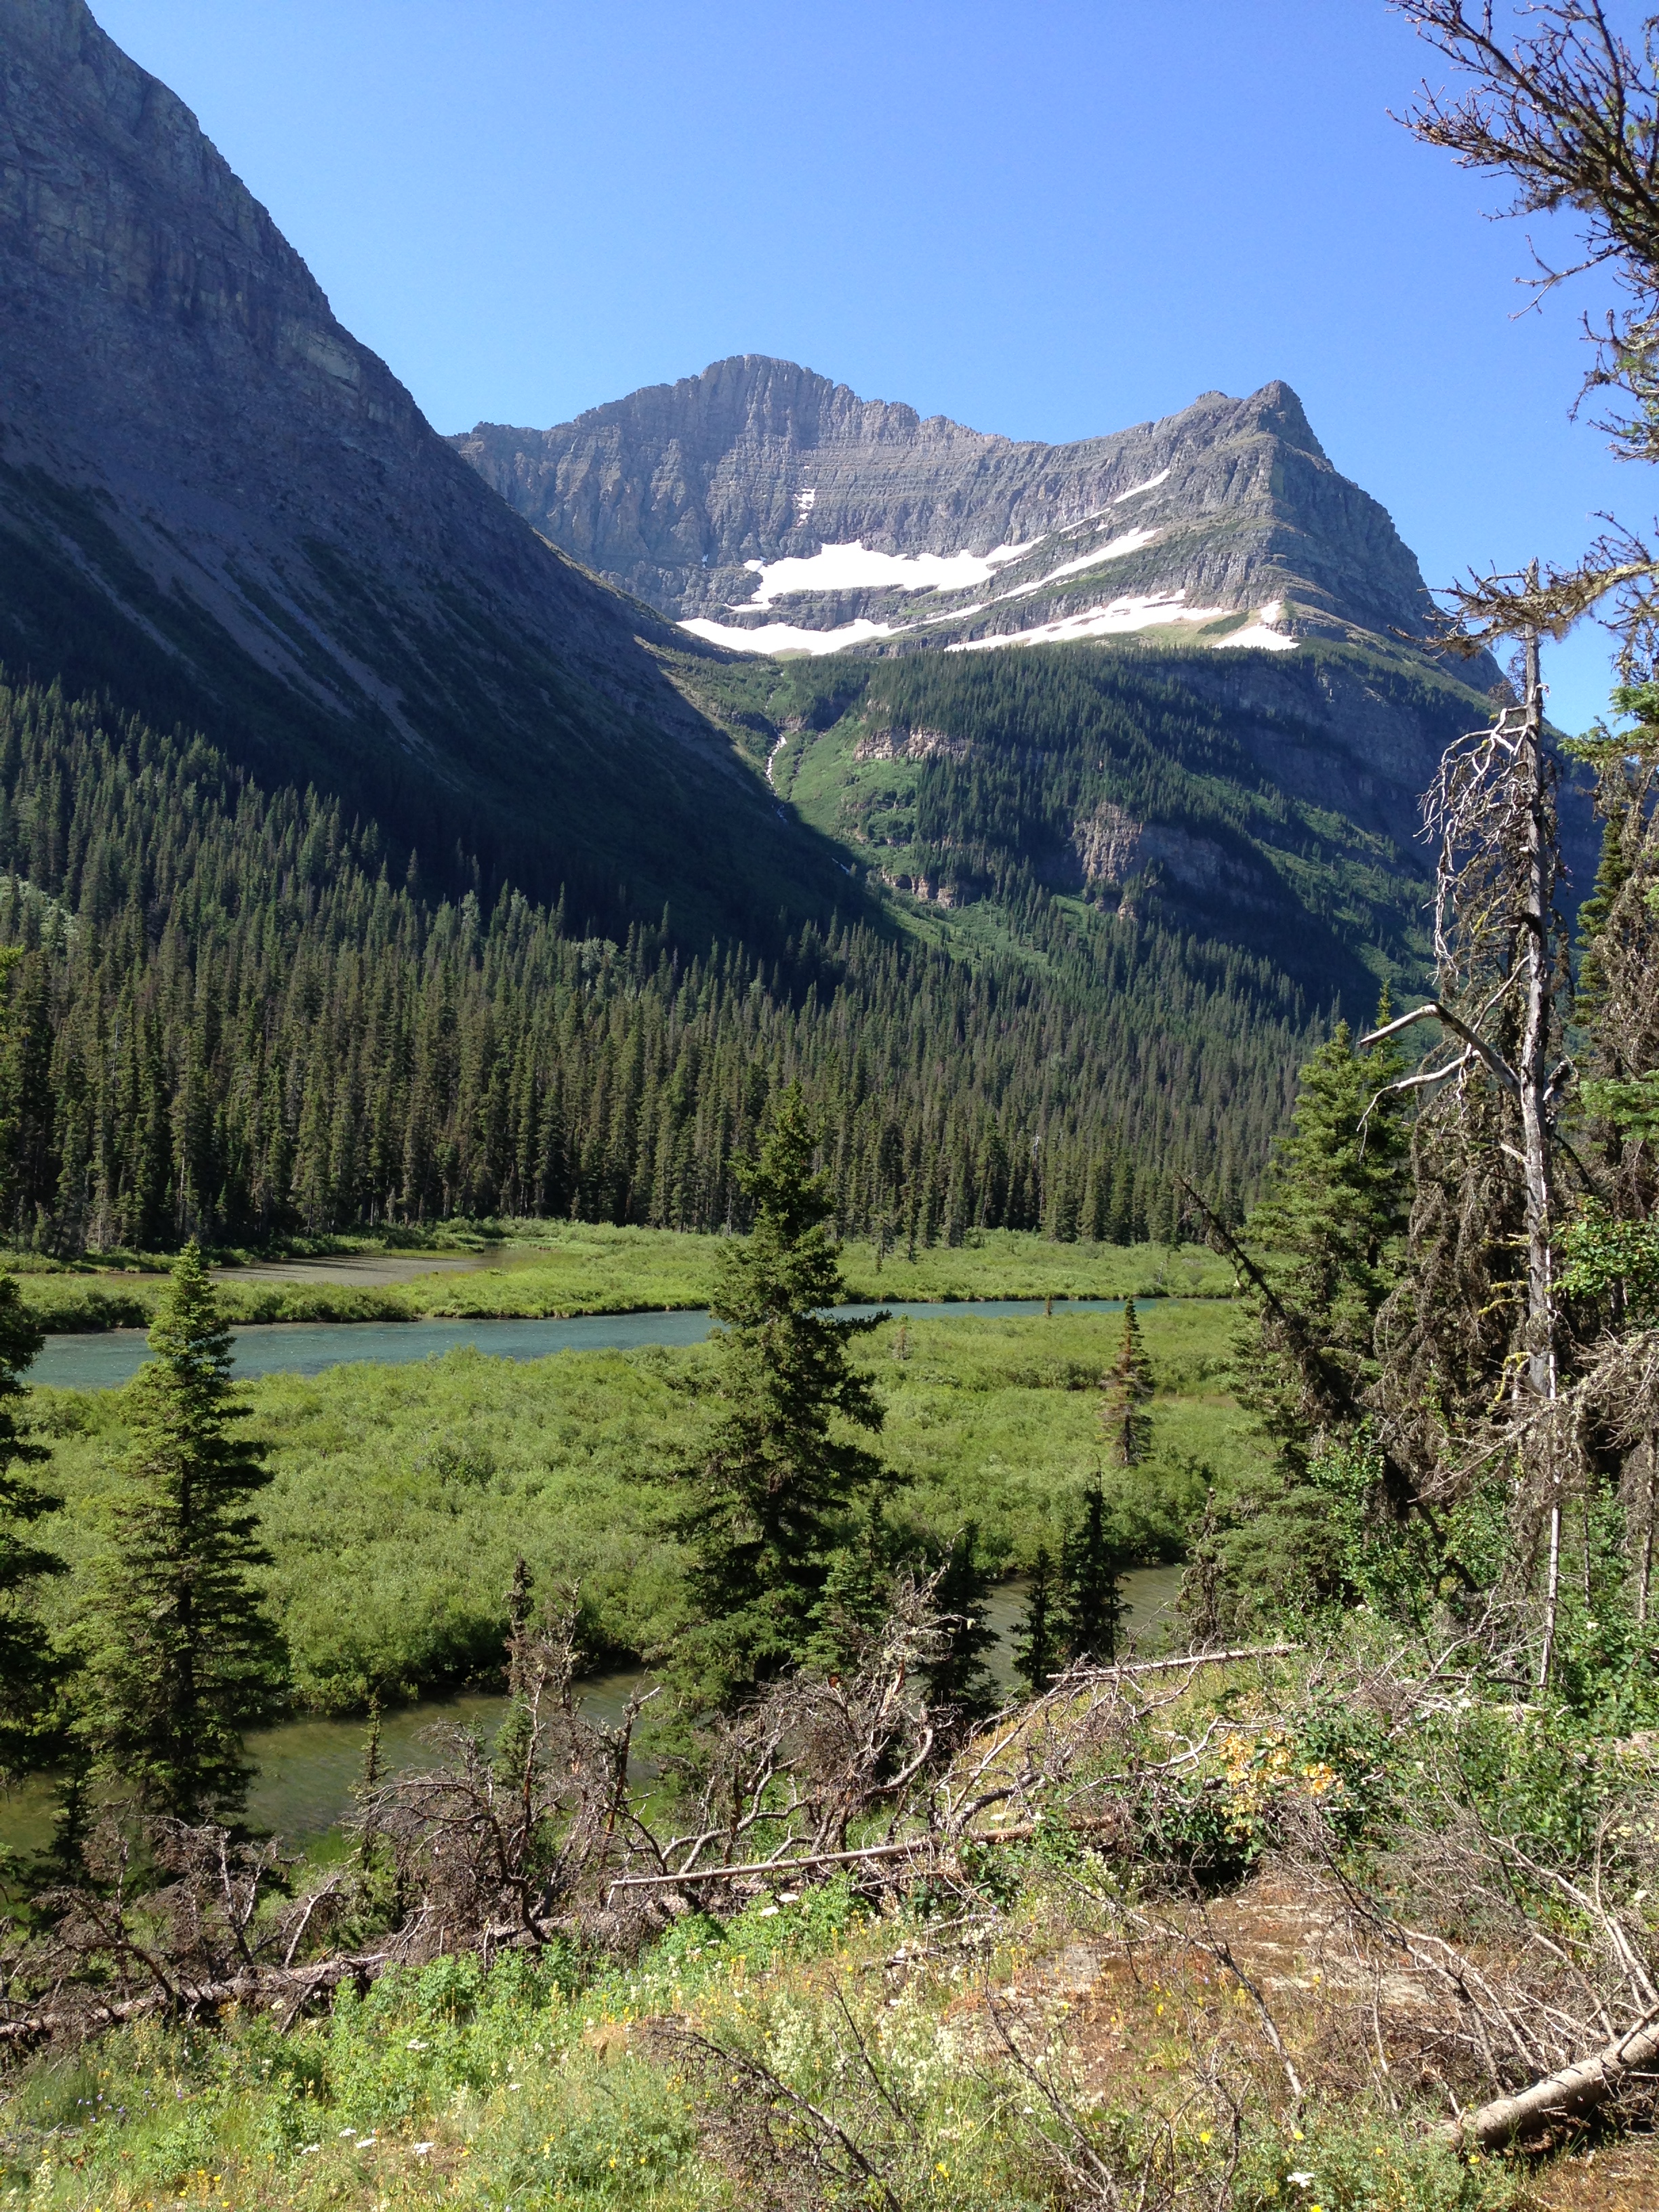
The initial descent ended when we reached the St. Mary River. Here we found wetlands and meadows ideal for wildlife viewing. This river basin is prime country for moose and bear and hikers usually have sightings of them more often than not. A few prominent peaks loomed around us including Citadel, Dusty Star, and Going-to-the-Sun.
This is Moose country! (Citadel Mountain)
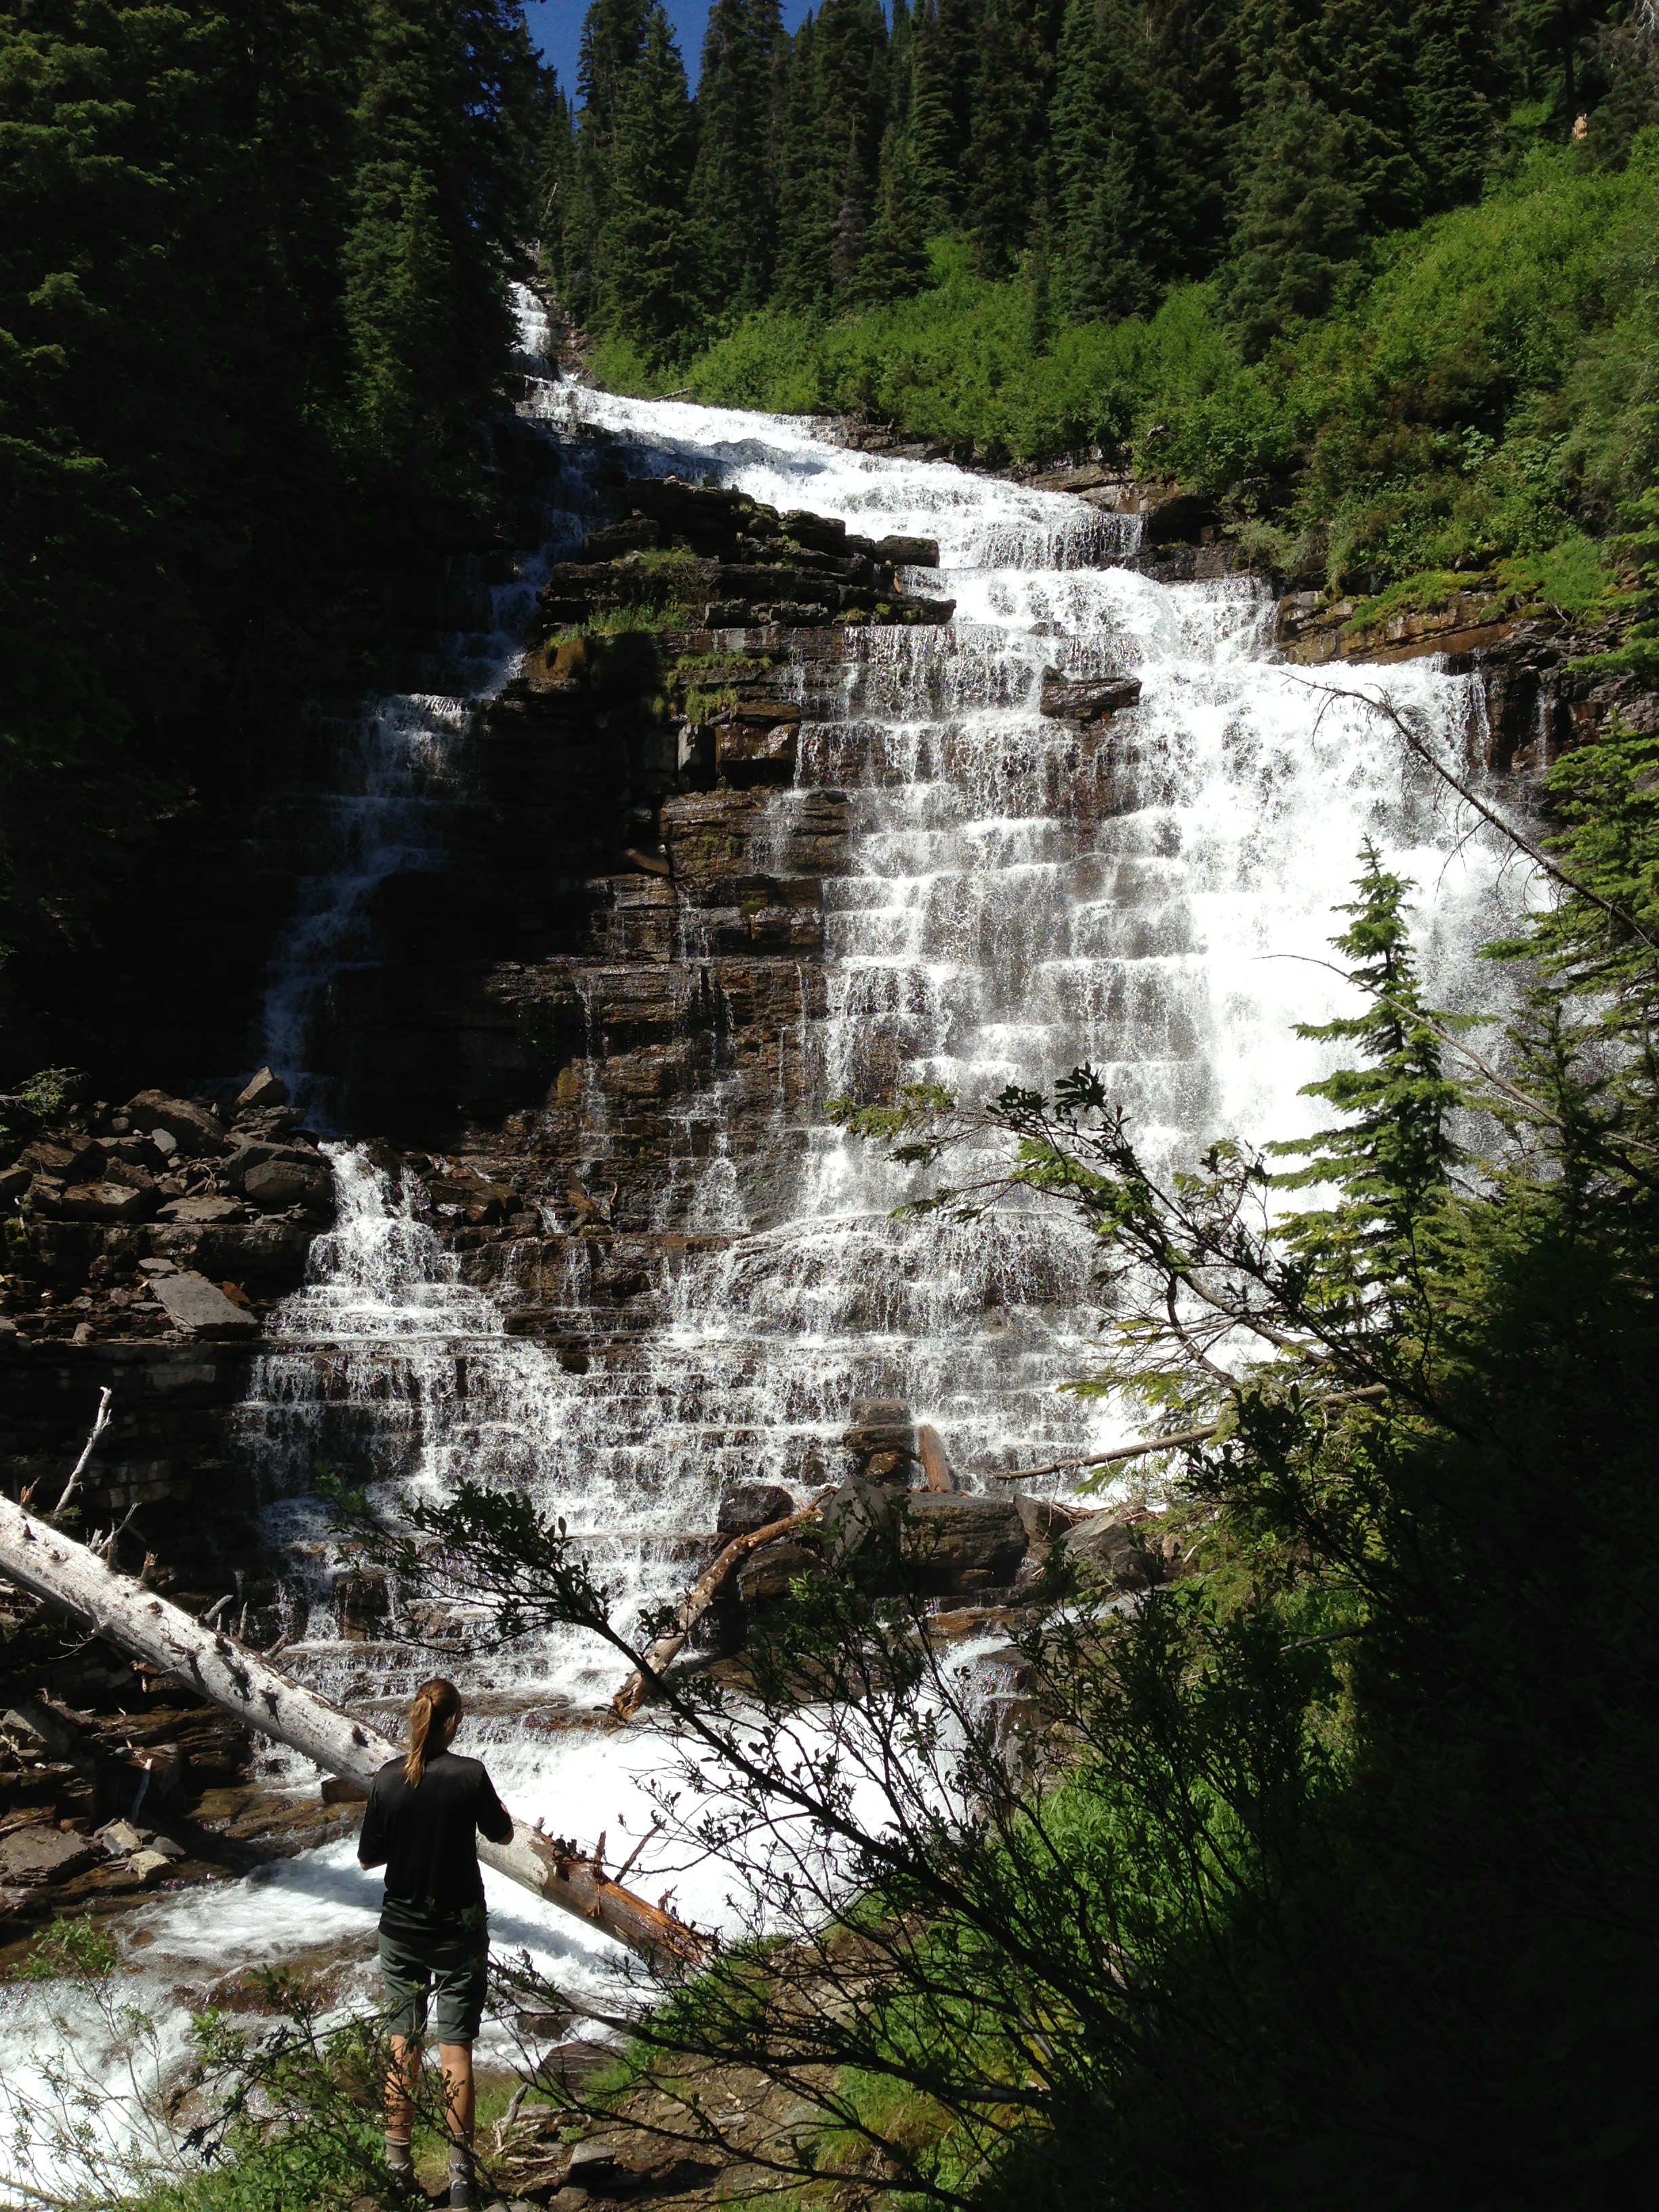
About four miles in we found the trail branching off to Florence Falls. We decided that would be a good place to stop and eat lunch. From the main trail it was only about one mile to the falls and absolutely worth the extra effort. And no matter what you’ve packed for lunch it’s going to taste a million times better sitting next to those falls!
Florence Falls
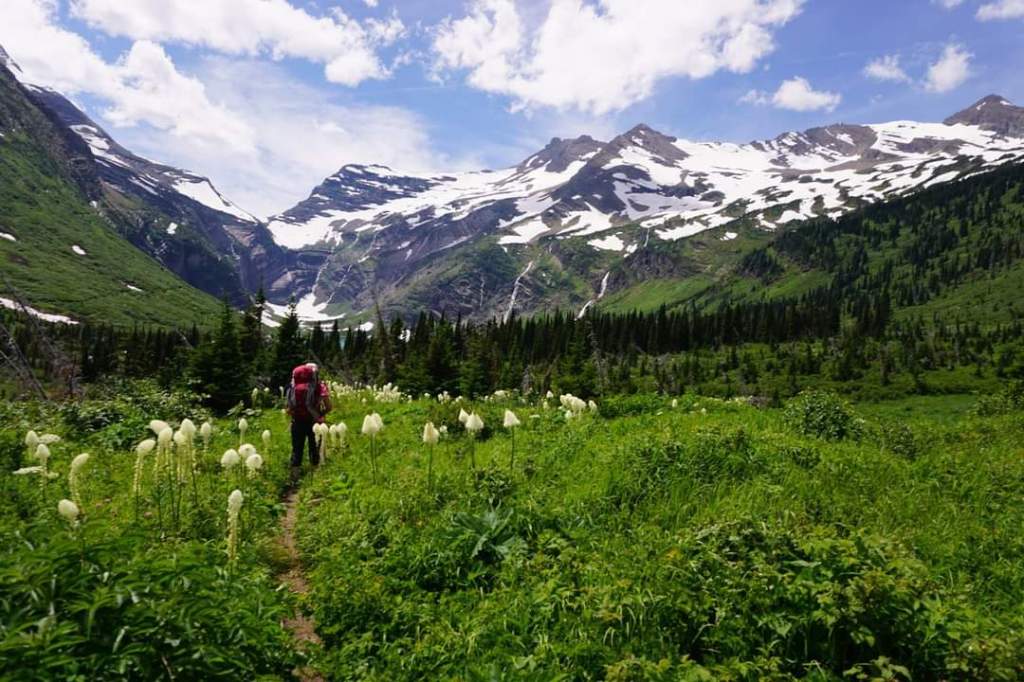
First full view of Jackson Glacier along the trail (Mt. Jackson on the right)
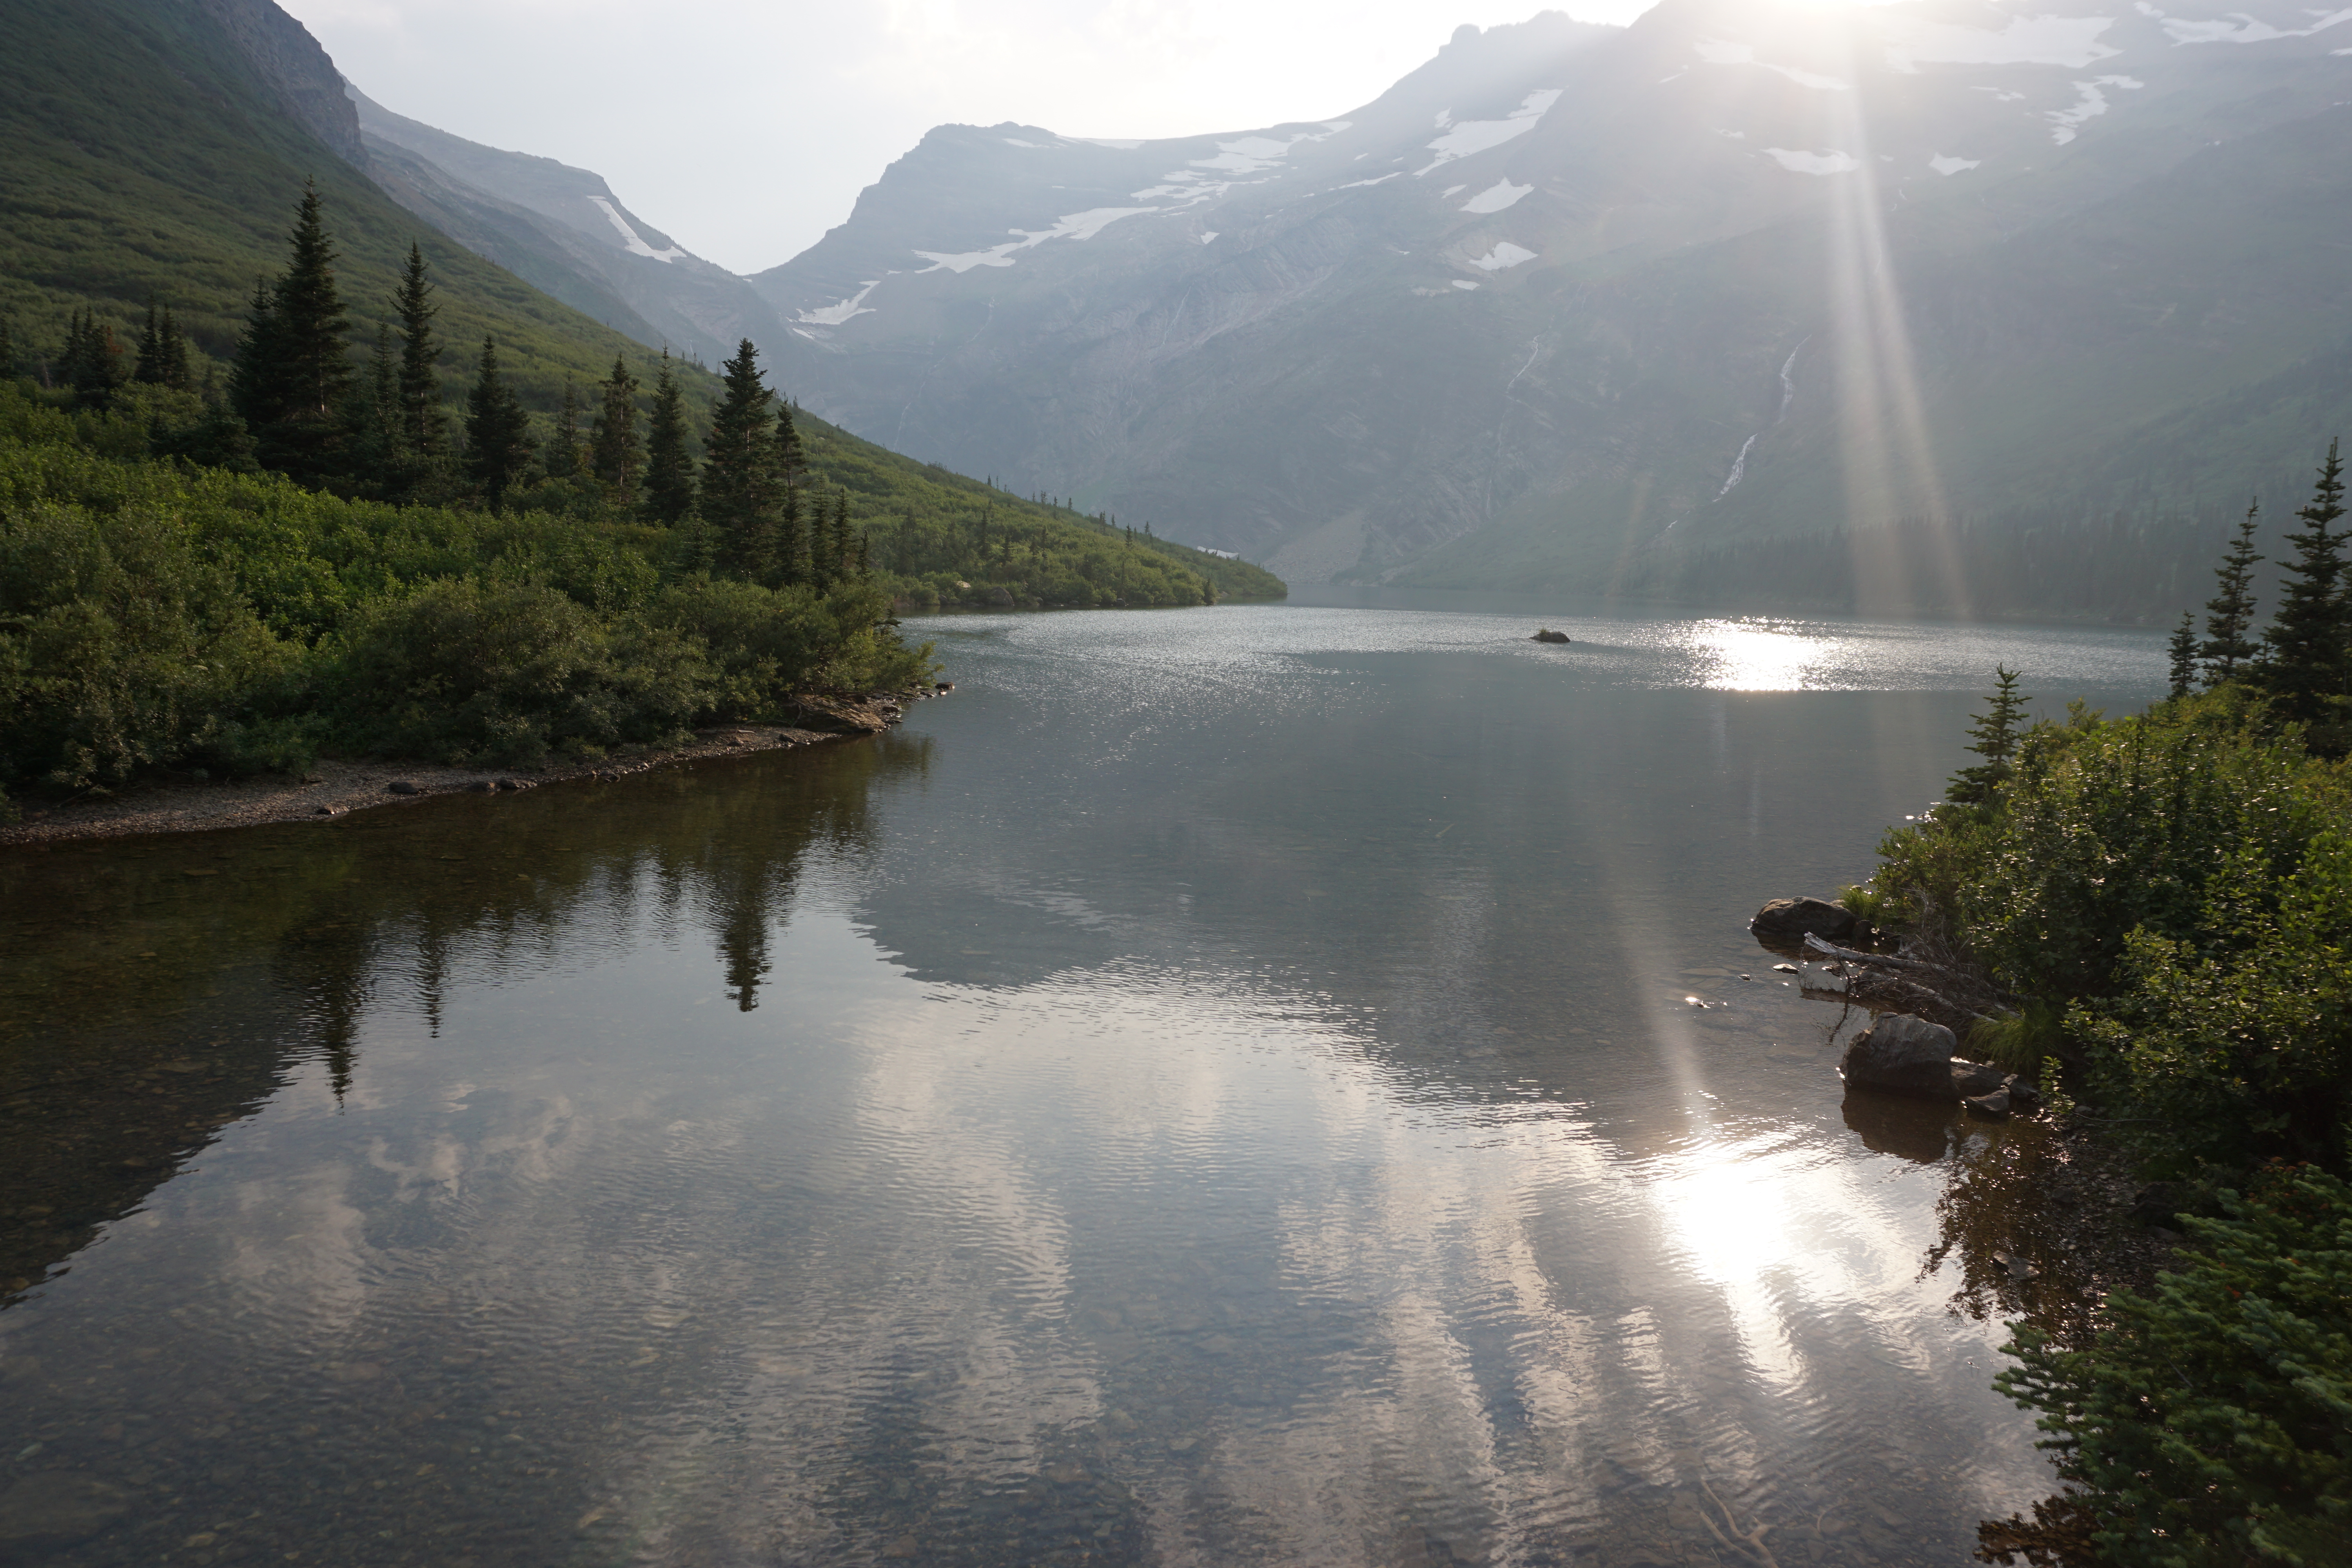
Arriving at the lake on a hot July afternoon we were anxious to go for a swim and cool off. We quickly set up our tents and headed for the lake shore. The water was cold but not intolerable. We took a brief swim, basked in the warmth of the sun, and enjoyed the views of Mt. Jackson, Gunsight Mountain, Blackfoot Mountain, and Mt. Logan.
Who wants to swim?
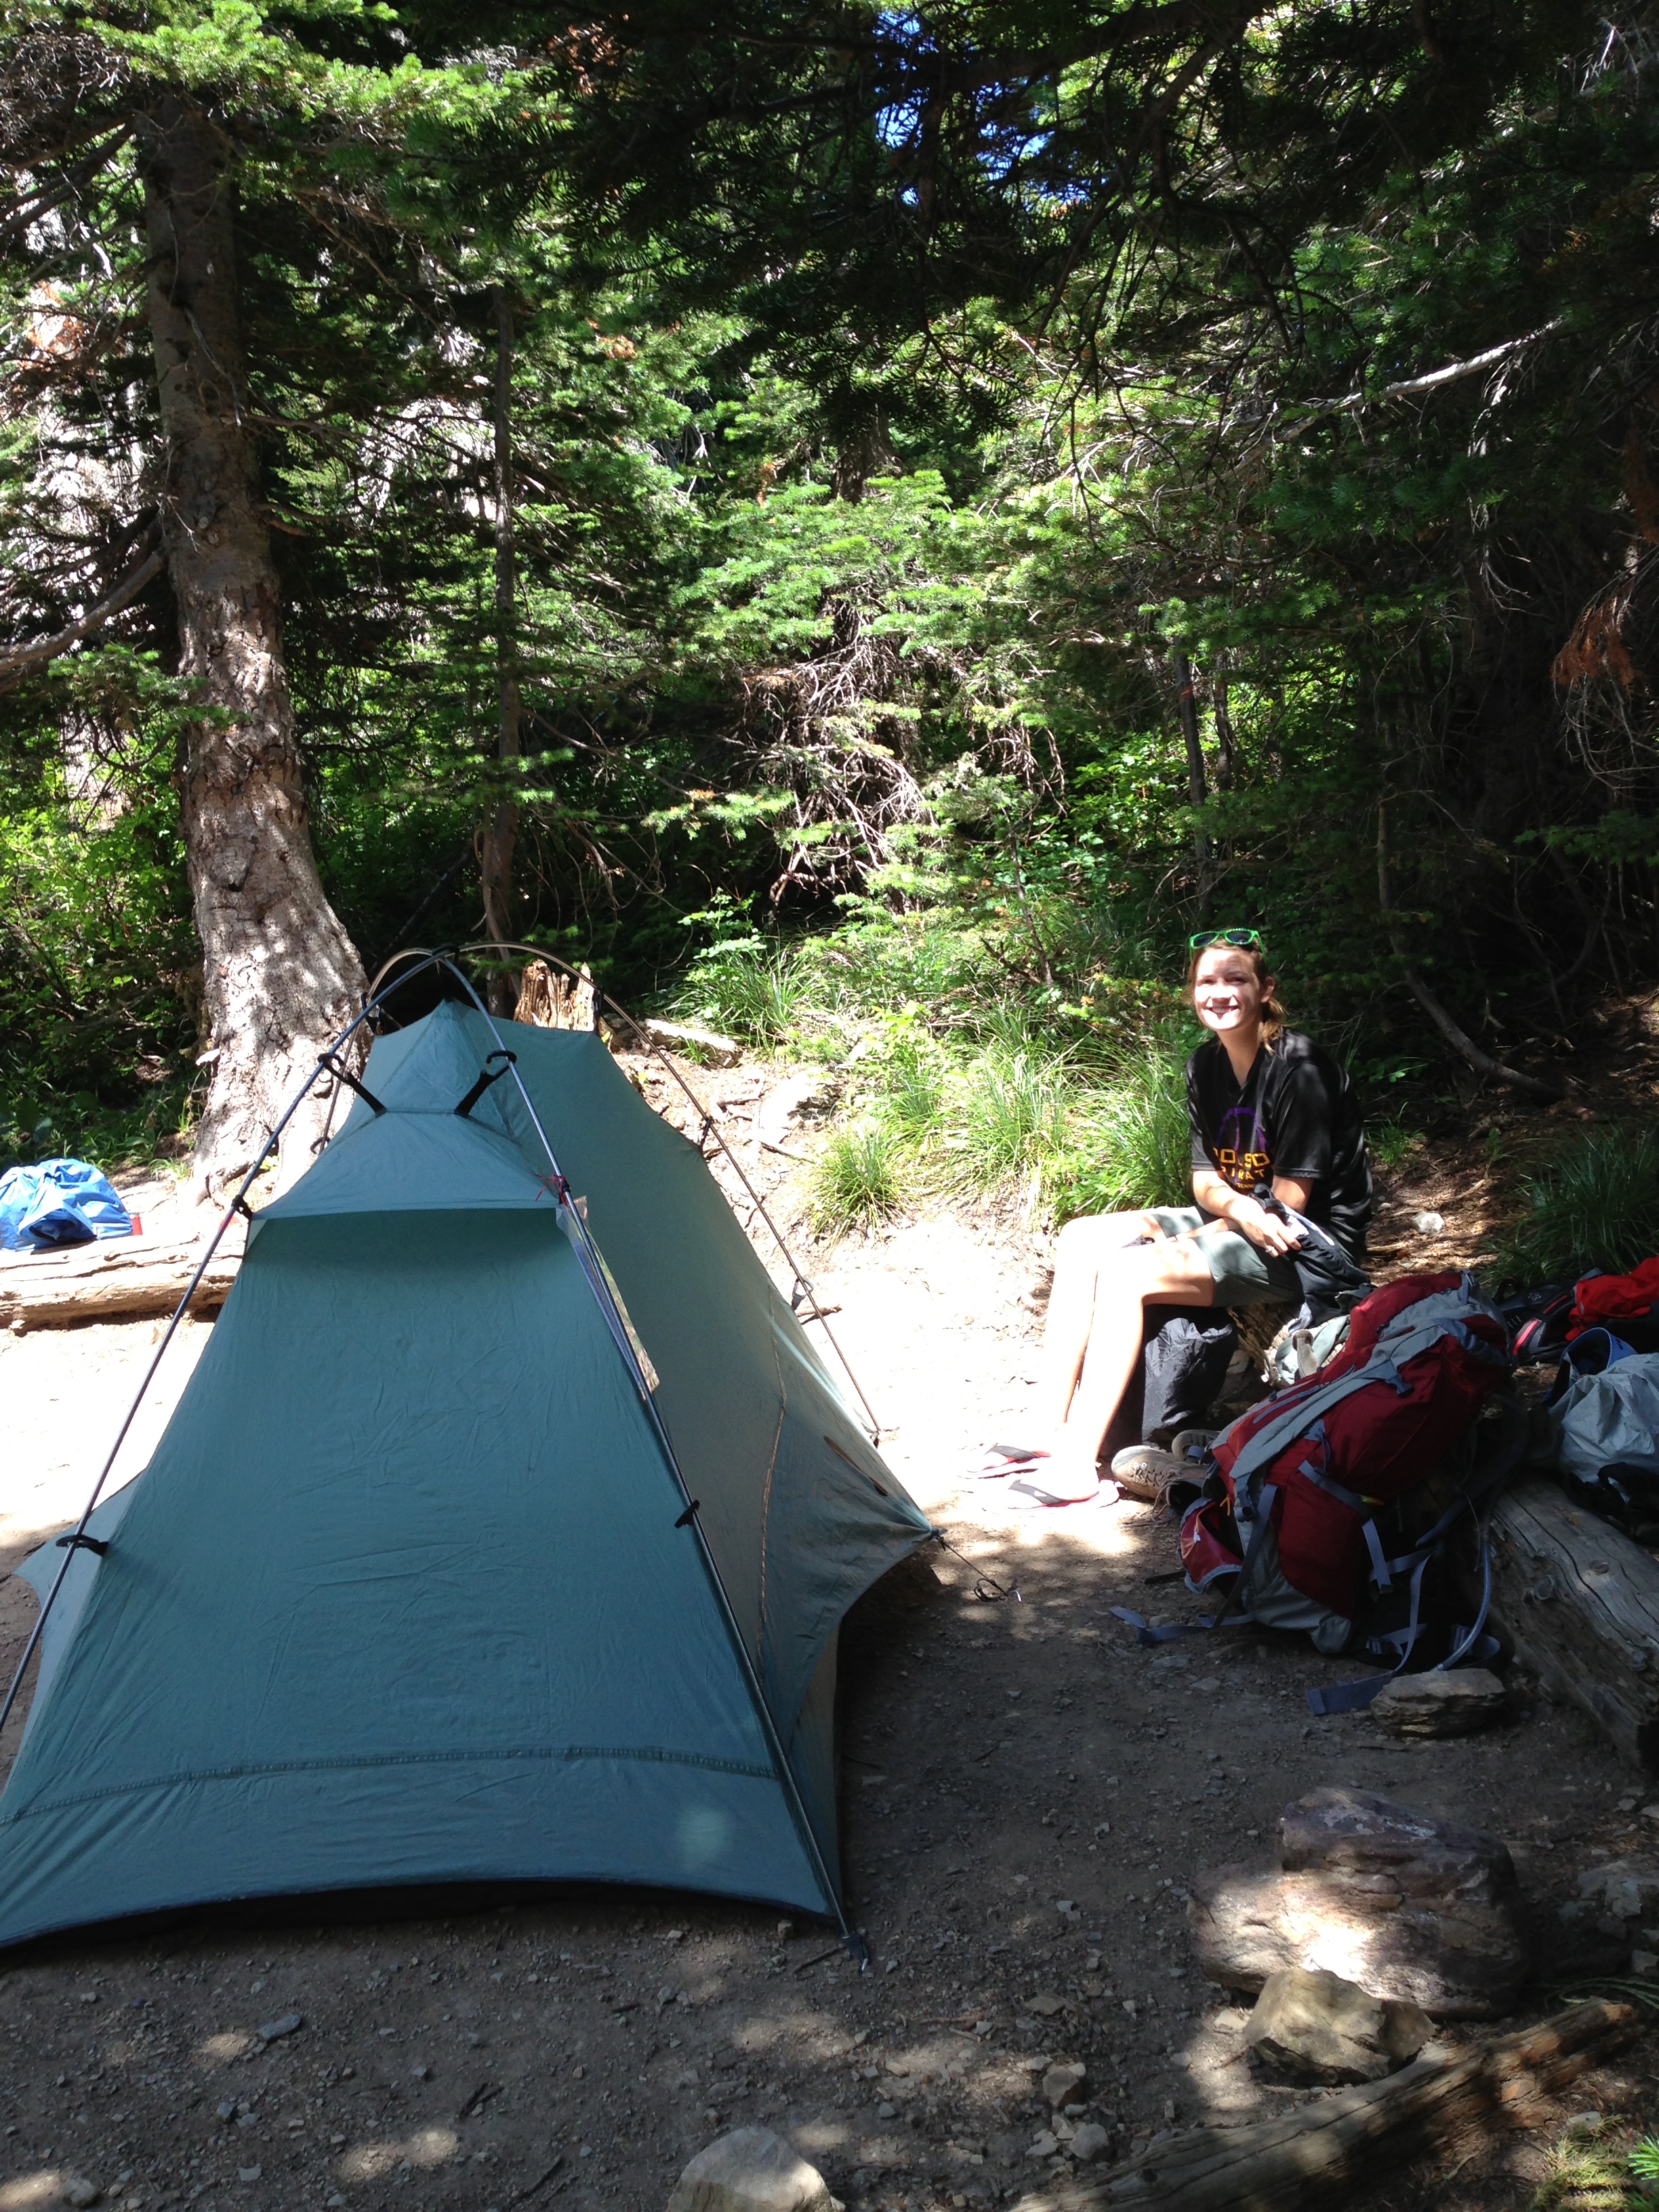
Our camp site right by the lake
We returned to camp and headed to the food-prep area to make our dinner. Another camper arrived to join us, short of breath and laughing. He had just chased down a deer that ran off with one of his trekking poles. He was able to recover the pole and show us the chewed up grip with deer slobber dripping off it. The deer and marmots here are notorious for being a nuisance like that. They love the salt on grips of poles and soles of shoes so NEVER leave anything out on the ground or within reach of tall deer. I have my own tattered pole handles and flips flops to attest to the determination of these critters.
The swim was refreshing
Taylor’s dinner at camp
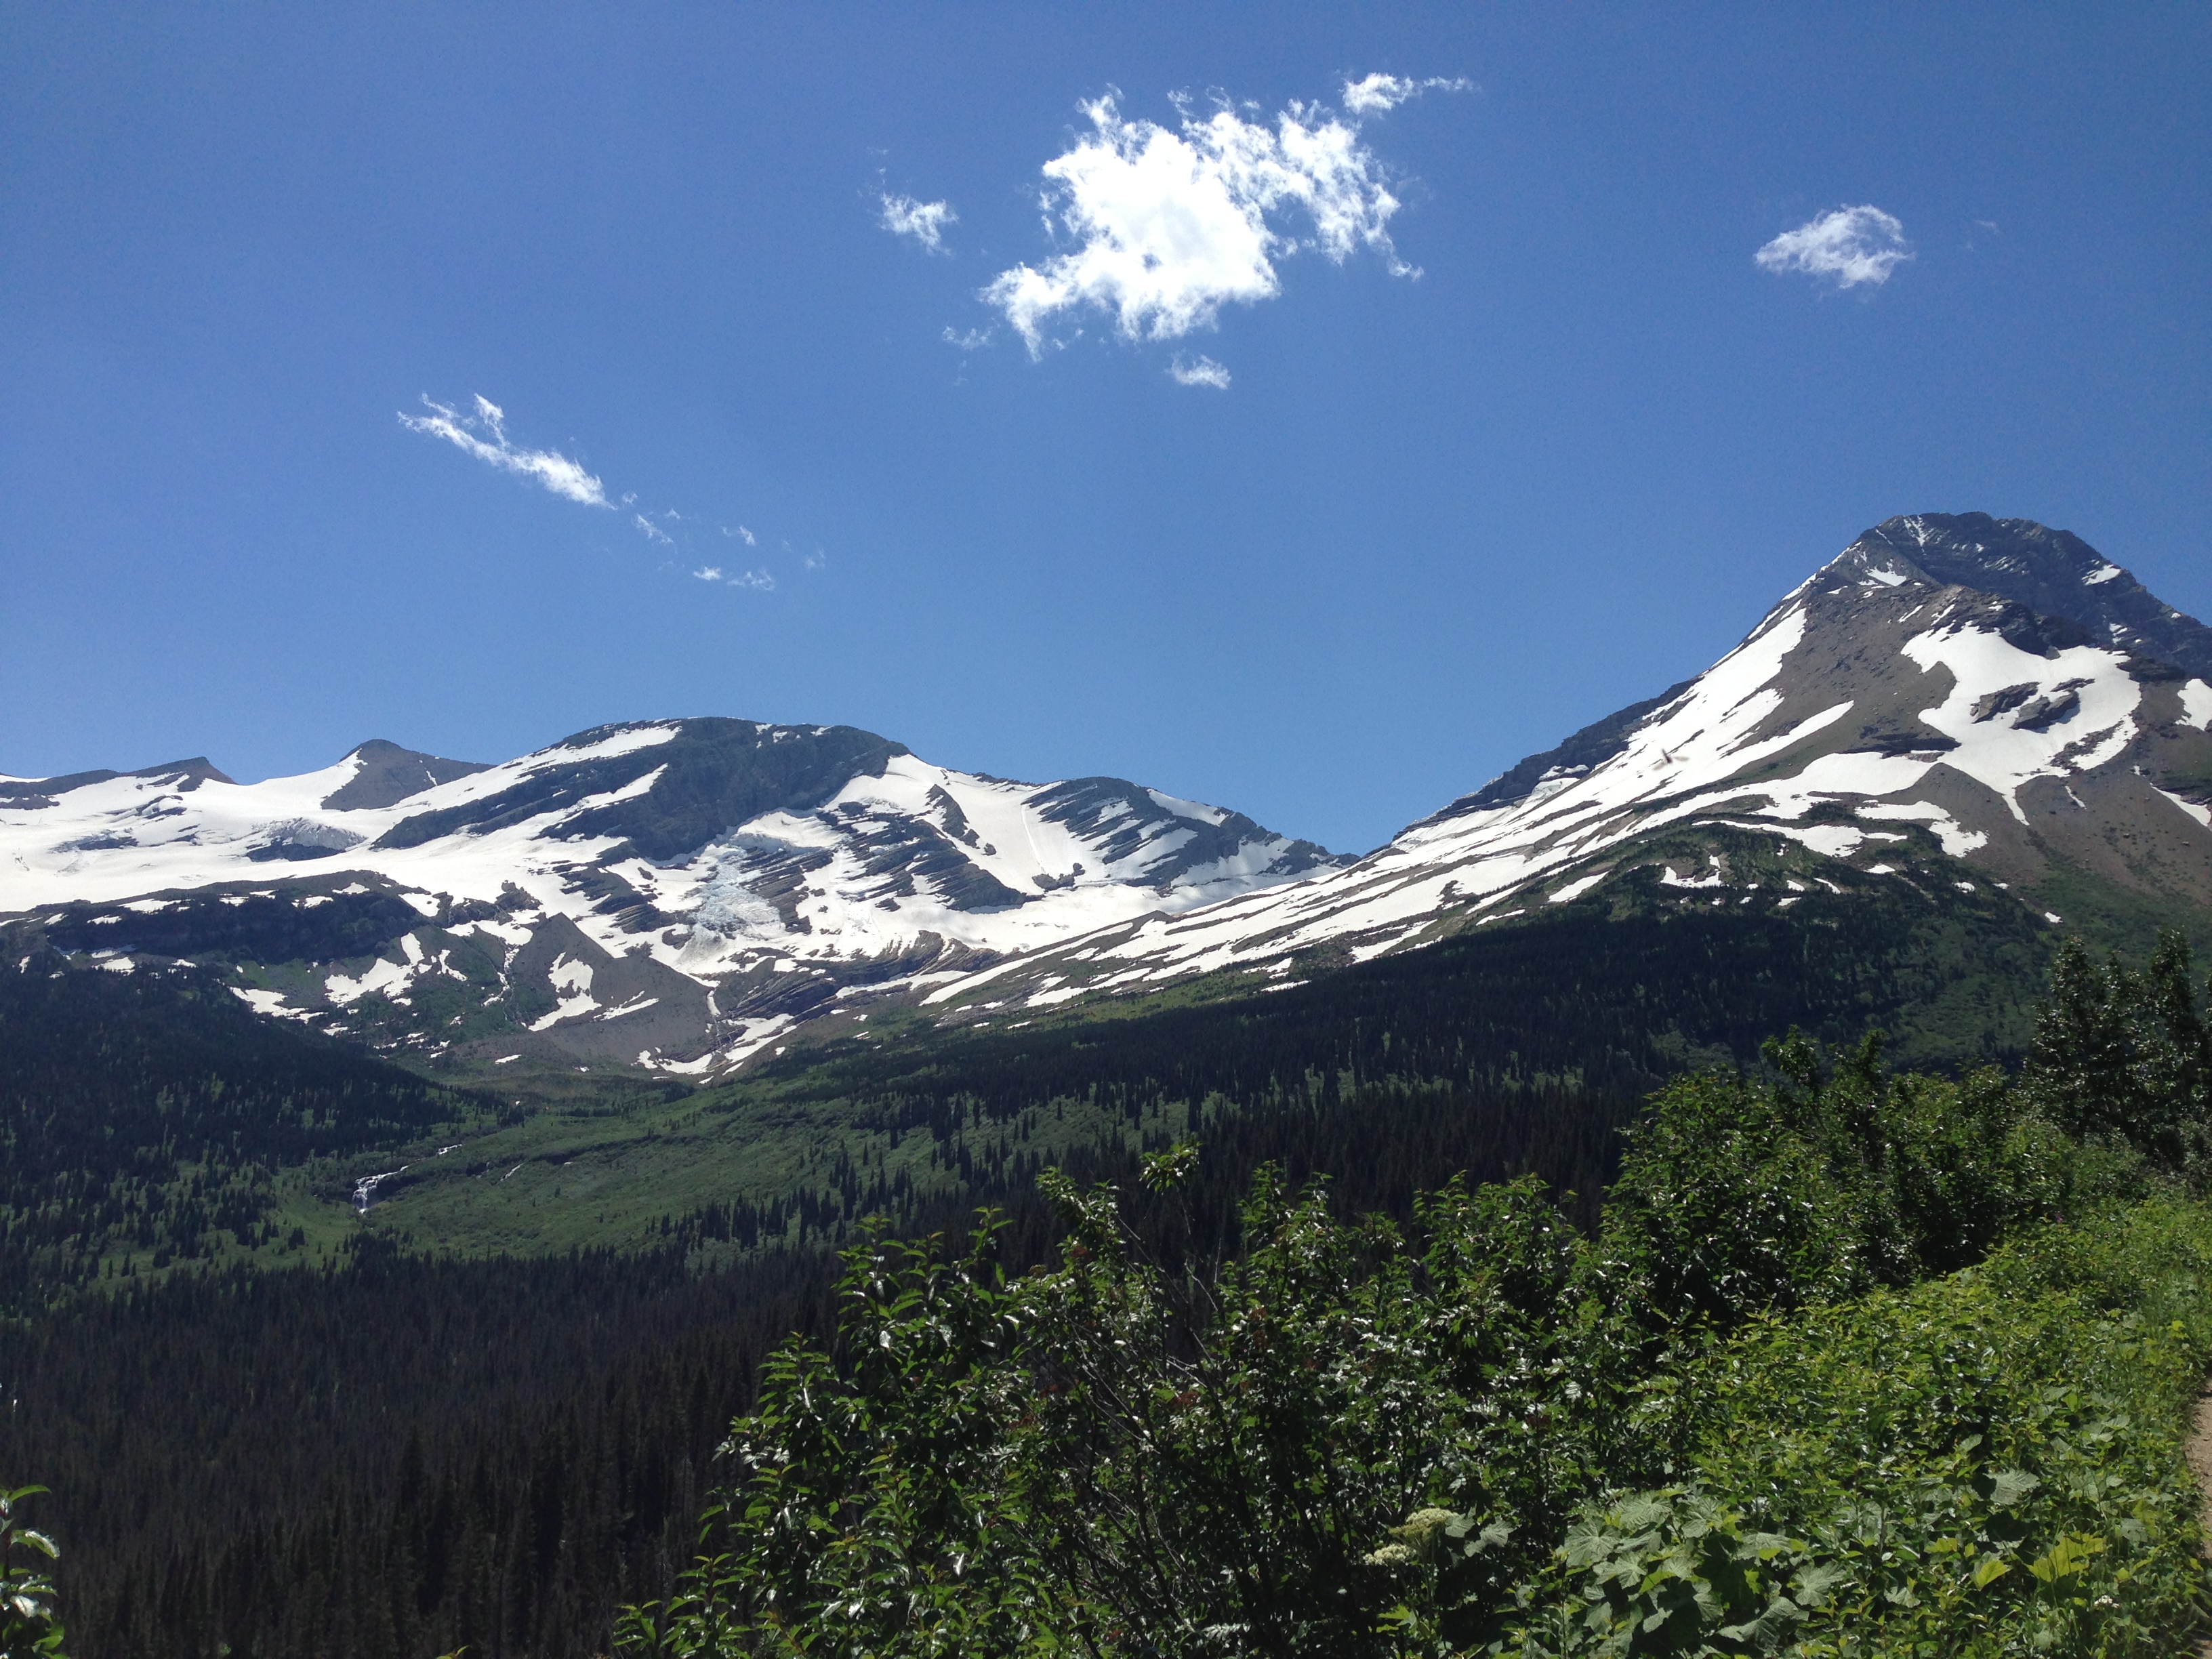
We went to bed early because we had a big day ahead of us. We planned to climb Mt. Jackson, the 4th of the six 10,000 ft peaks in Glacier, behind Cleveland, Stimson, and Kintla. The climb from the campground would entail just under 5,000 ft elevation gain over a few miles to reach the summit at 10,052 ft. With bellies full of complex carbohydrates we slept soundly with visions of glaciers, mountains, and sparkling waters filling our dreams.
Crossing the foot of the lake
Beginning the off-trail portion
The next morning we awoke early and headed across the suspension bridge on the trail over to Jackson Glacier. From there we branched off-trail and began the ascent of the mountain. My daughter got a little spooked at some of the exposure so when we took a break at 8,400 feet she remained on the ridge while Dustin and I continued to the summit. The remaining 1,500 ft was an easy class 2 and 3 scramble to the top.
Steep snow and scree
The descent later
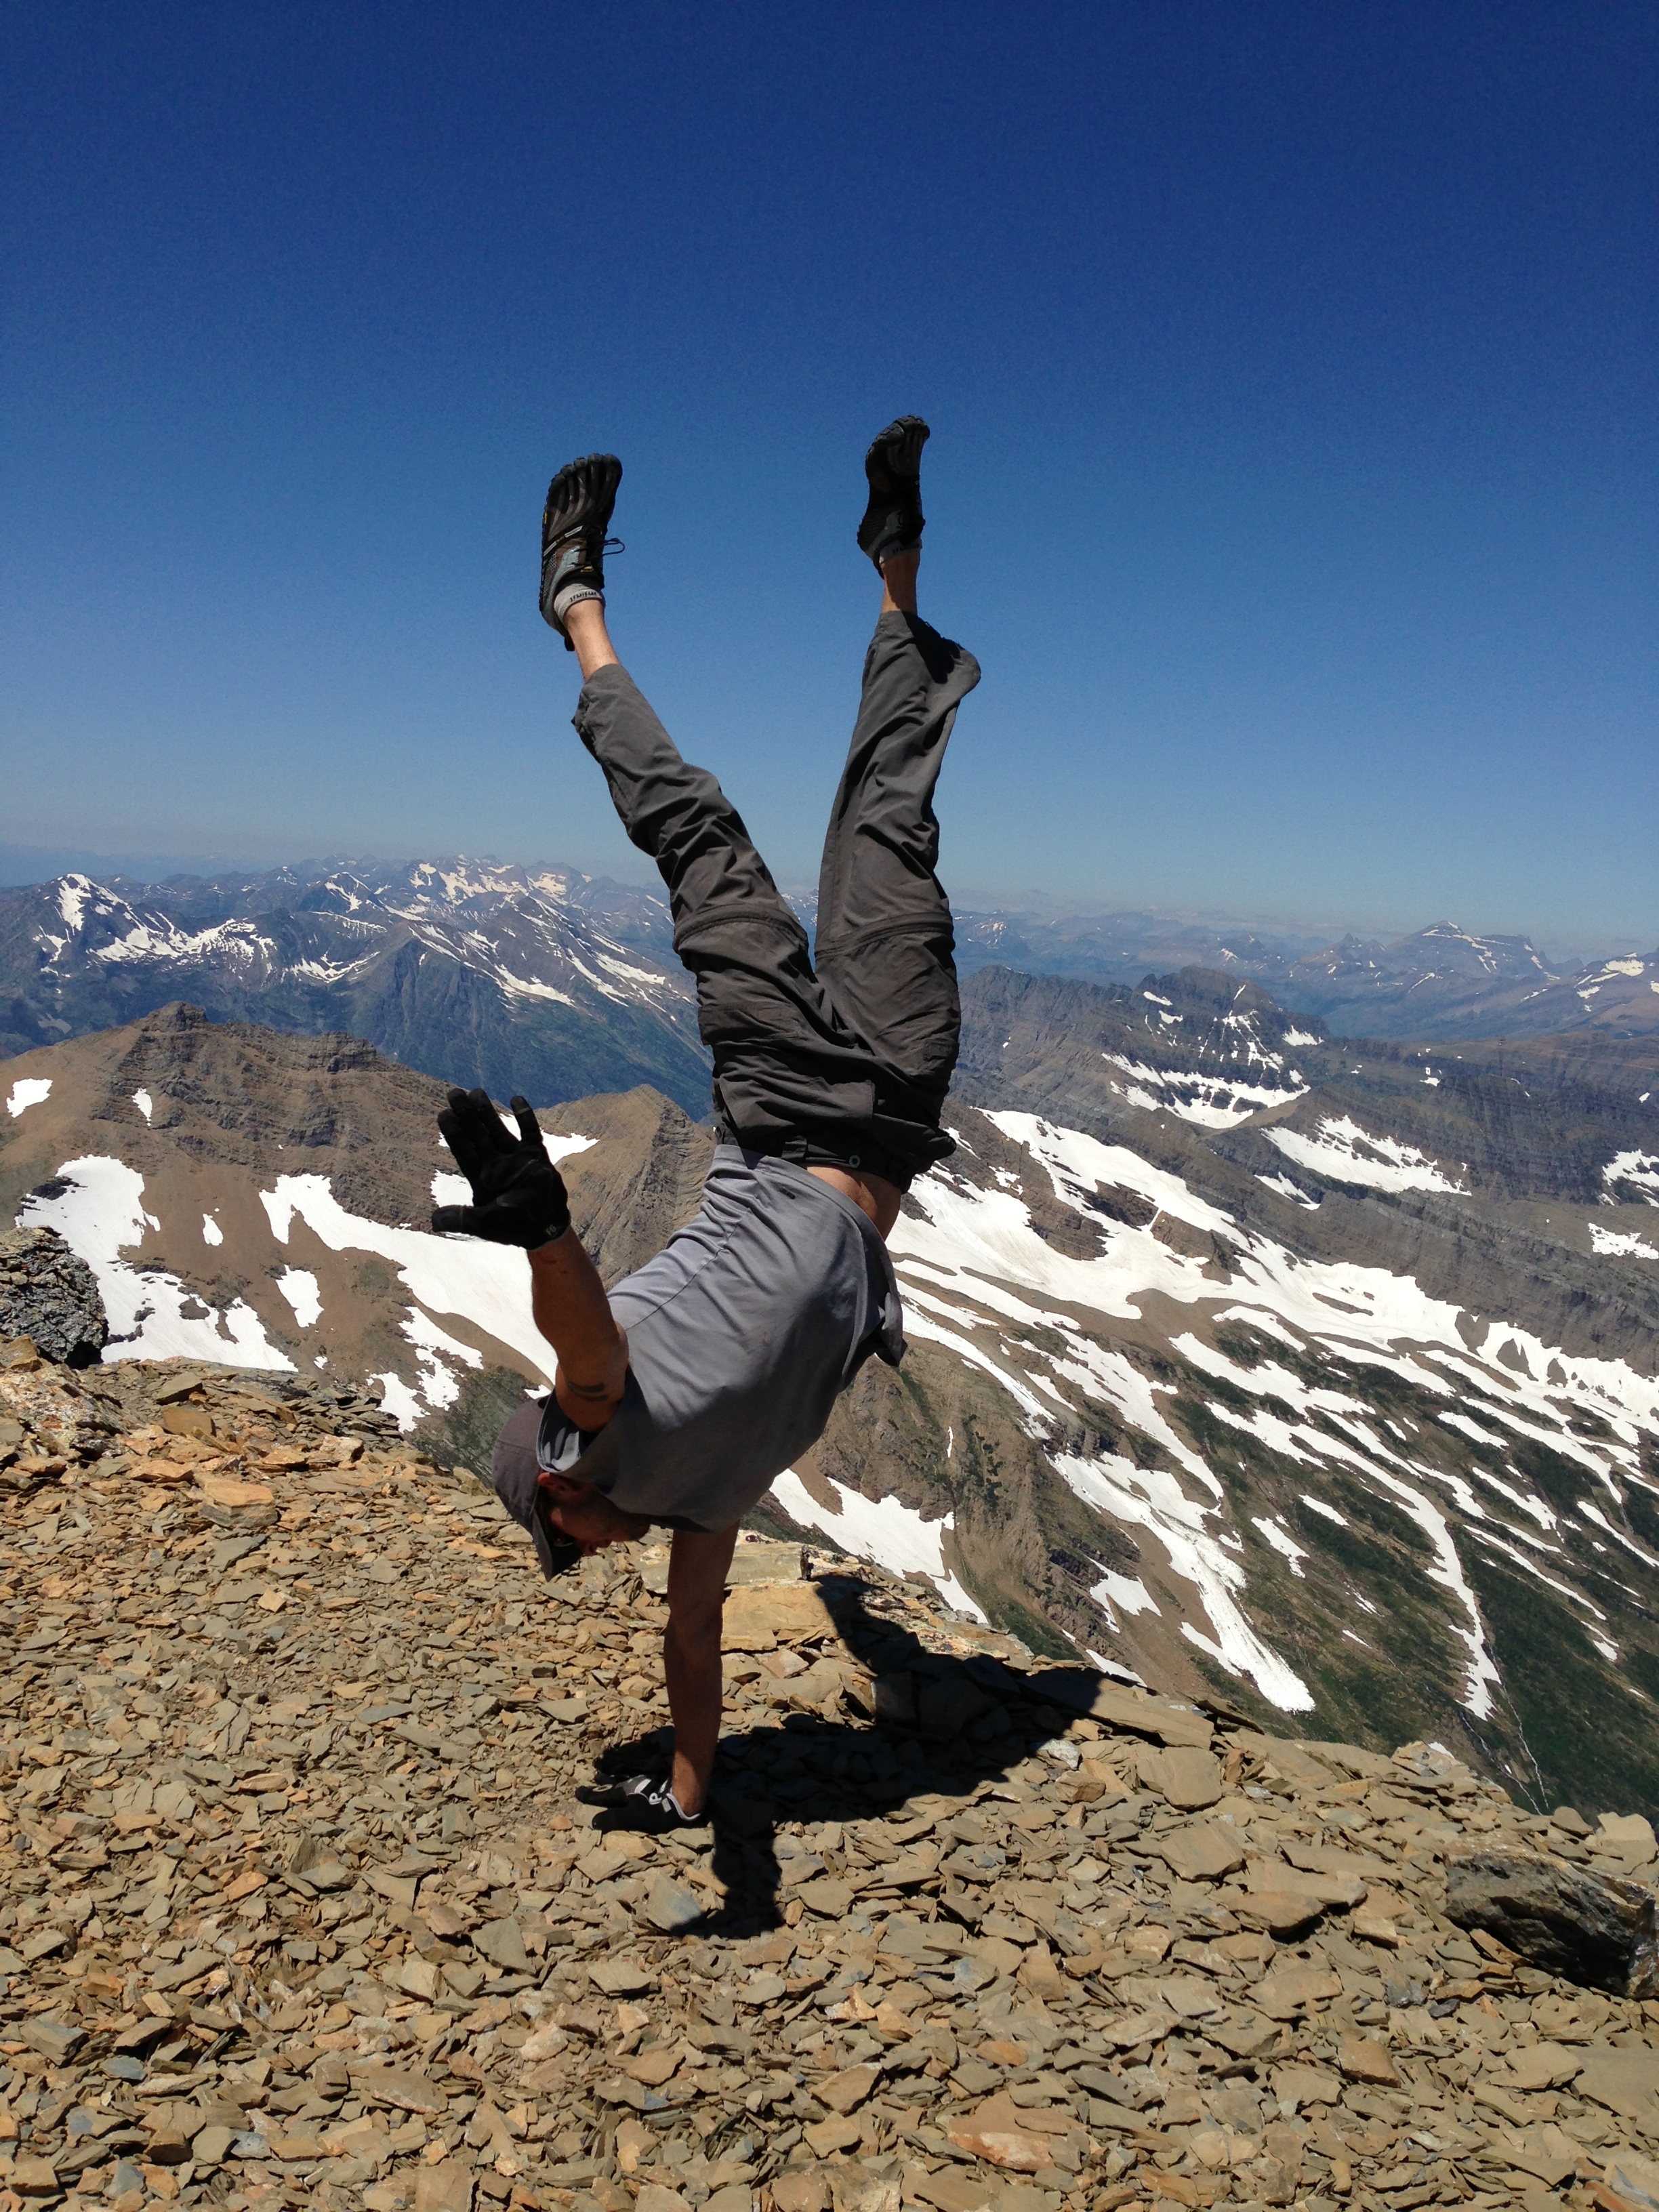
It was thrilling to be on the top of Mt. Jackson. On the top we had spectacular 360 degree views. We had also gained a view of the Harrison Glacier. While we were taking summit photos we heard the incredible sound of a monstrous ice chunk cleaving apart from Jackson Glacier and crashing down the cliffs below. Unfortunately we were only able to hear the event and not see it. I would say the sound was similar to a sonic boom followed by continuous thunder with a jet flying overhead, all in about 10 seconds total.
The name of the mountain was changed from a tribal term in 1891 by G.B. Grinnell. The previous name was “Sixikaikoan” which meant Blackfeet Man. According to Jack Holterman in his book Place Names of Glacier National Park this may be the peak that inspired Grinnell with the term “Crown of the Continent” as this is the only 10k peak on the continental divide.
Our break at 8,400′
Ridgewalk to the summit
Celebratory summit hand stand
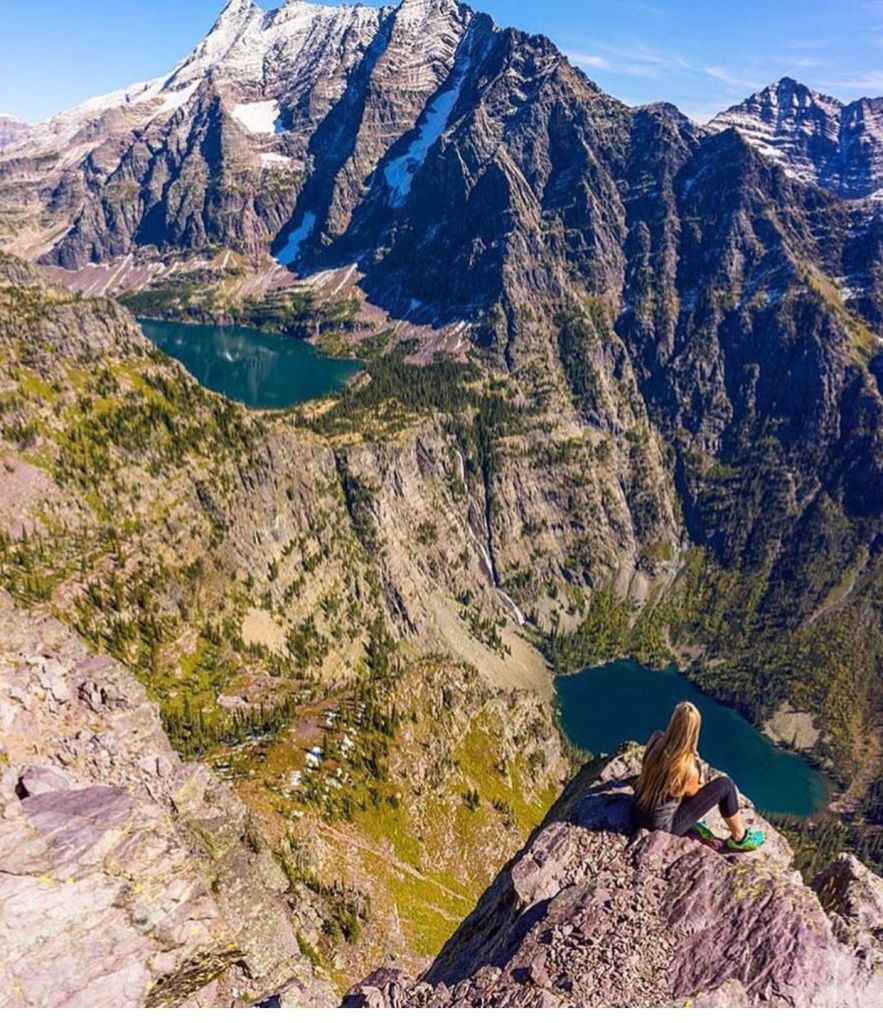
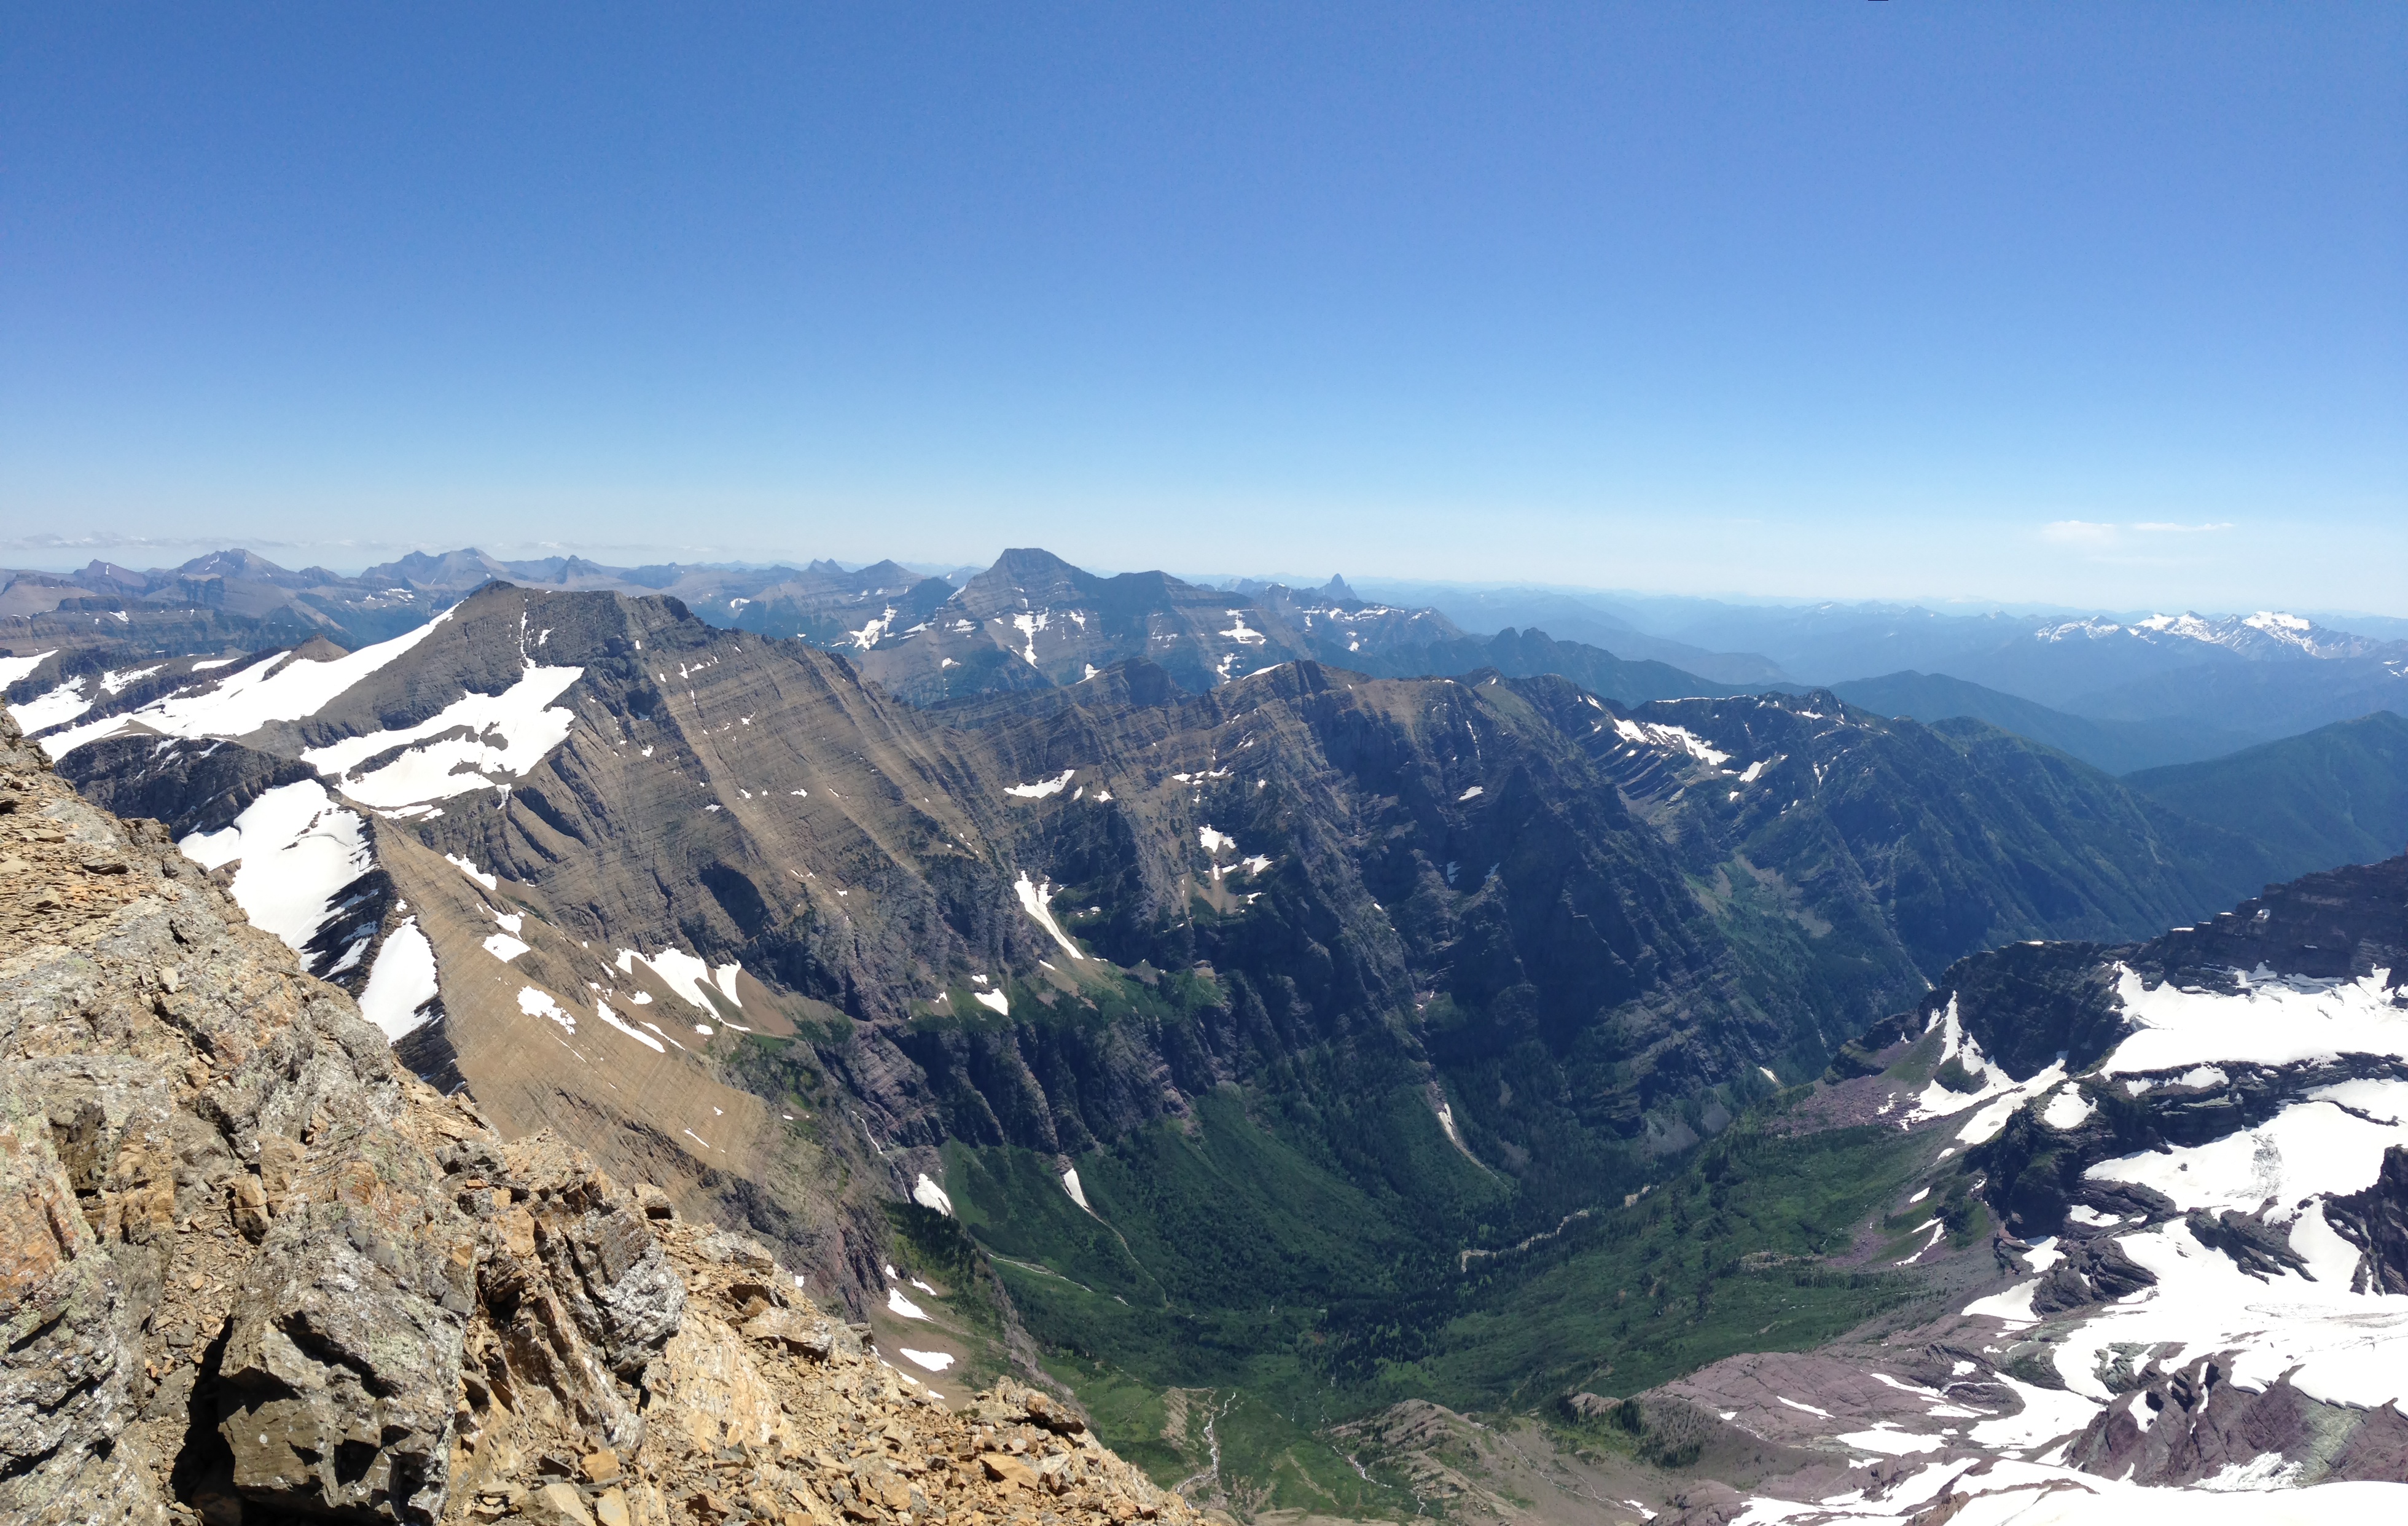
Summit view looking SE
Summit view looking NW over Gunsight Lake
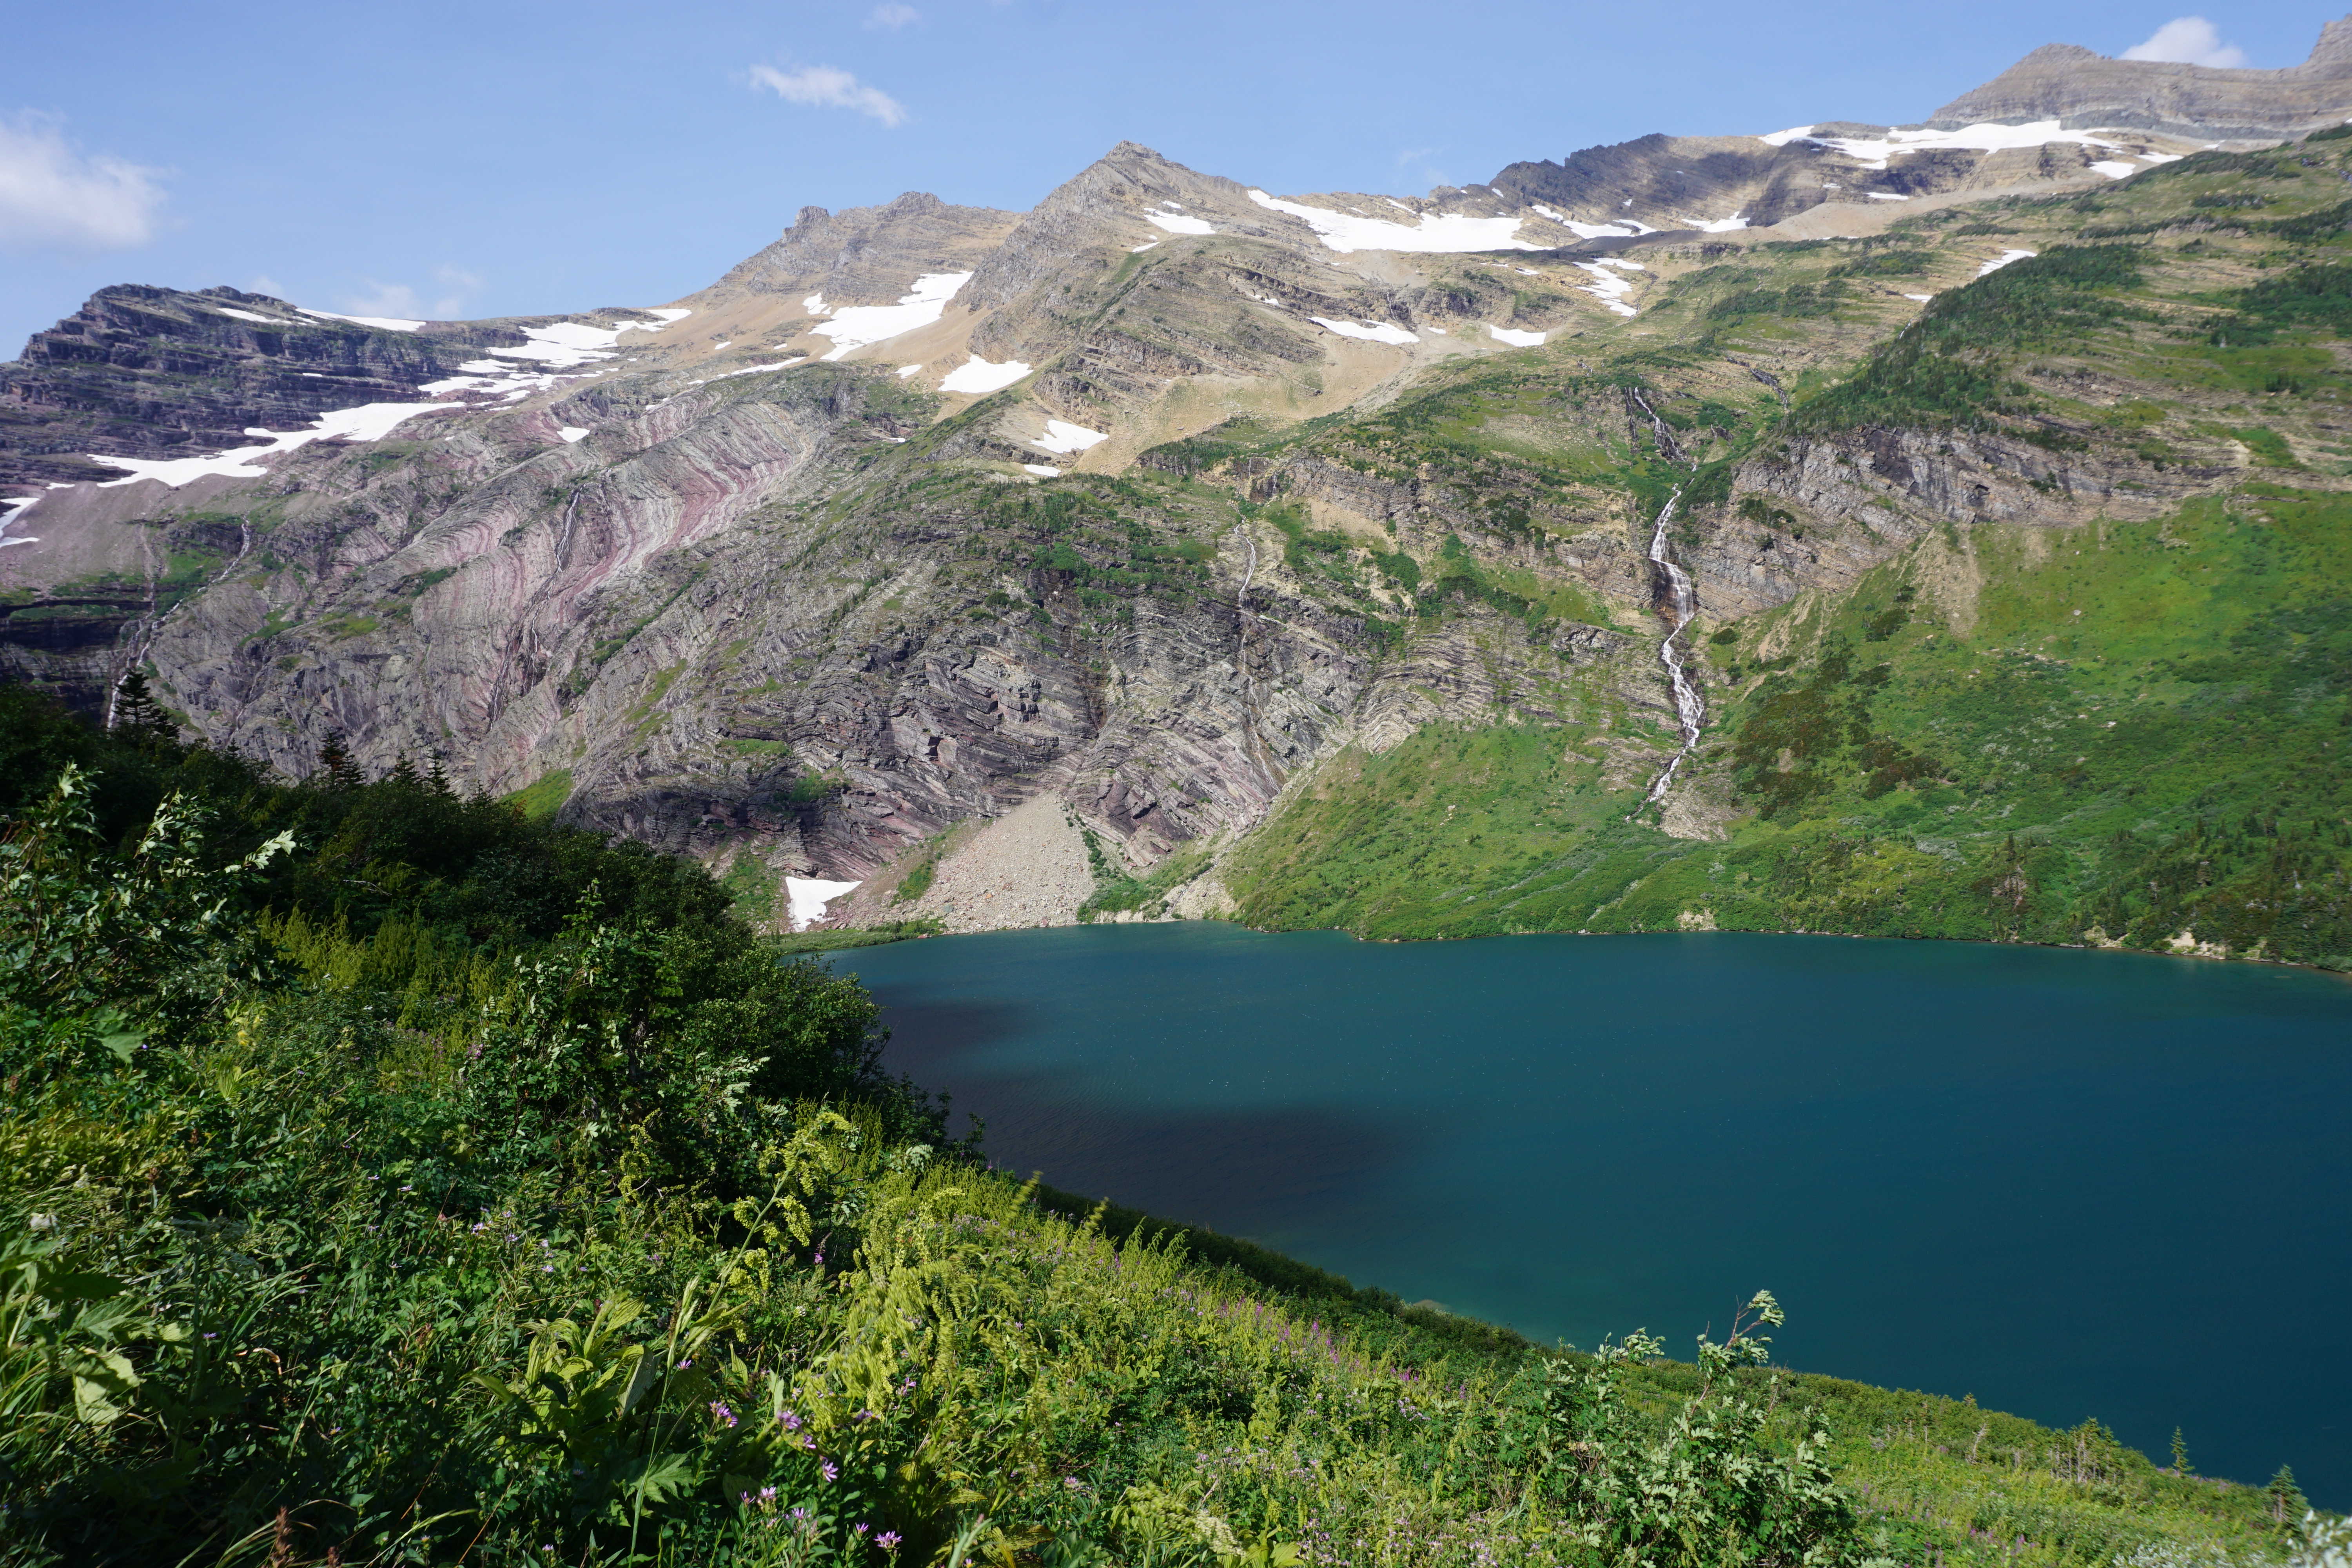
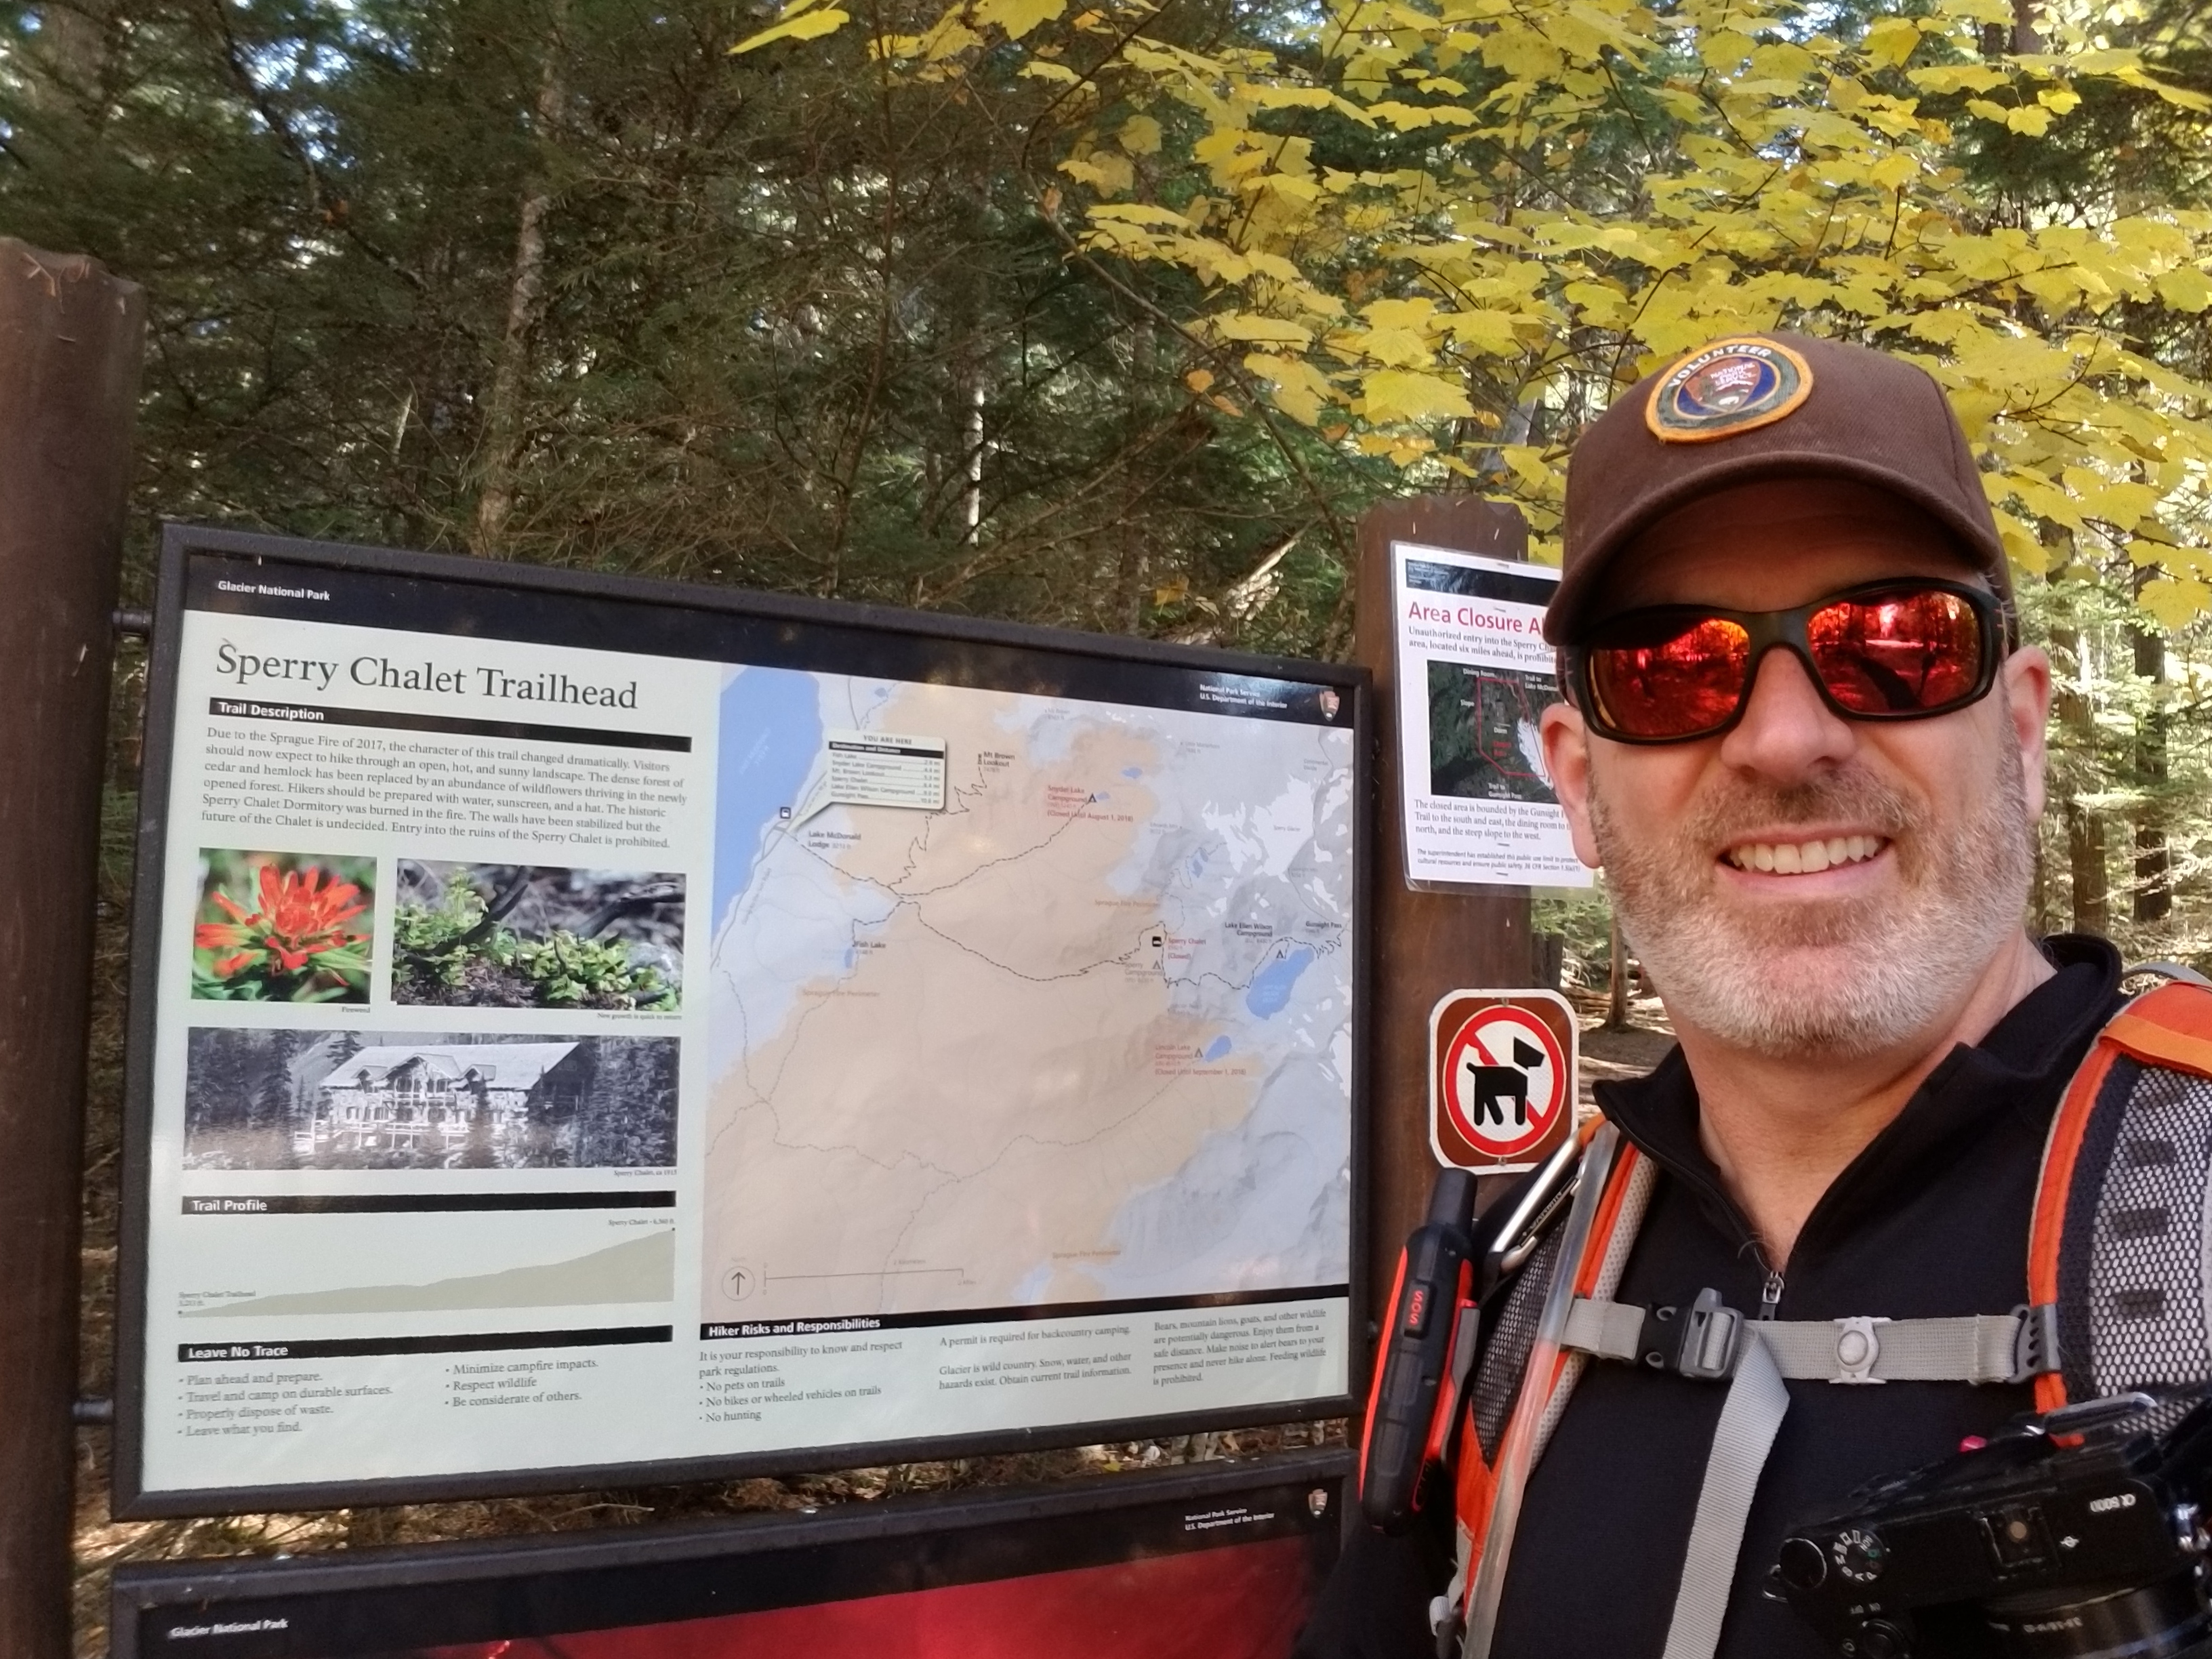
Gunsight Lake is a fantastic destination for a day hike, overnight camp, or as part of the Gunsight Pass trail that goes from the Jackson Glacier Overlook to Sperry Chalet and down to Lake McDonald Lodge (about 20 miles total). This hike can be done from either direction depending on your itinerary. There are waterfalls along the trail and long cascades near the head of the lake. Flora and Fauna are also typically abundant. Don’t forget your bear spray, bug spray, fishing pole and camera.
Morning view from the bridge
Views from the trail
Gunsight Lake from the Gunsight Pass trail looking west
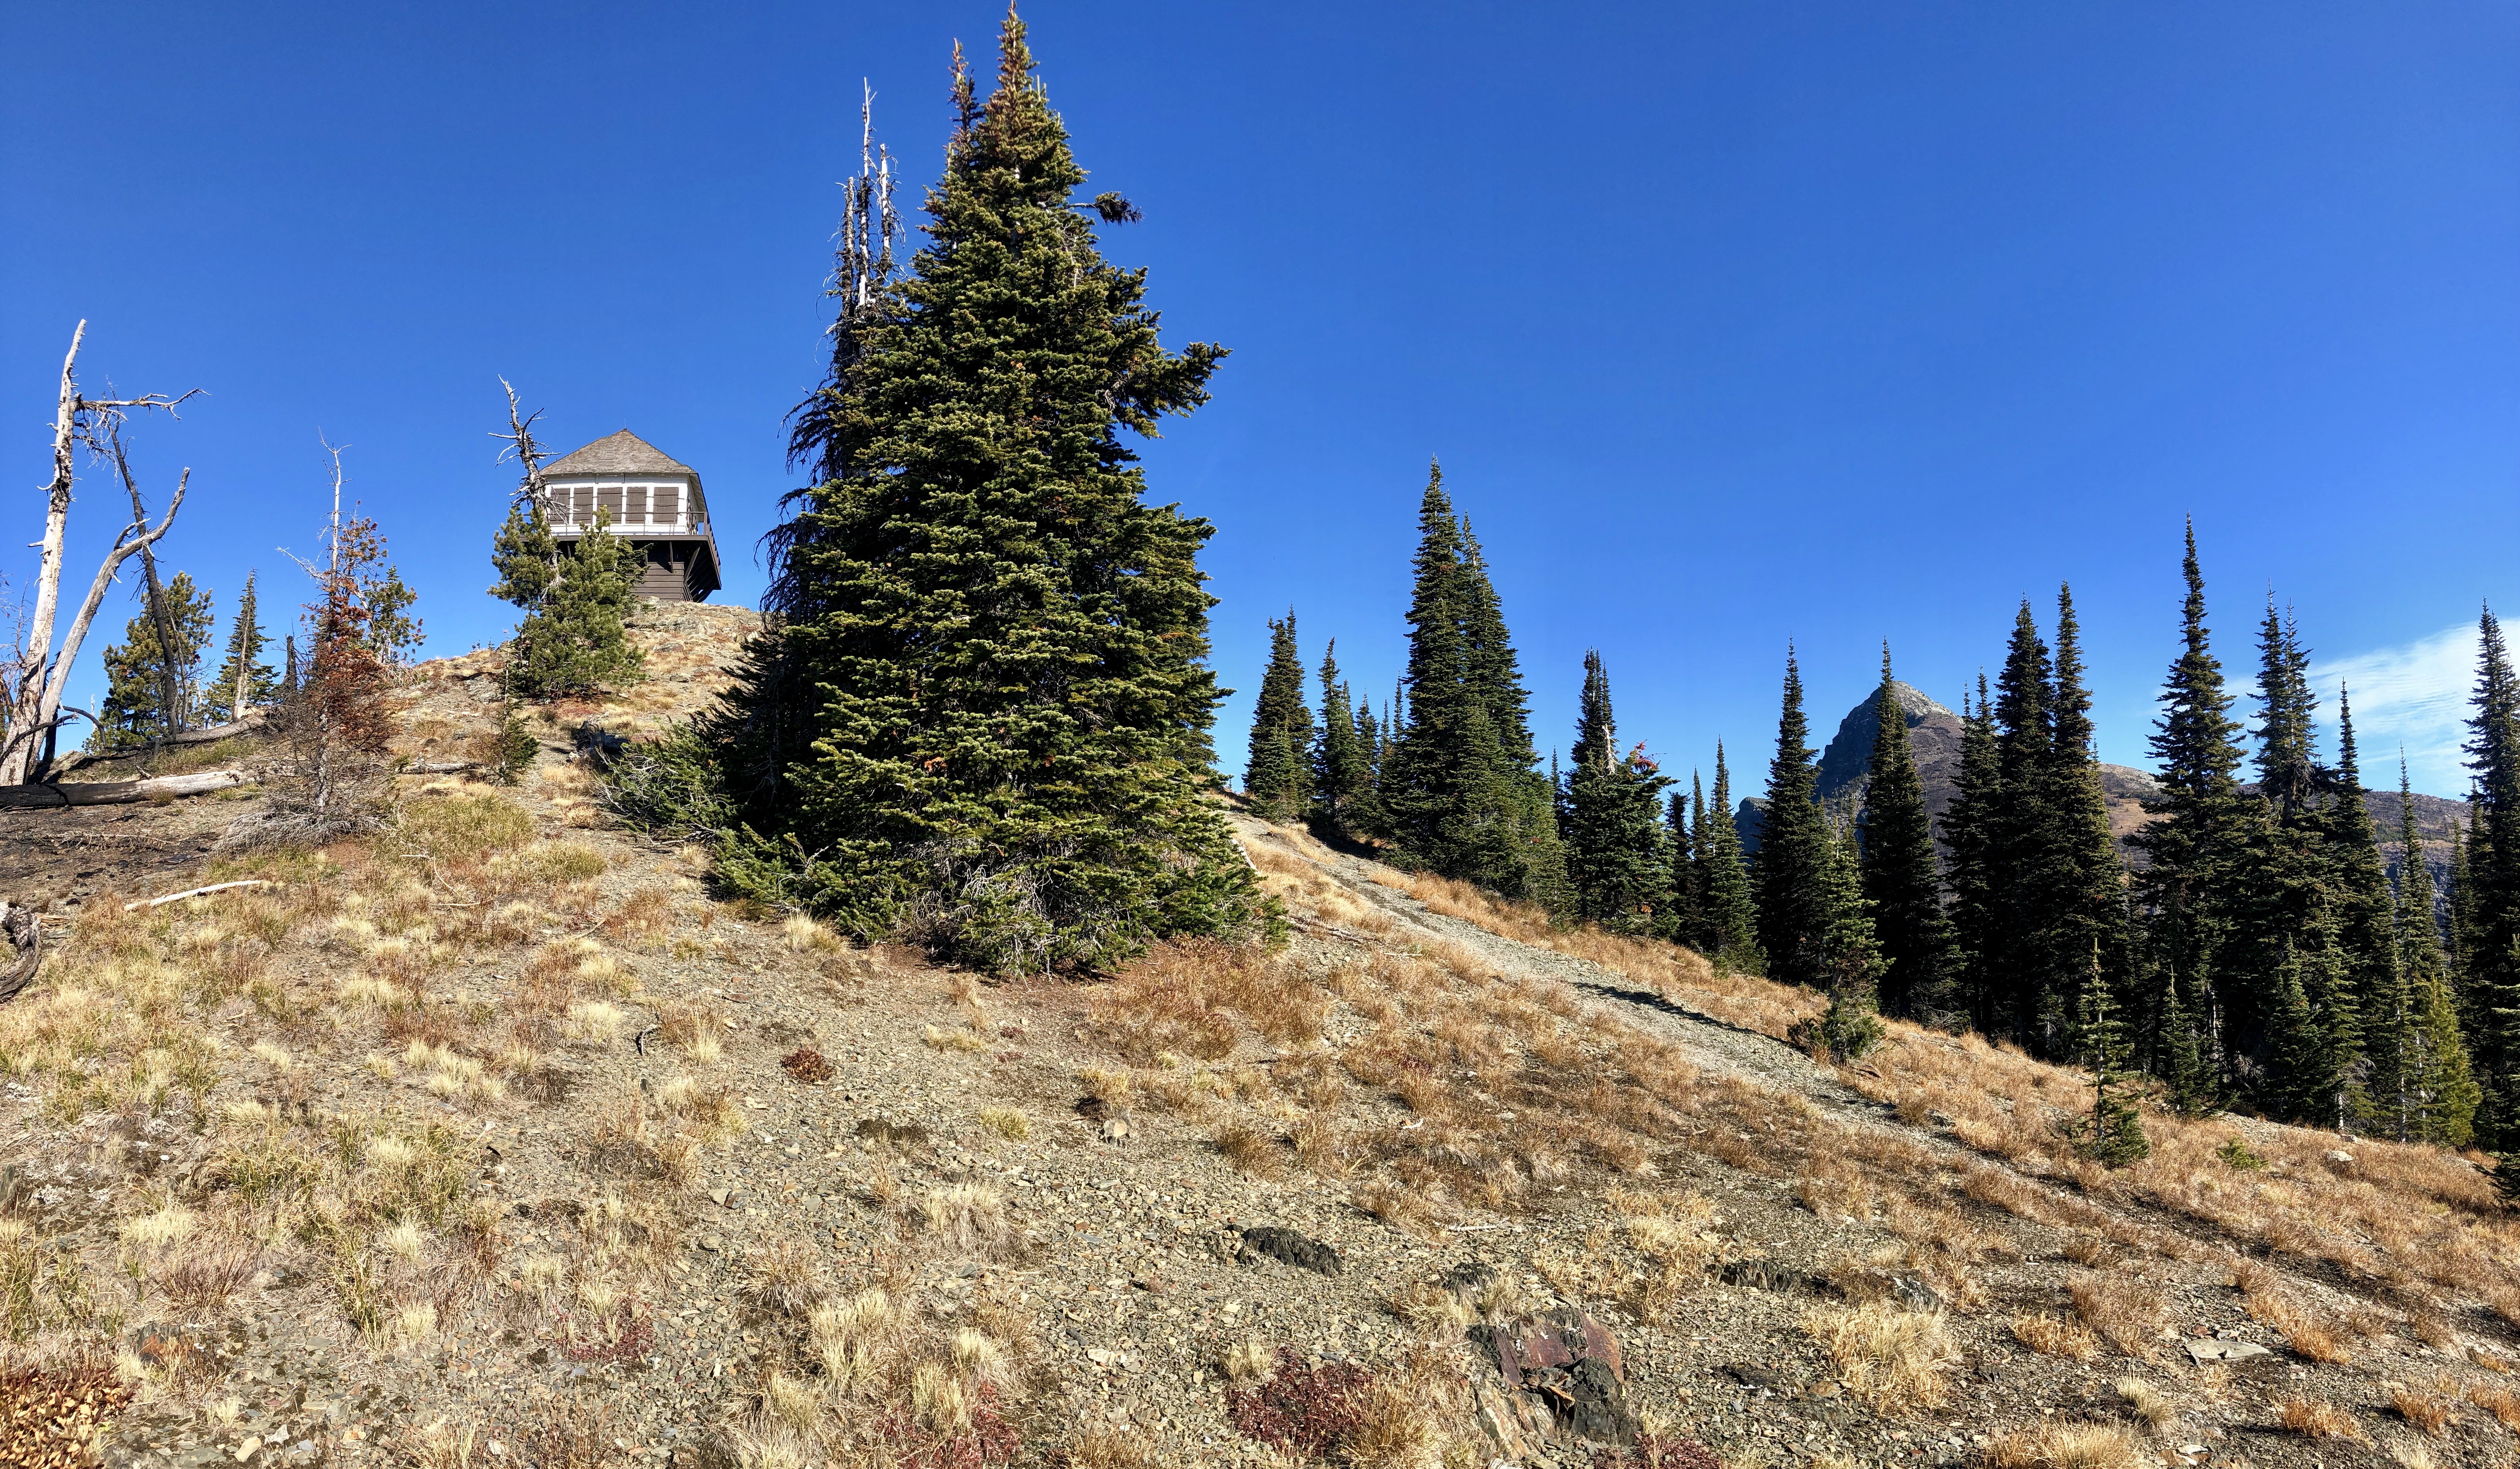
Built in 1928-29 and manned full-time until 1971 this lookout stands at 7,487 ft
The Mt. Brown Fire Lookout is a fantastic feature in the Lake McDonald Valley. You’ll find spectacular views, migratory birds, flora and fauna, and currently you can see just how close the Sprague fire came to destroying this historic structure. This hike however, is not a casual hike and should only be attempted by those in excellent physical condition.
The sign does NOT mention the lookout
The Mt. Brown trail boasts the most elevation gain of any official trail in the park at 4,325 vertical feet. This is accomplished in only 5 miles so be prepared for a continuous uphill slog! Find the trailhead directly across the road from the Lake McDonald Lodge parking area. The shared trailhead also branches off to Snyder Lakes, Fish Lake, Comeau Pass, and Sperry Chalet.
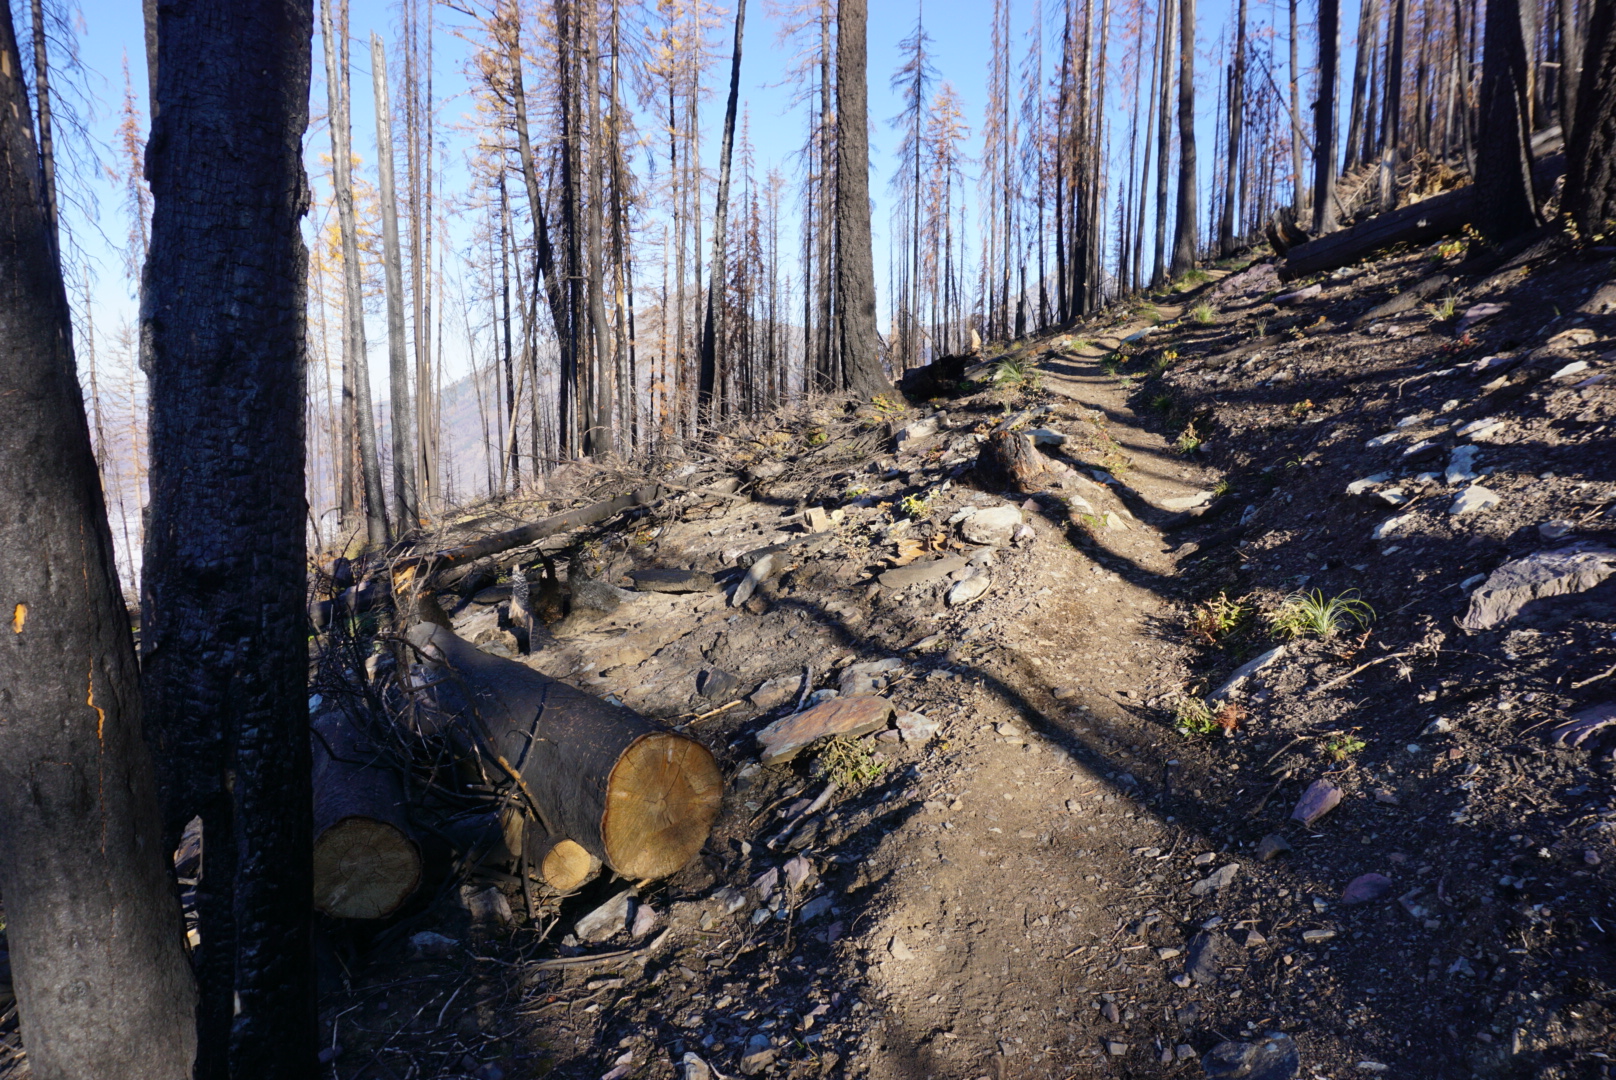
We hiked this trail in October 2018, just after the Howe Ridge Fire wreaked havoc in the park. It was a weekend of perfect Fall weather. Temps were cool, wind was mild, and skies were clear. An early cold snap weeks earlier turned the trees so the colors were in-your-face vivid.
At first we were in thick forest
Rising off the forest floor (PC Rachel Payne)
The Sprague Fire of 2017 burned out much of the area surrounding the trail so there were sustained views along the way that were not available in the past. And there was something oddly beautiful about all that black char on the skeletal remains of trees towering around us. The new undergrowth was fresh and green and spoke of new beginnings.
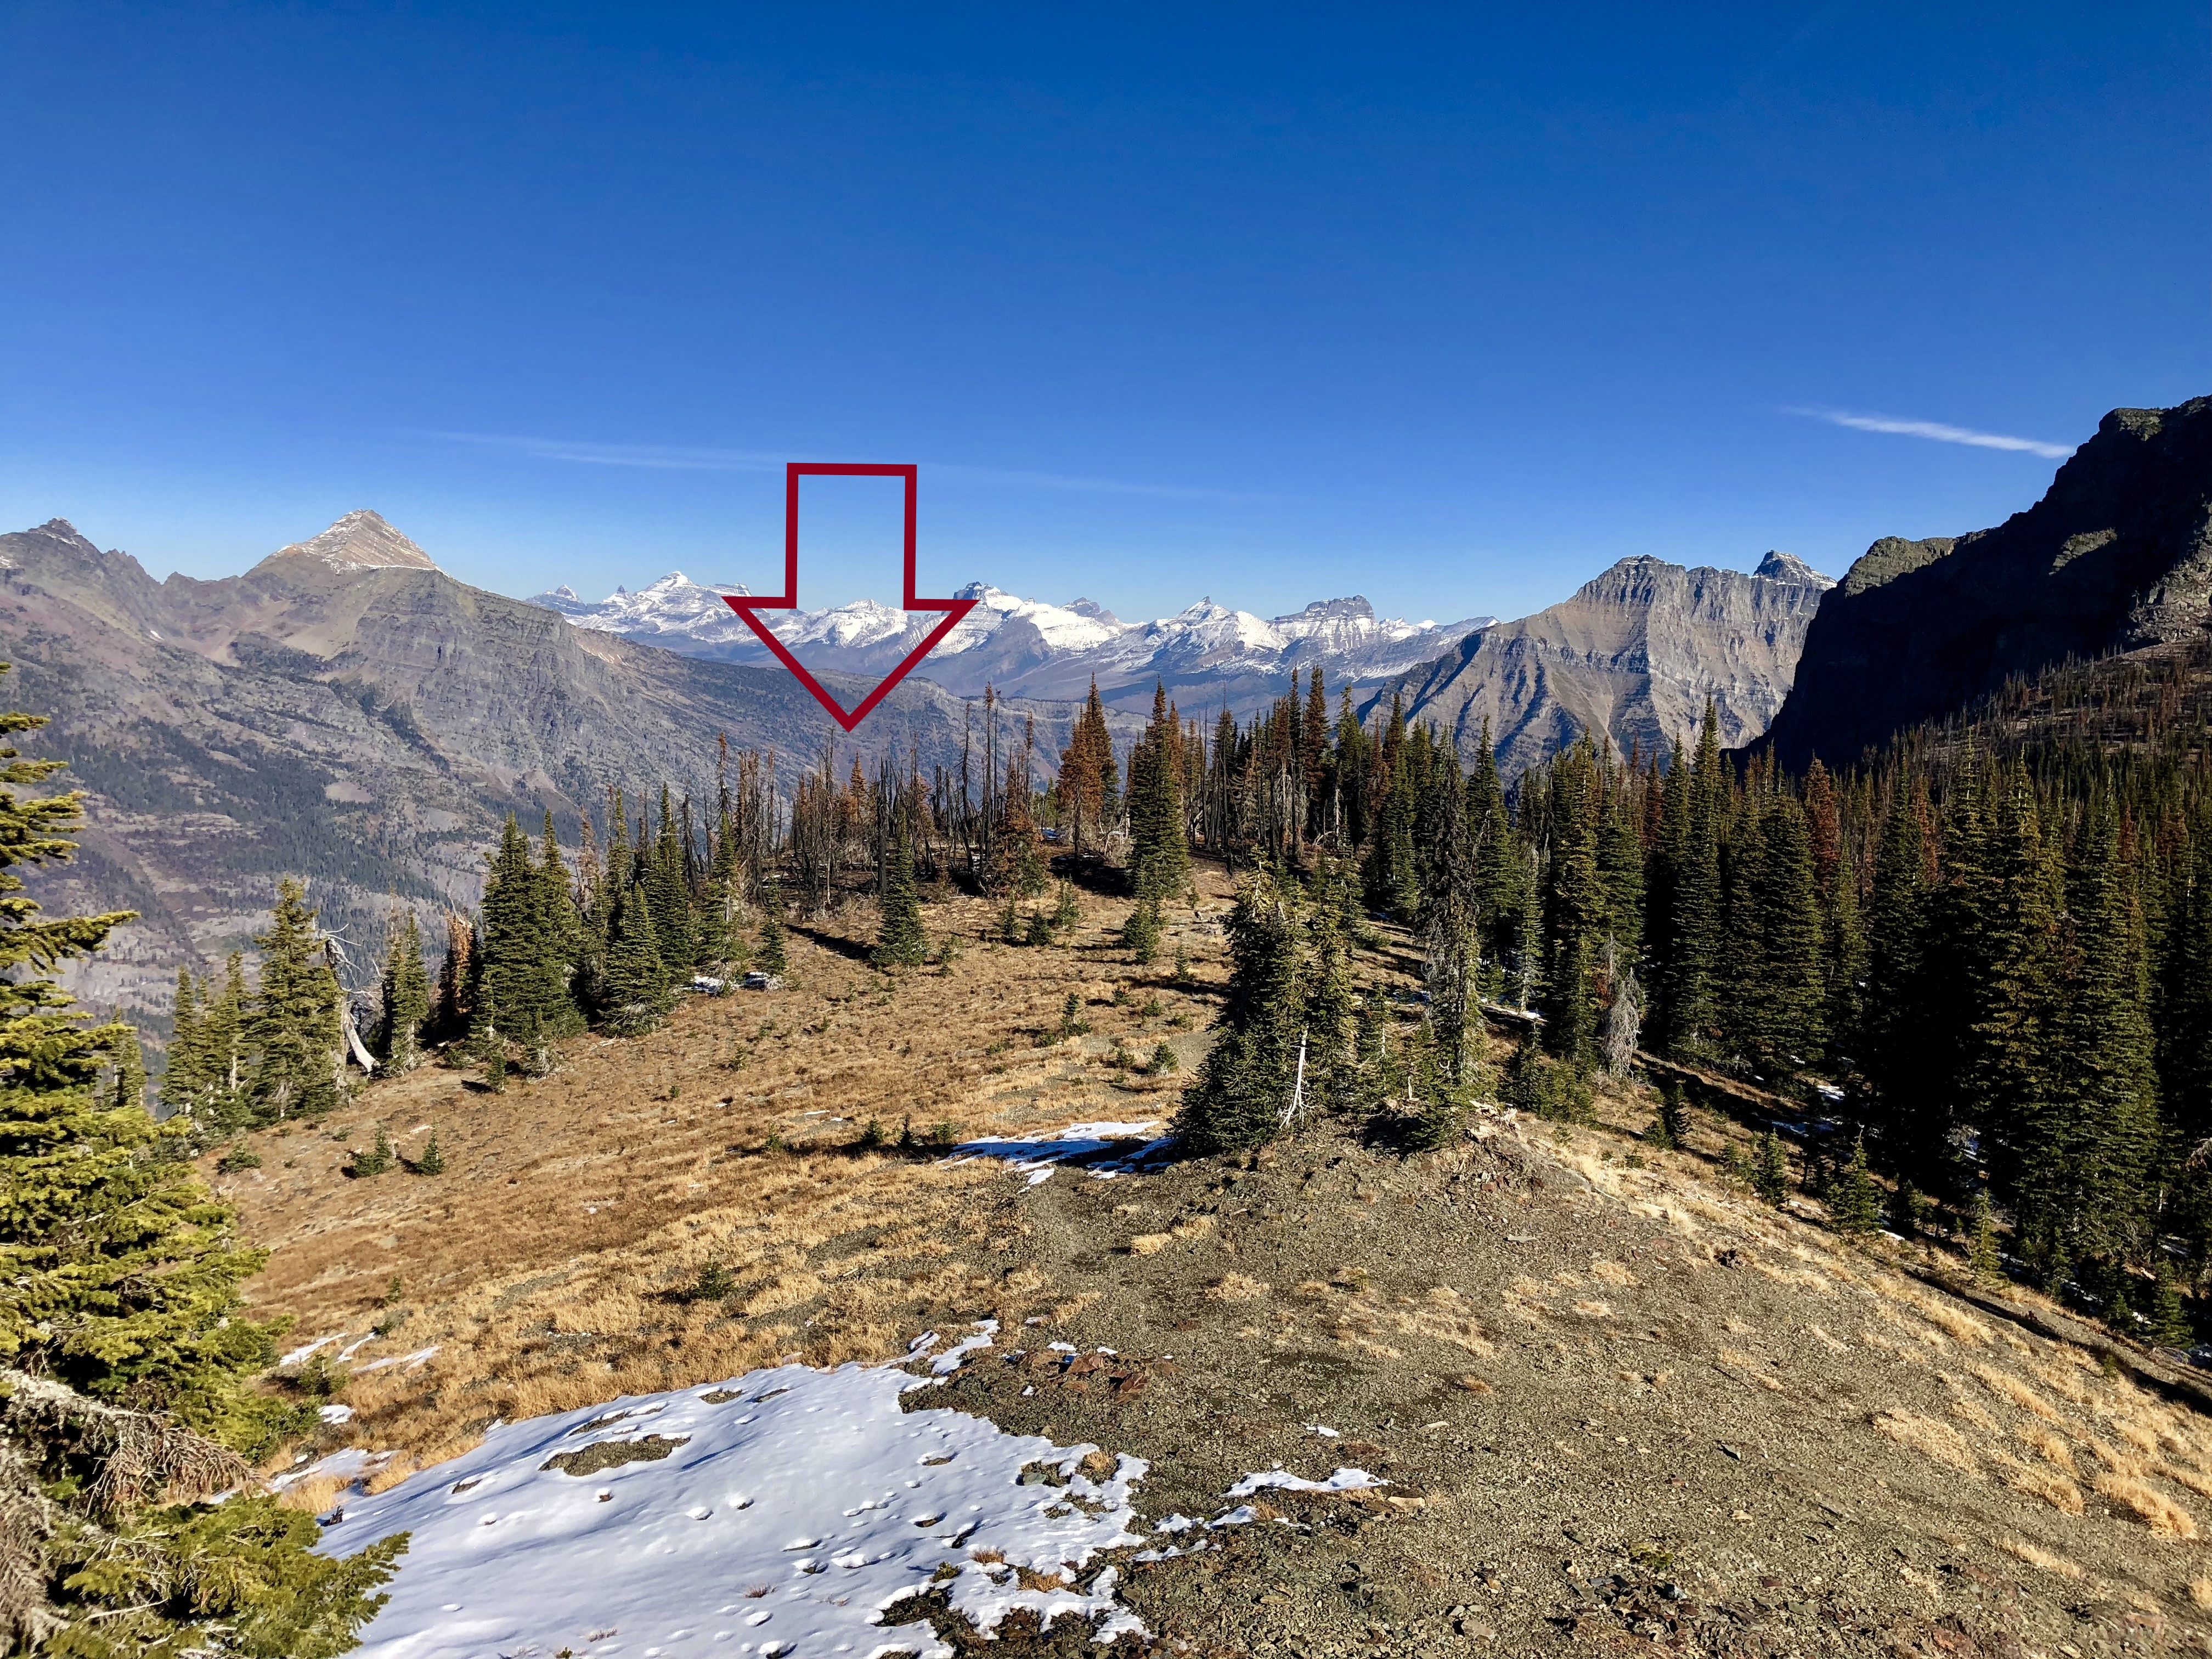
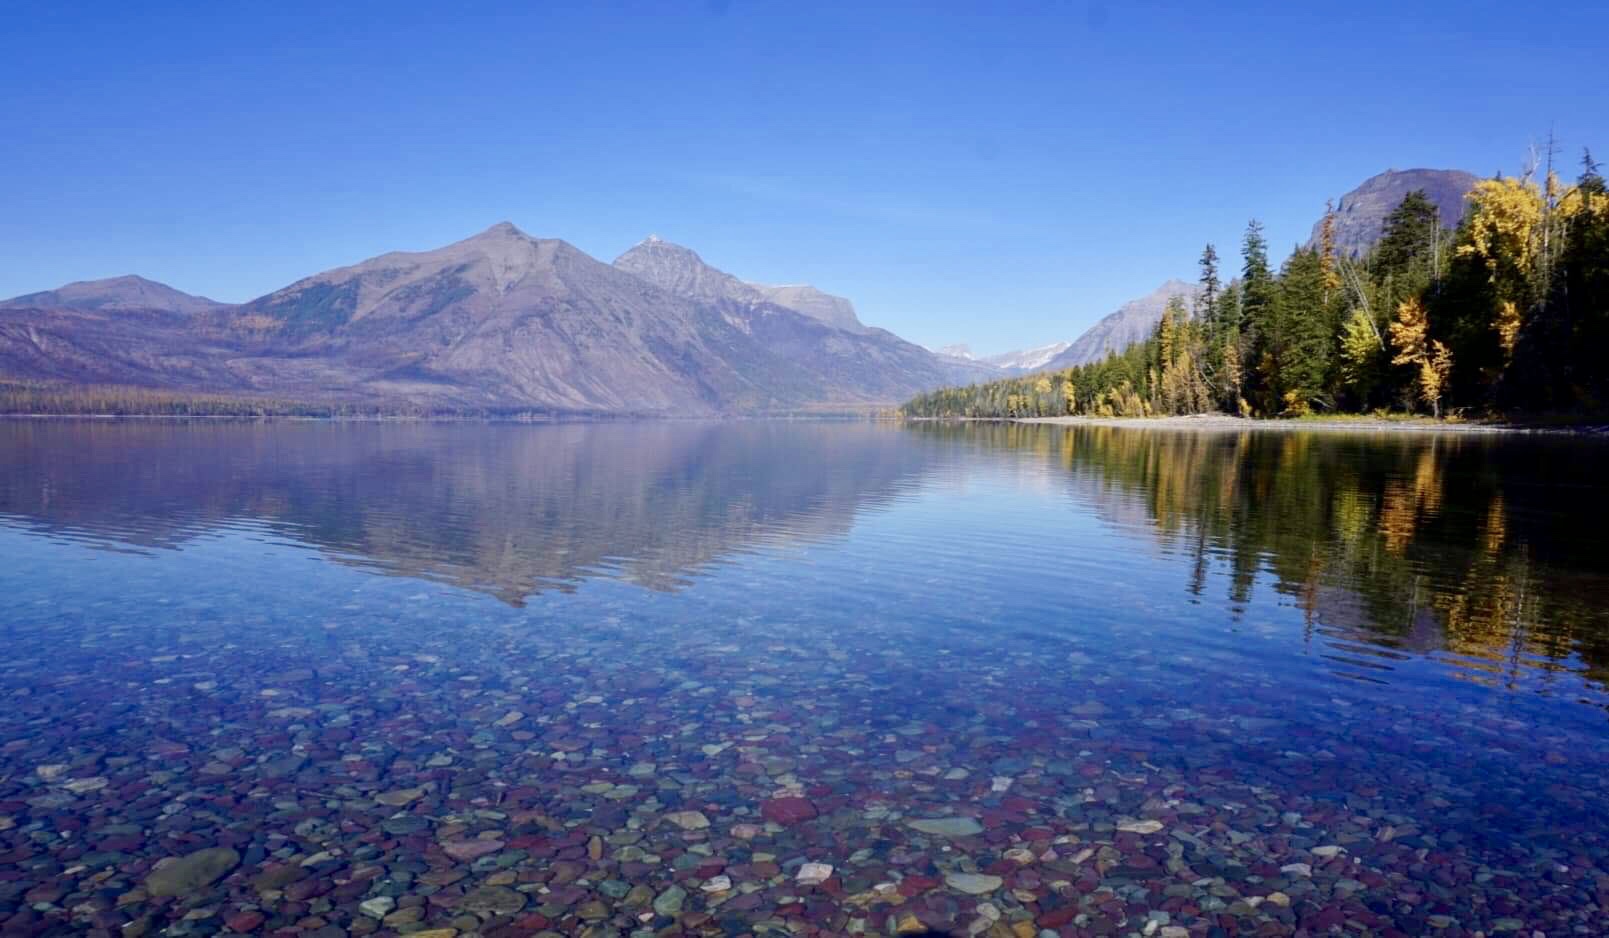
As we got higher and higher along the trail we began to appreciate the prominence of the mountains around us. Peaks in immediate sight were Stanton, Vaught, McPartland, Little Matterhorn, Edwards, and Gunsight. To the south we could see Lake McDonald in its entirety. And we saw from the southern base of Stanton the area of the 2018 Howe Ridge Fire and where it met up with the 2003 Robert Fire.
From within the Sprague Fire we see the Howe Ridge Fire and Robert Fire
You will see quite a few people on this trail because of its popularity but it rarely feels “crowded” because the dauntingly steep grade tends to spread people out sparsely. We saw only a dozen people on the trail this day, but despite the difficulty they ranged in age from adolescent to geriatric. I hope I’m climbing 4,300′ a day when I’m in my 70’s!
Can you see the lookout above?
Mid-to-Late October is a time of year when migratory eagles are passing through this area. We came across two volunteers from the Citizen Science Program who were doing annual raptor counts on one of the rocky outcroppings where the view into the Snyder Valley was prime for seeing birds. Sometimes the lookout is used as a base camp for the raptor count activities. Want to get involved in projects like this? Go here: GNP Citizen Science
The Snyder Lakes and Sperry Chalet trails are ~2000 ft below
Approaching the lookout. Mt. Brown visible in the trees to the right (PC Rachel Payne)
Of course the views from the lookout are fabulous! We took our time getting the photos we wanted, which certainly included panoramas. Then we had a quick bite. Lunch always tastes good on a mountain and this was no exception. And today our dessert included some Ibuprofen because we knew we would “kneed” it for the pounding our joints would take on the way down.
View of Lake McDonald (PC Rachel Payne)
This is a fairly popular winter trail as well. I have snowshoed this trail before and I plan to ski it this year. Who knows, maybe I will even do a winter ascent of the Mount Brown summit!
The fire came within 100 yards of the lookout !
Starting off from Lake McDonald. The classic colored rocks
People are often asking me gear questions, probably because they know I’m a gear junkie and I spend a lot of time in the park. The most common questions are about my choice of pack and what I take with me for day trips. So I’d like to tell you my thoughts on this very dynamic and ever changing list.
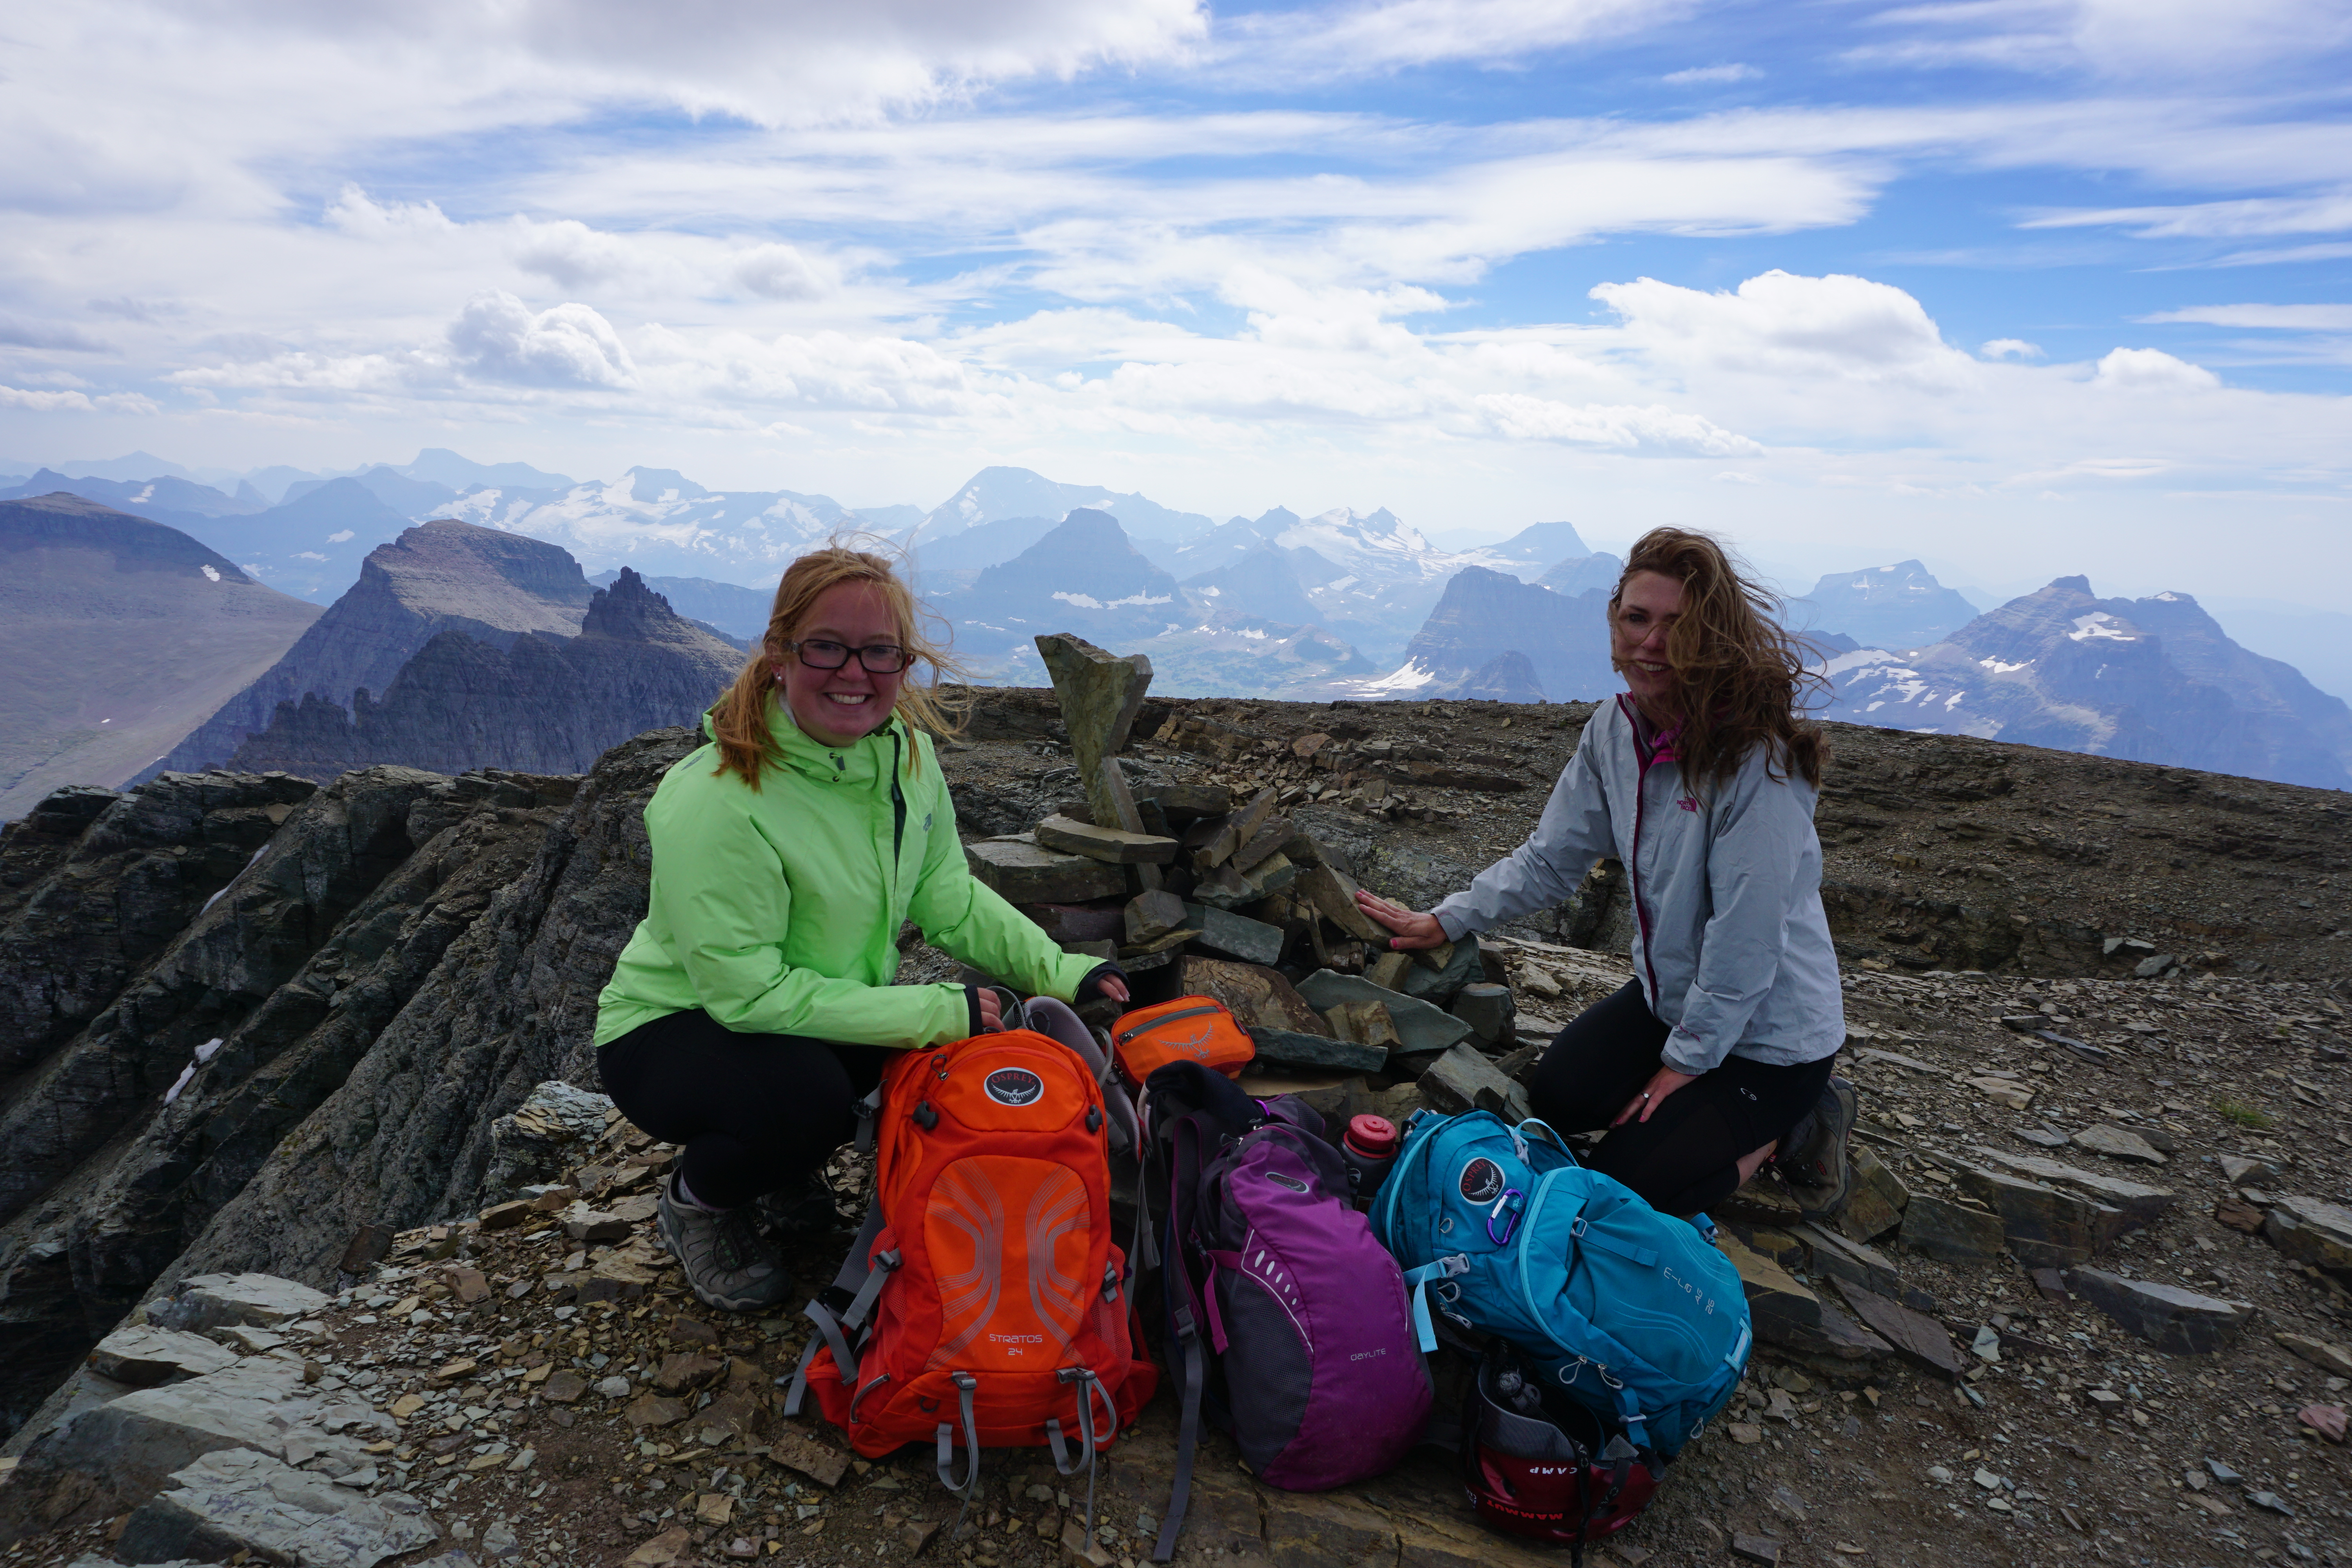
Emily and Alex on the summit of Mt. Gould
First and foremost you need a good pack that fits well. A properly fitted pack will distribute the weight appropriately, prevent skin abrasions, prevent sore shoulders, and won’t make you off balance. I recommend trying on packs before buying. You should put weight or gear in the pack when you try it on. Have someone knowledgeable about proper fit (a friend or store salesman) inspect the pack while trying it on. Walk around with the weighted pack and make sure it feels comfortable. If it doesn’t fit well or you feel it pulling back on your shoulders right away…that’s not the pack for you. Continue reading “The Day Pack…”
Amy is a freelance author and photographer in Great Falls, MT
As each summer flits by, it’s more obvious that time is precious with our children. For many summers, my girlfriends and I ventured into Glacier for a grand “Moms’ Hike Out” exploring the trails and chalets as we recharged our mental batteries. This year, we included our kids as three of us brought our 11 year olds on an overnight trip to Granite Park Chalet.
Securing a room at the chalet is competitive reservations at its finest. There were four of us, including my son Samuel, on the computers at the appointed date in January ready to type as soon as the 8 a.m. hour hit. Although all of us submitted reservations, only two of us were given the dates we requested, but we had our spot! From then it was watching the copious snowfall and counting down the days until mid-July.
A man does not climb a mountain without bringing some of it away with him and leaving something of himself upon it. Sir Martin Conway
Calf Robe Mountain is part of the Continental Divide and is located on the Firebrand Pass trail which starts at the Lubec Lake Trailhead. Elevation at the peak is 7,920 ft and ranks 173 of 234 named peaks in the park. This is not a challenging hike/climb even though round trip mileage is around 10 miles and elevation gain is 2,800 ft. Most of the distance is covered on-trail versus off-trail.
August 21, 2018 by Joanna Adams www.adventureadams.com
Right now, a lot of the park is under fire and what’s not seems to be covered in an oppressive blanket of smoke. I am so thankful we at least got one more hike in before the smoke came.
There are so many great peaks in Glacier. I picked this one out because it seemed like a good beginner peak without a lot of technical spots or intense climbing.
We started our trek early. . . I always do when going to Glacier. The swarms of people seem to start congregating early and with the crazy intense heat we’ve been having lately, it is great to get a head start.
By the time I got the trail head at Lunch Creek, I had already downed a full cup of coffee so felt quite ready to take on the journey. The climbers trail at Lunch Creek is super easy to find.